
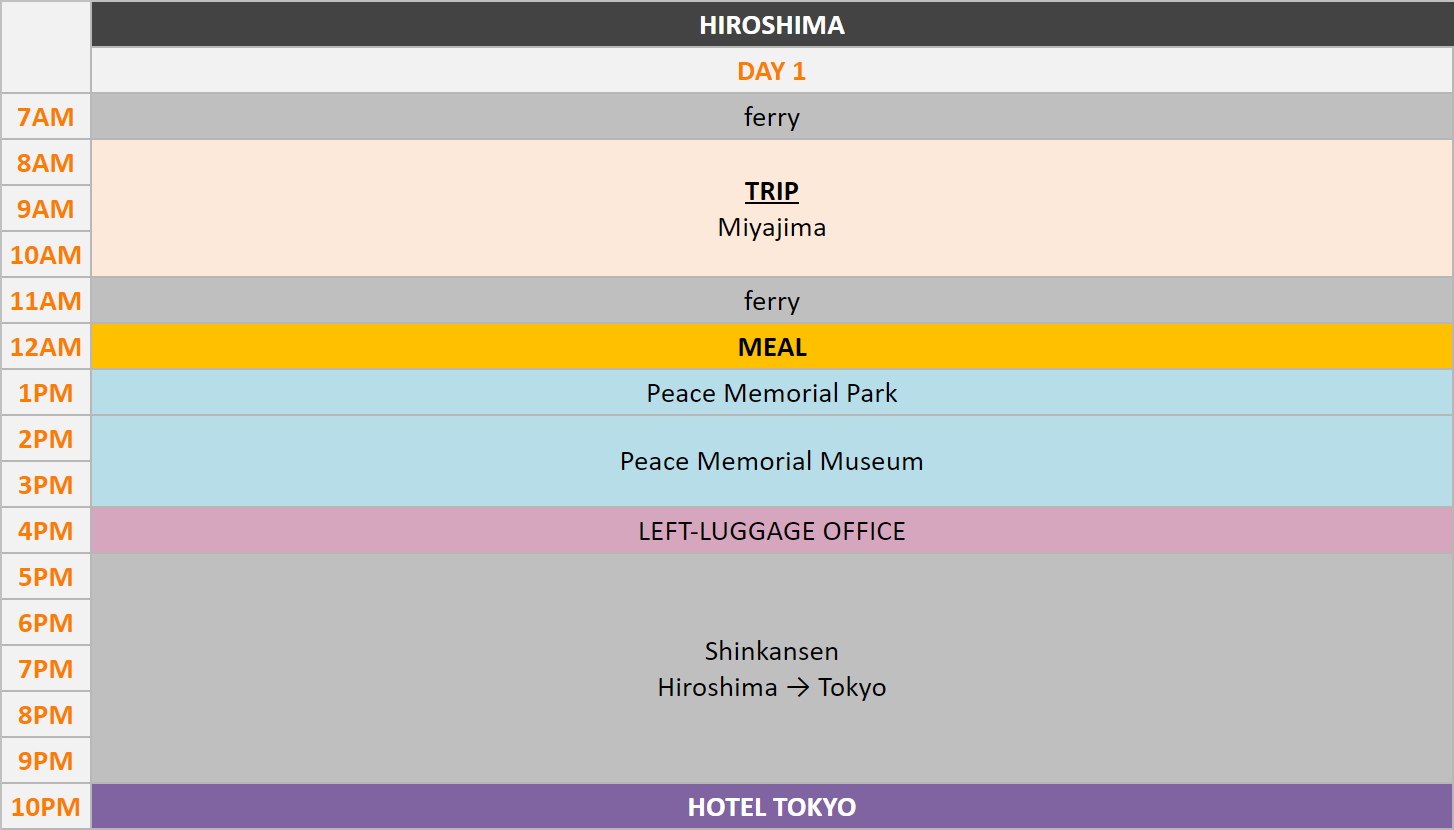
You’re planning a short trip to the city of Hiroshima, plus a visit to Miyajima Island? Follow me to find out how to organize your trip in order to fit the schedule.
ITINERARY - JAPAN: here is the full itinerary for a tour of Japan.
Hiroshima is a city made of two very different registers. On one hand, you have this city which bears heavy historical tributes, and the visit of the Peace Memorial park will remind you of the tragedy that the city lived, and on the other hand, you have the beautiful island of Miyajima that will take you to a whole different atmosphere. The city is pretty big, but if like me you only visit the Peace Memorial area, the tram network will be enough. However, it covers a big part of the city.
With that being said, let’s go to see the details of the schedule:
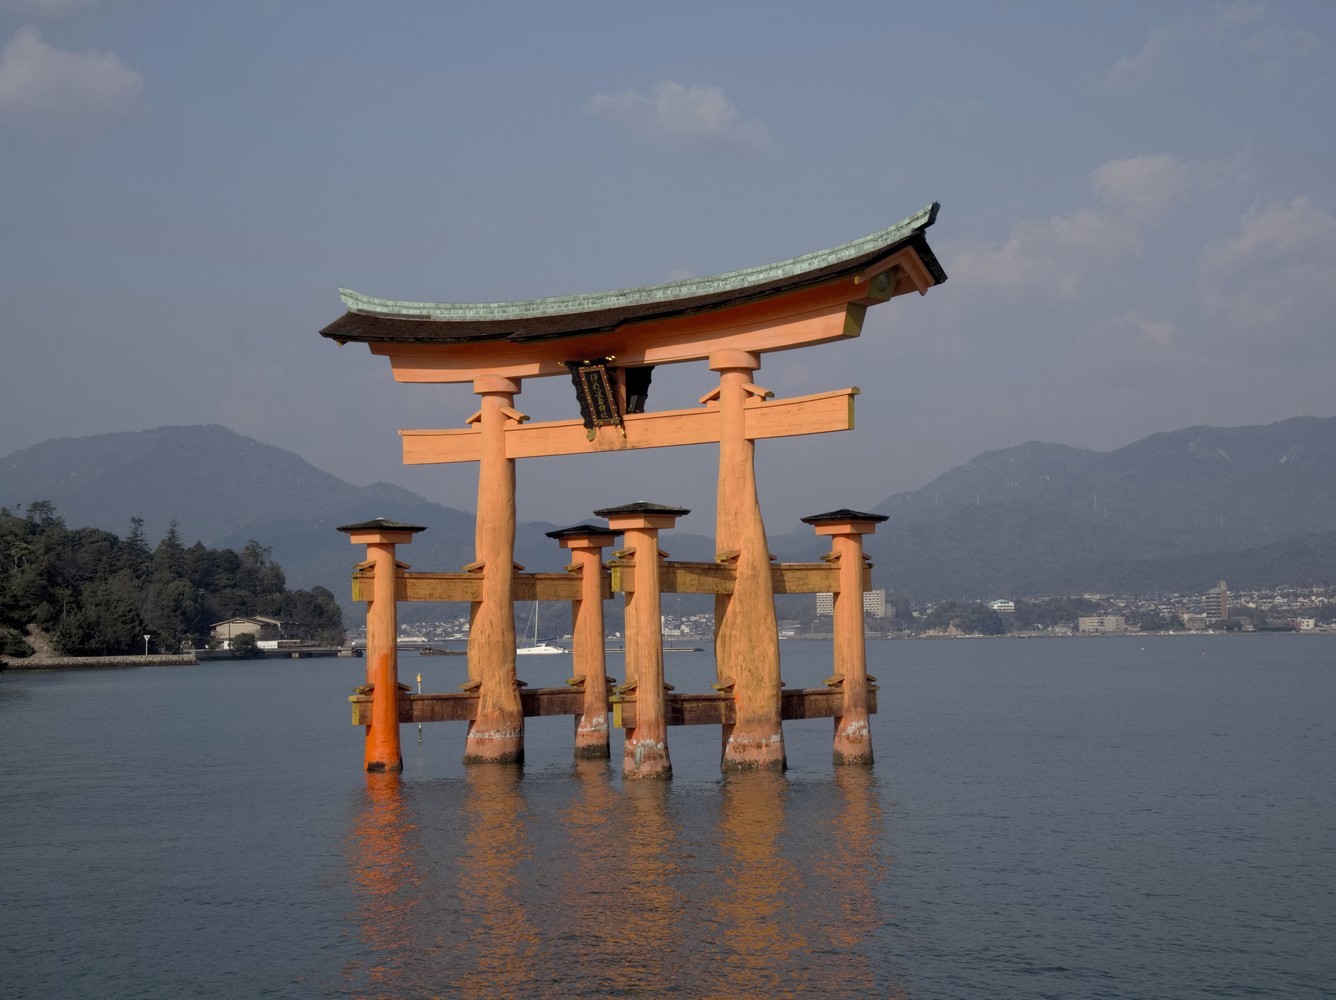
Stop # 1: the beautiful island of Miyajima!
Tip: if you follow the itinerary I took and that you’ve booked a hotel in Tokyo for the night (or in another city), don’t forget to check out at the hotel in the morning in order to leave your suitcases at the left-luggage office.
Tip: you can also click on the link down below from your smartphone, to open the itinerary to follow on google maps: Miyajima Island walking tour
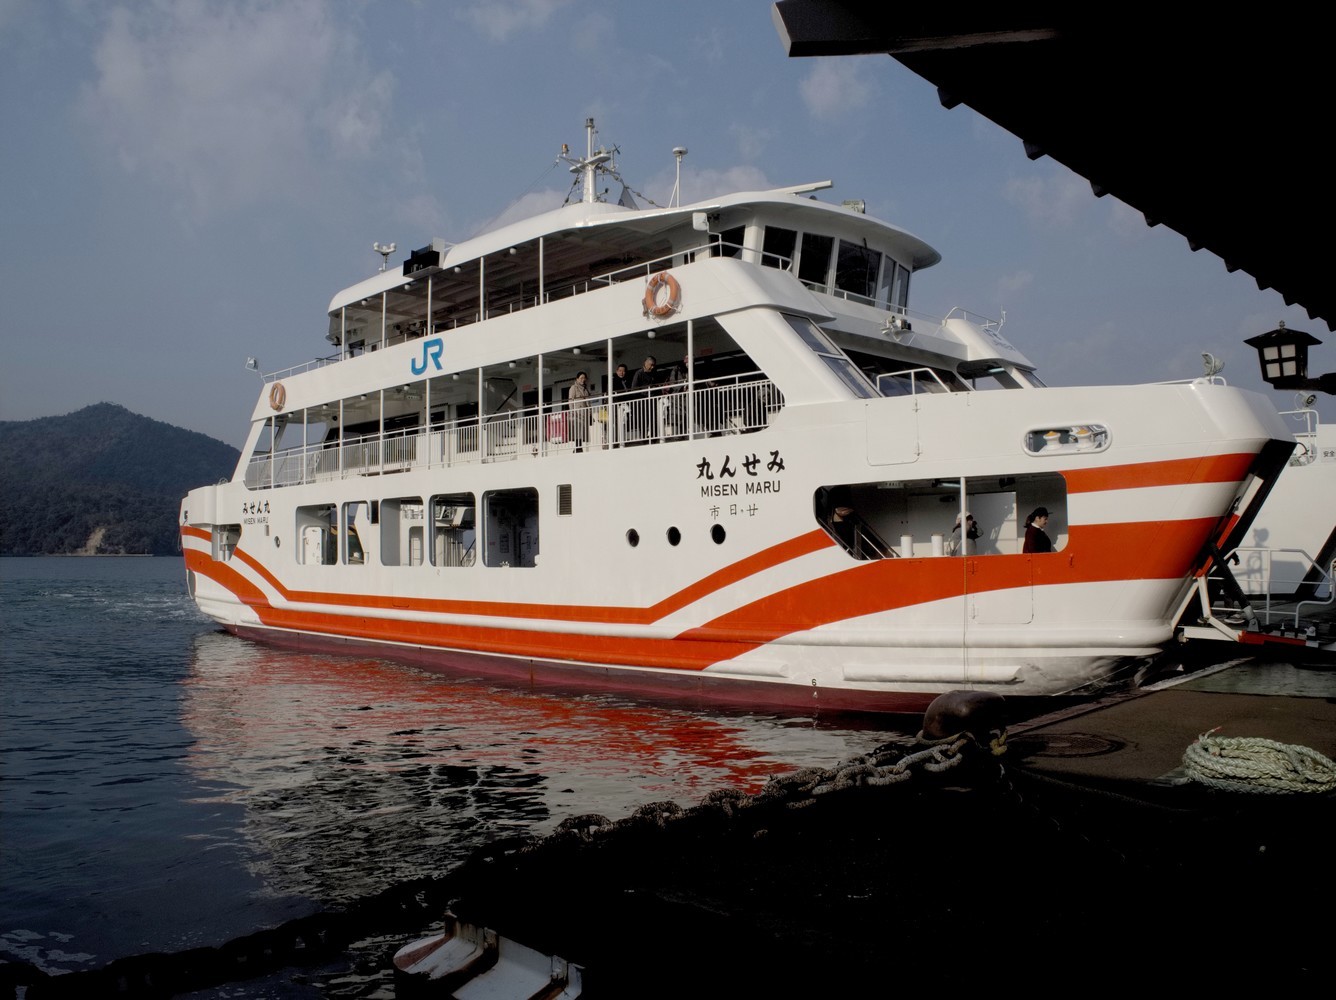
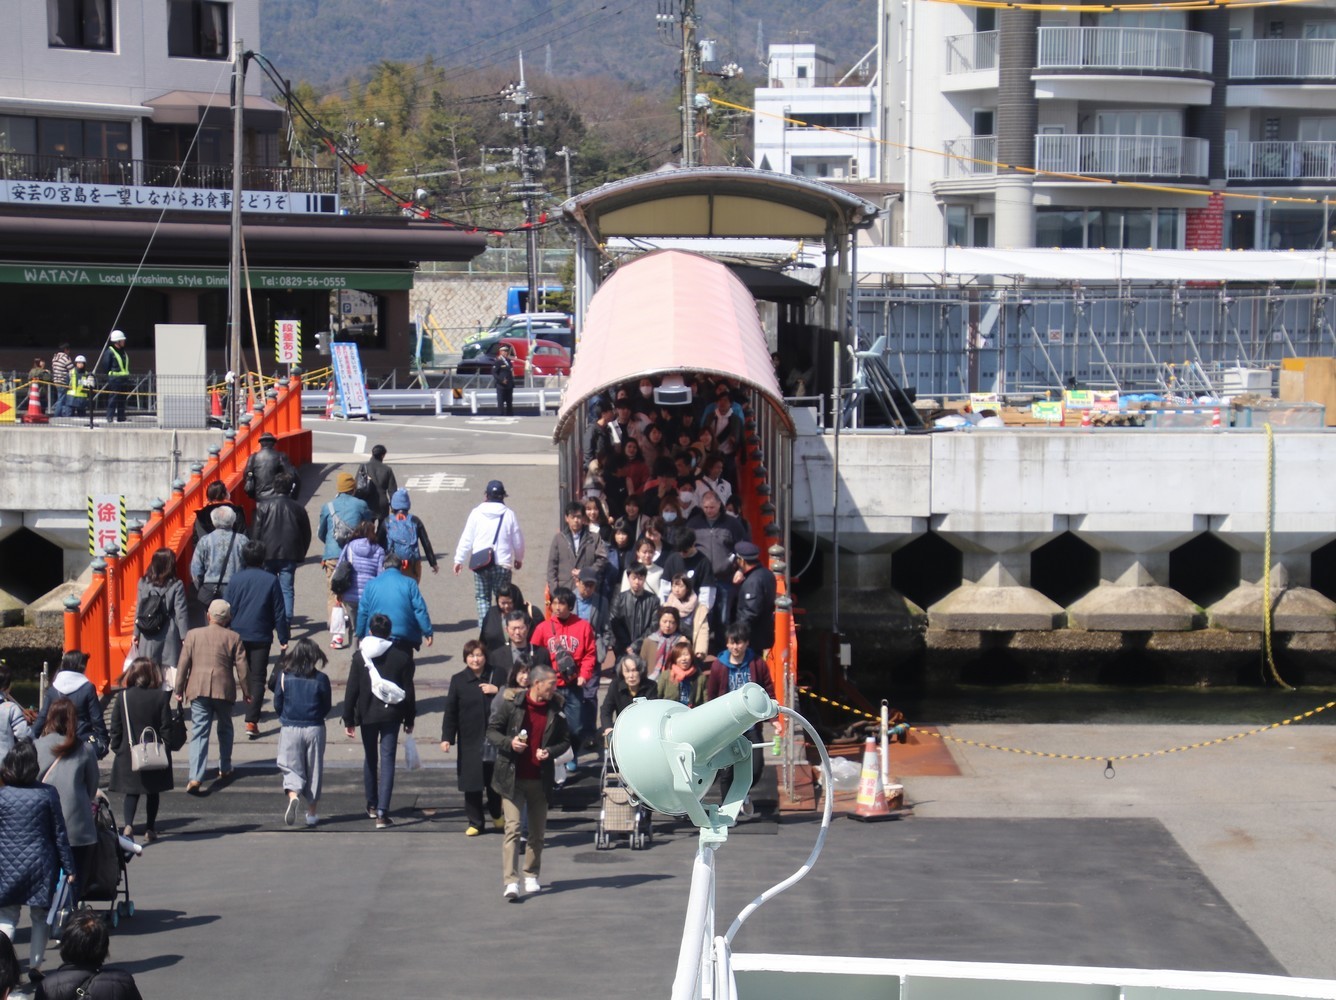
To start your day, I highly recommend waking up early in order to go to visit Miyajima Island. This will allow you to take pictures and to have a look at the floating torii gate almost alone, because from 10 a.m. it’ll be crowded! To get there, you’ll have to take the train from Hiroshima Station, and more specifically the JR Sanyo line, in order to reach Miyajimaguchi Station. Trains run frequently and the journey takes about 30 minutes. From Miyajimaguchi Station, by walking a little bit (you’ll just need to go straight), you’ll quickly reach the harbour where you can take a ferry that will take you to Miyajima Island. To take the ferry, with the JR Pass, you won’t need to go to the ticket office, you can directly go queuing at the boat. From 7:40 a.m., a ferry leaves every 15 minutes and the journey takes about 10 minutes. It’s the same thing for the return. You can go to check the timetables on the website.
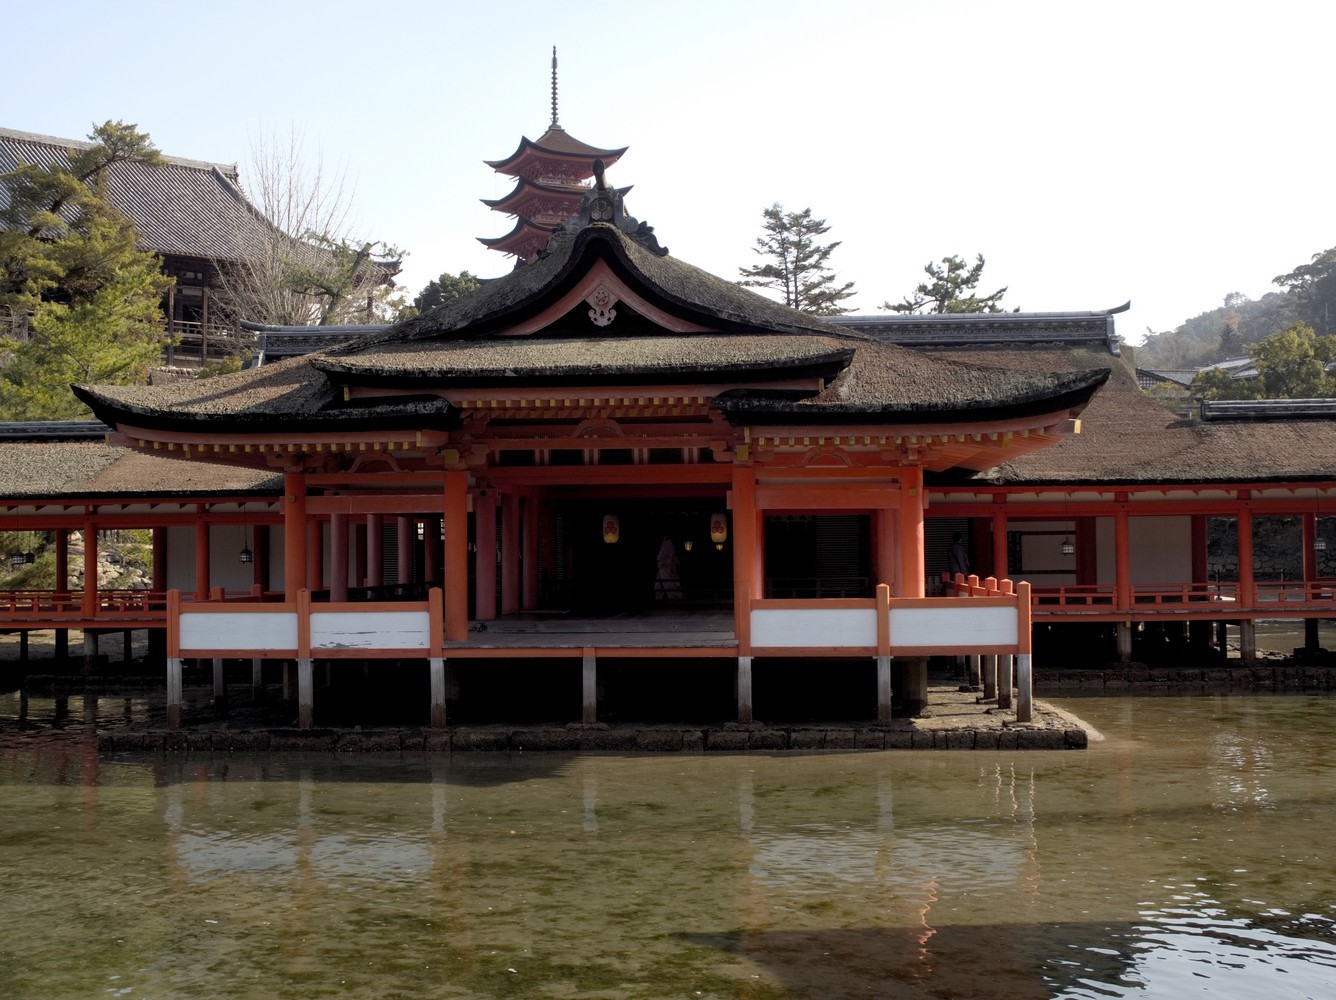
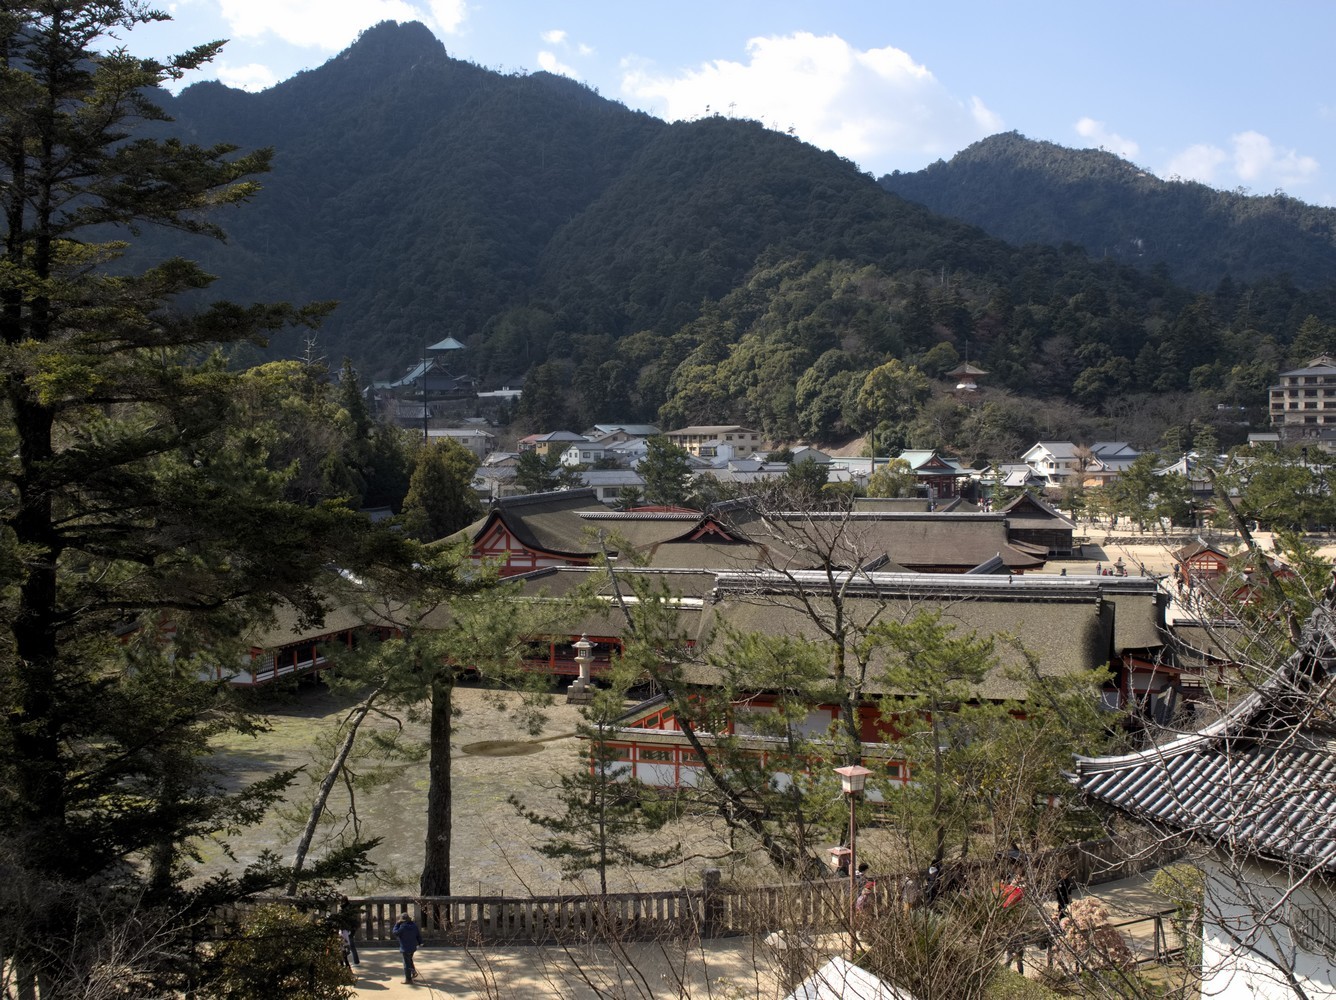
Once you’ll arrive on Miyajima Island, it’ll be time to go to have a look and to take photos of the floating torii gate. Then, right next door, you can go to visit the Itsukushima-jinja Shrine which was built by the sea. To reach the torii and the shrine from the pier, you’ll just need to follow the path that goes along the waterfront. Entrance fee to the shrine is ¥300 per person.

When you’ll exit the shrine, you should see Daiganji Temple which is a kind of square with many small buildings to look at.

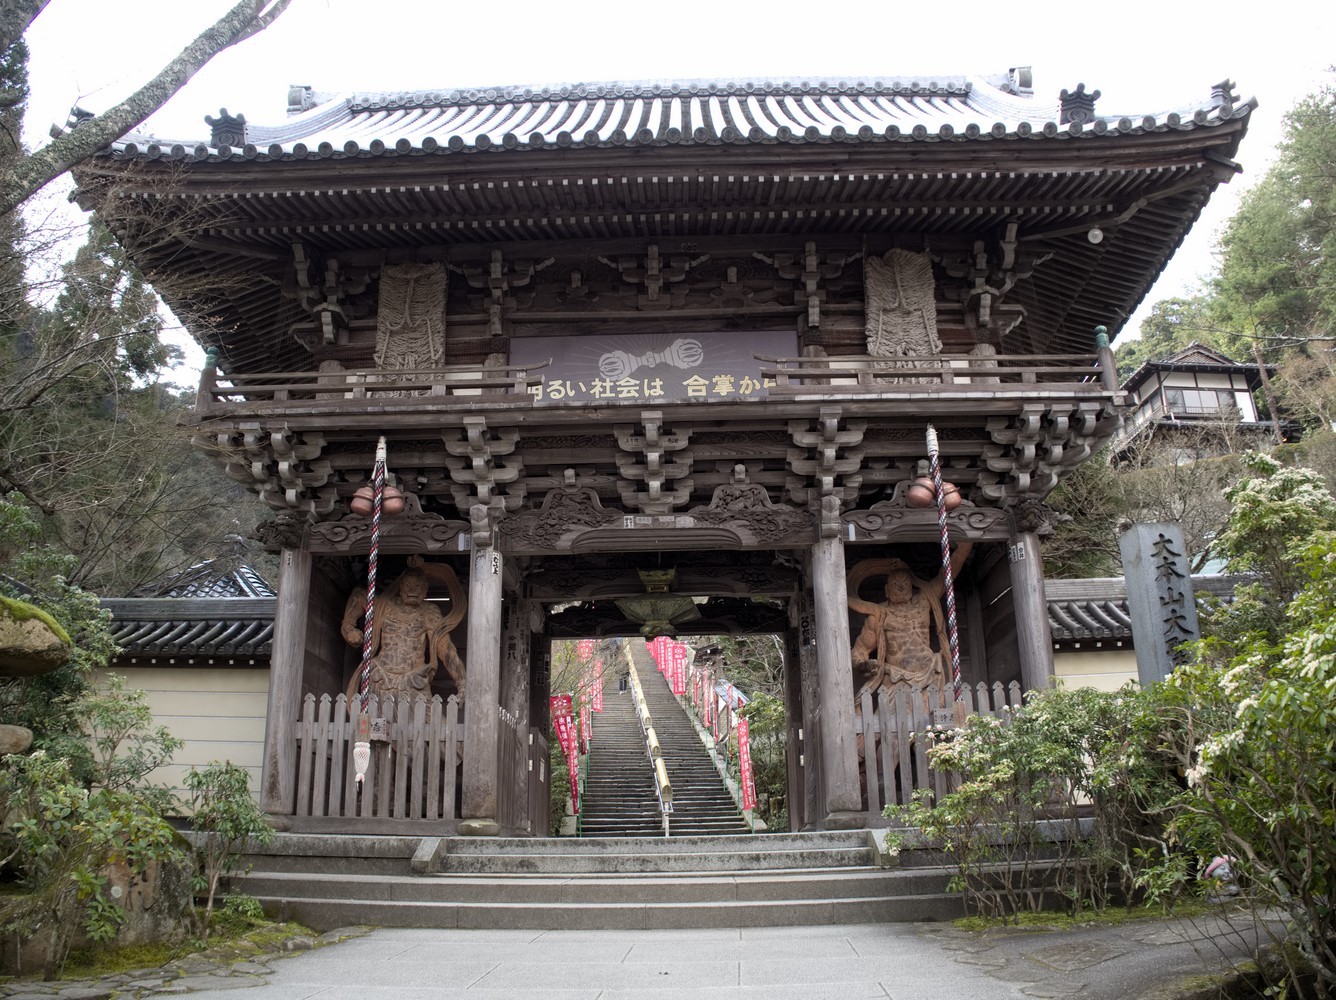
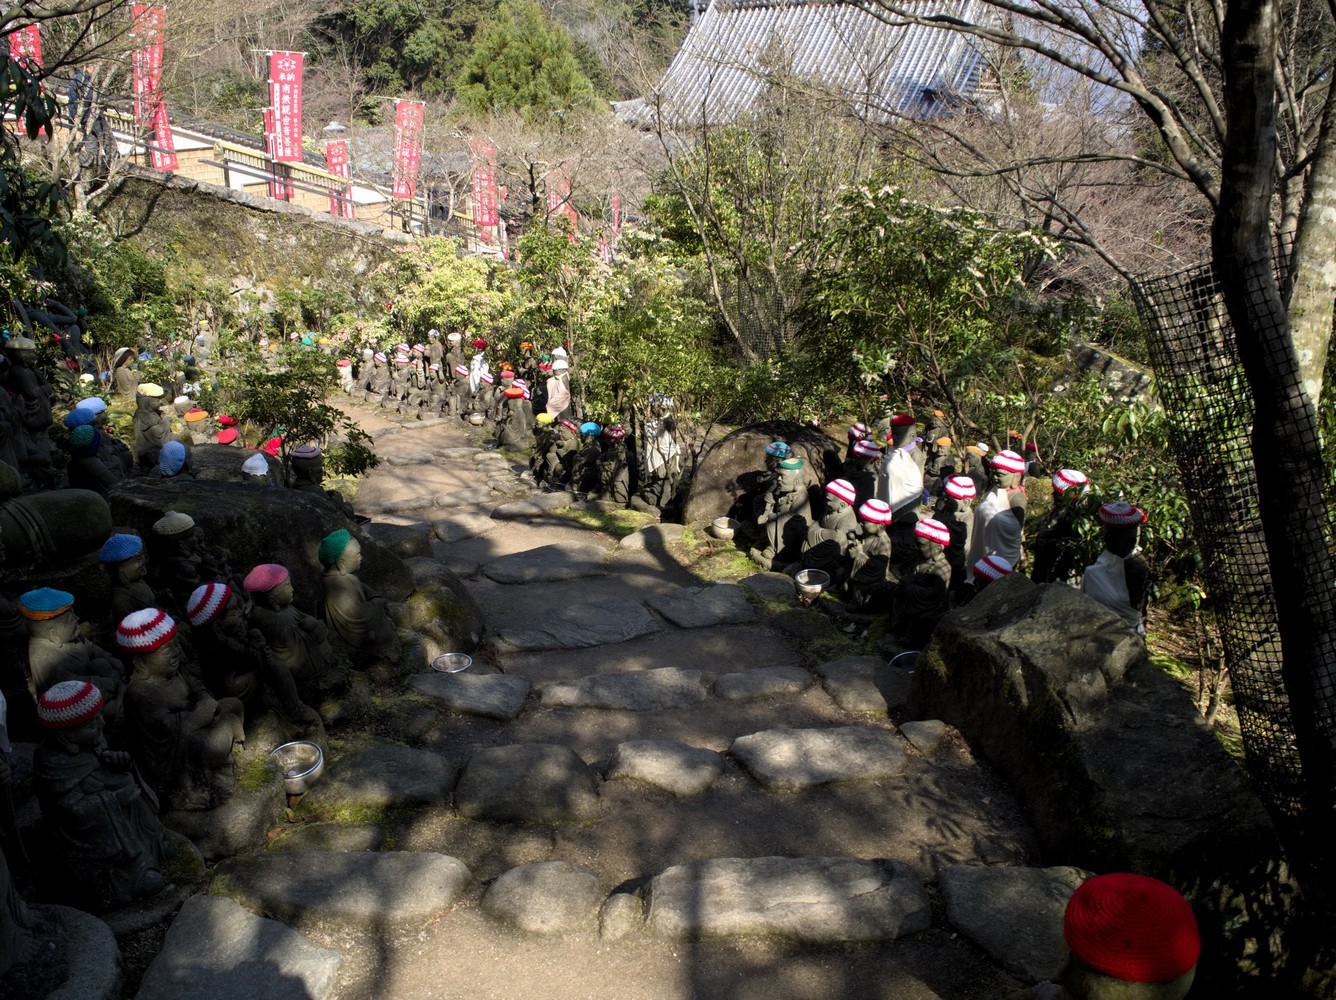
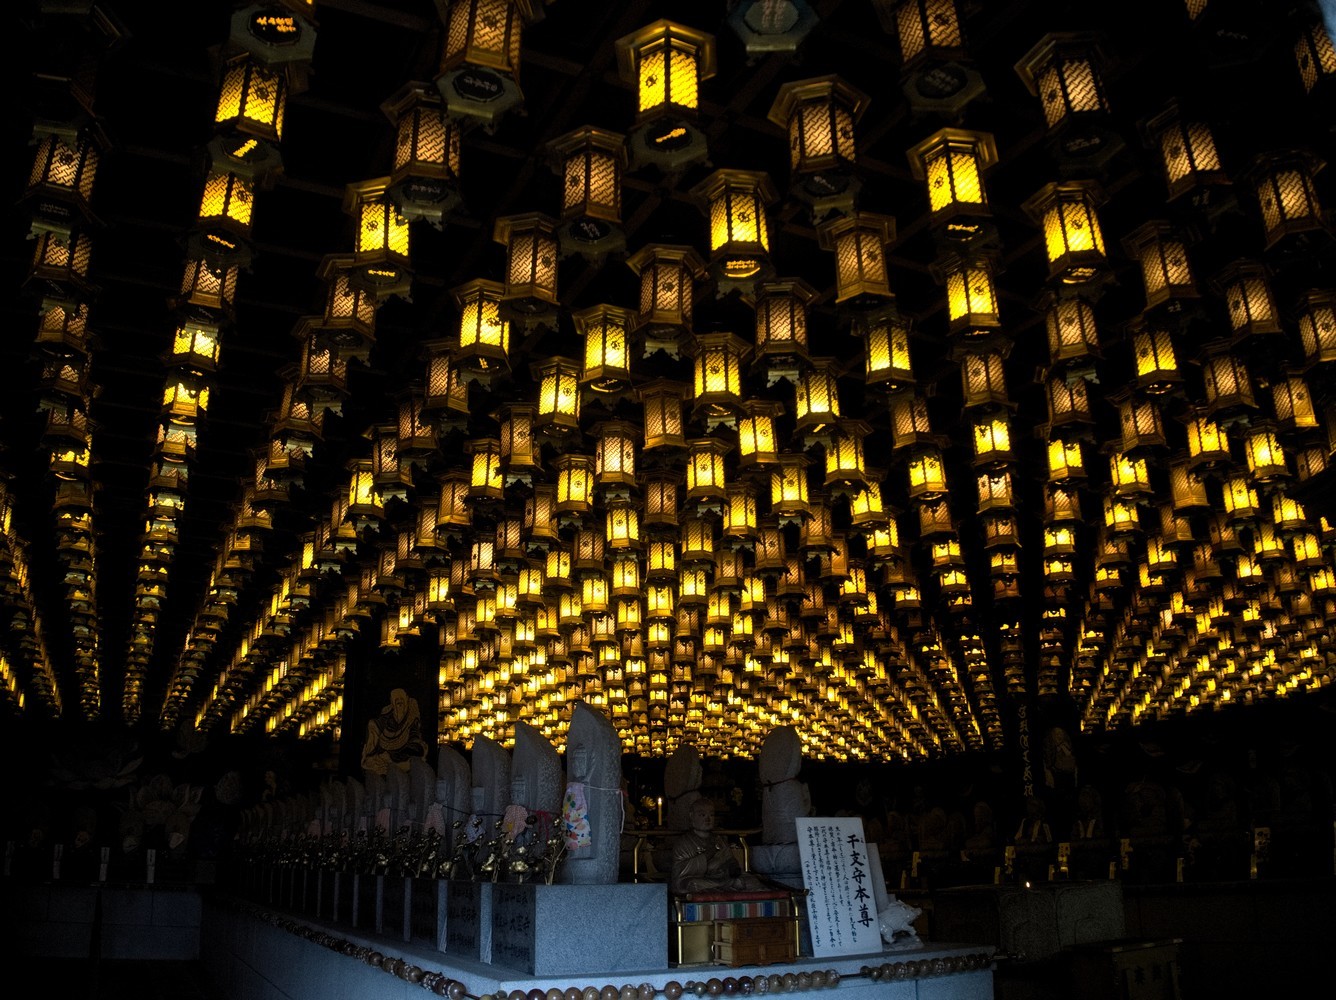
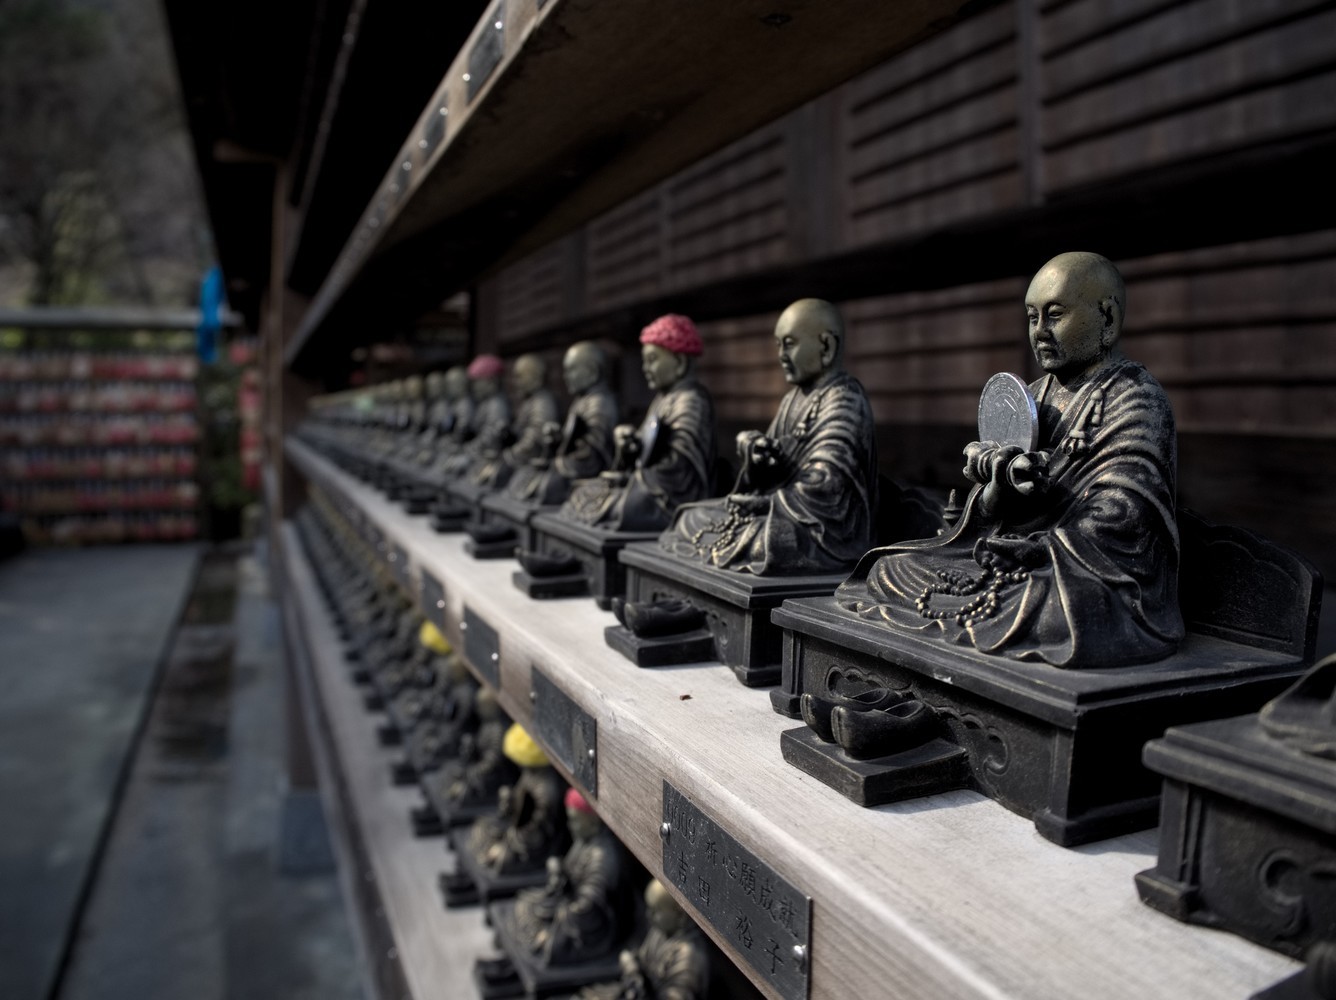
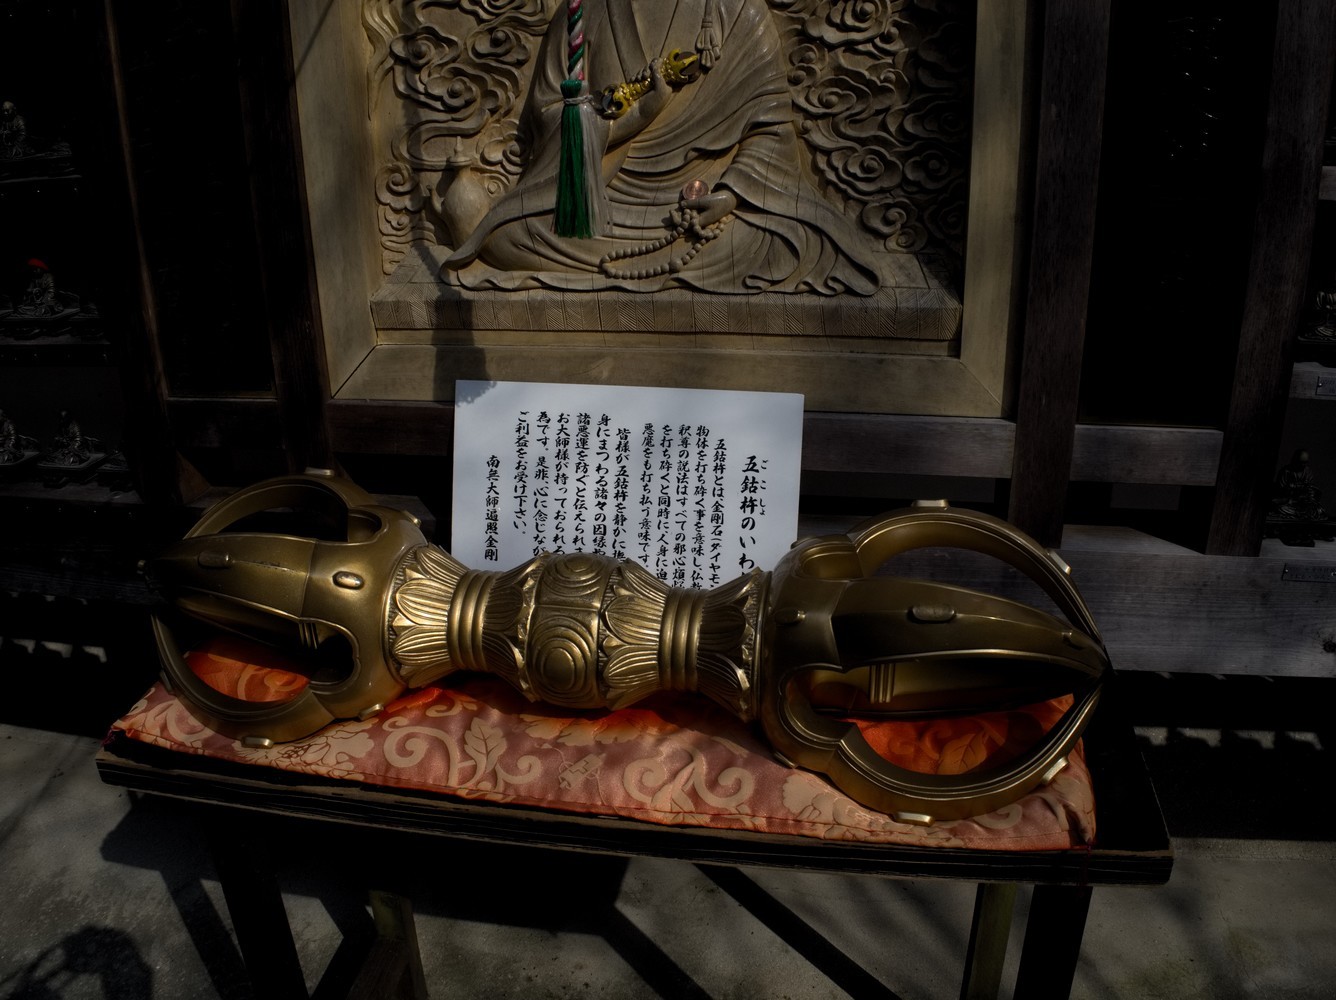
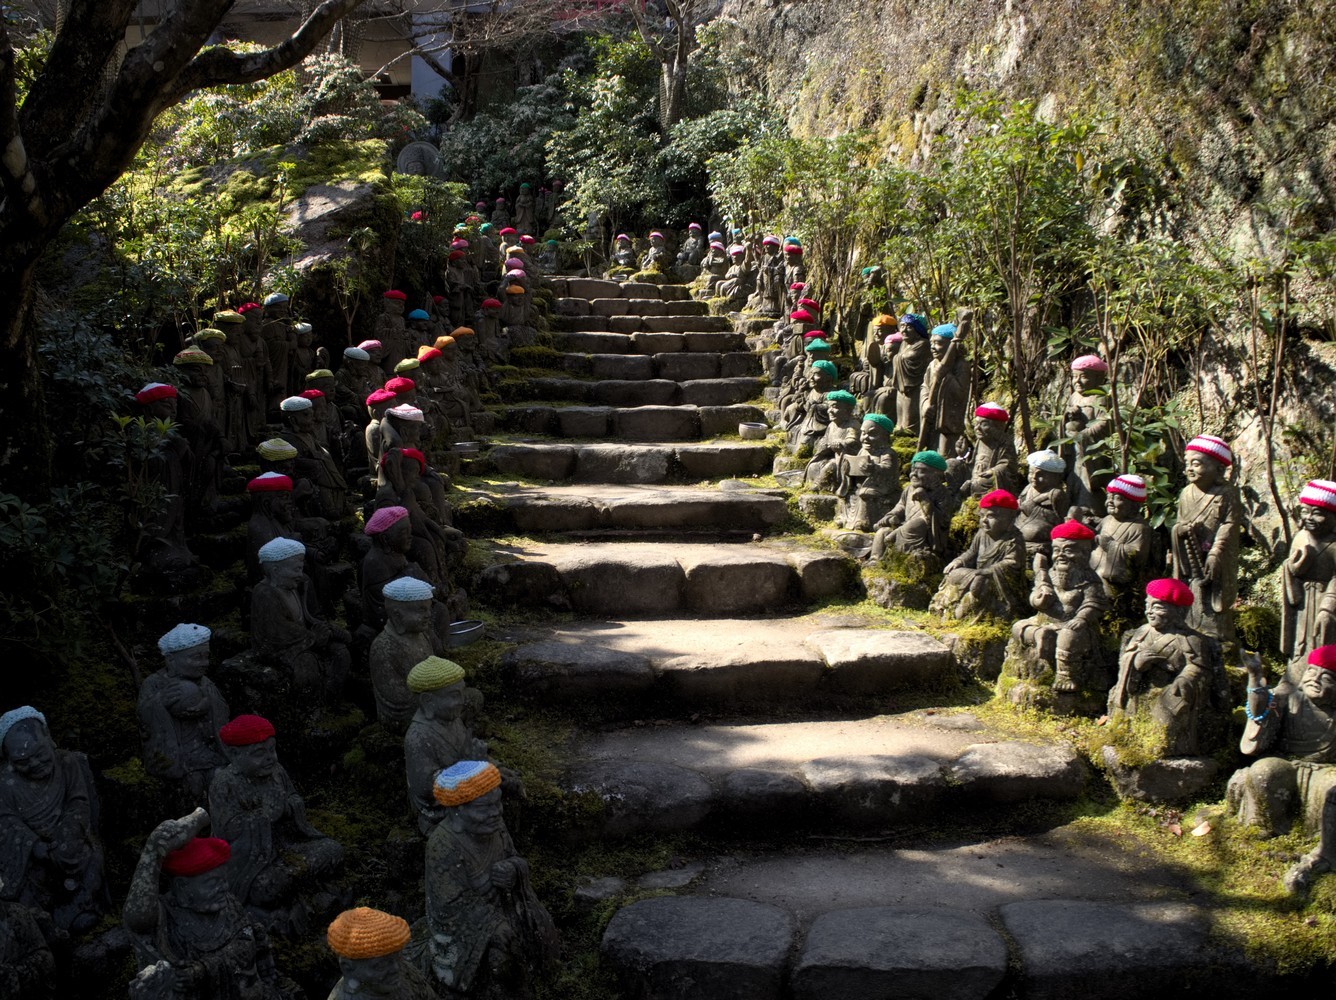
Then, it’ll be time to go to explore the famous Daisho-in Temple. It’s straight ahead from Daiganji Temple, but the path is slightly sloping. Once there, you can for example, take the main staircase to go up, the one lined with flags, and go back down by the staircase located on the side, which is bordered by small Buddhas.
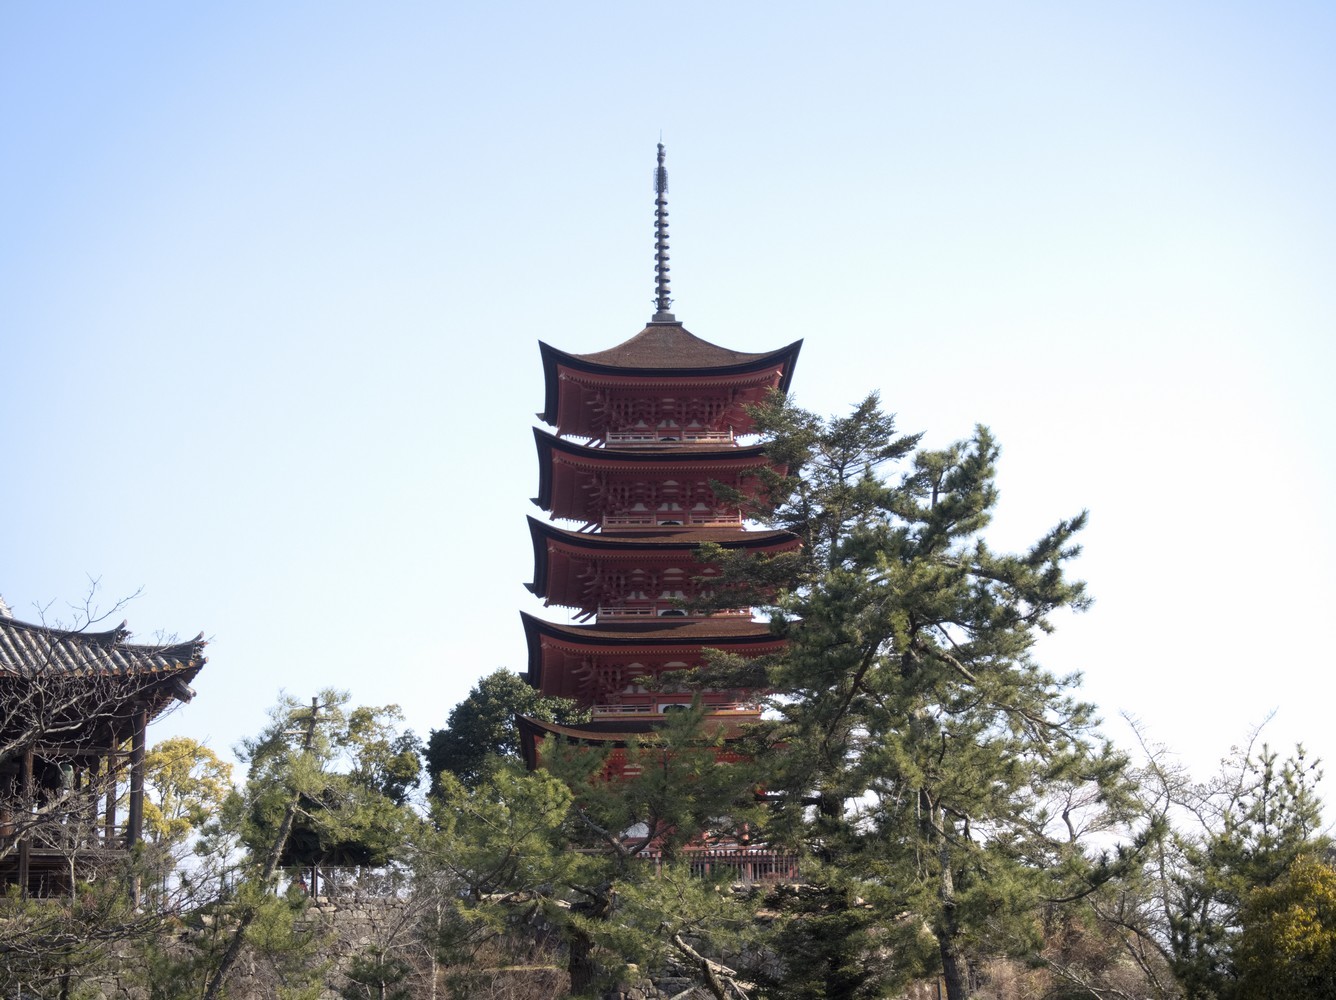
Once the visit is over, head back to the harbour. On the way, stop at Senjōkaku Shrine. It’s located on a hill, so you’ll have to take the stairs in order to climb up there. However, there are several ones, so it’s up to you choosing the one you prefer. Up there, you can visit the shrine (admission fee: ¥100), or simply enjoy the view of Miyajima from the hill. You can also spot a 5-storied pagoda.
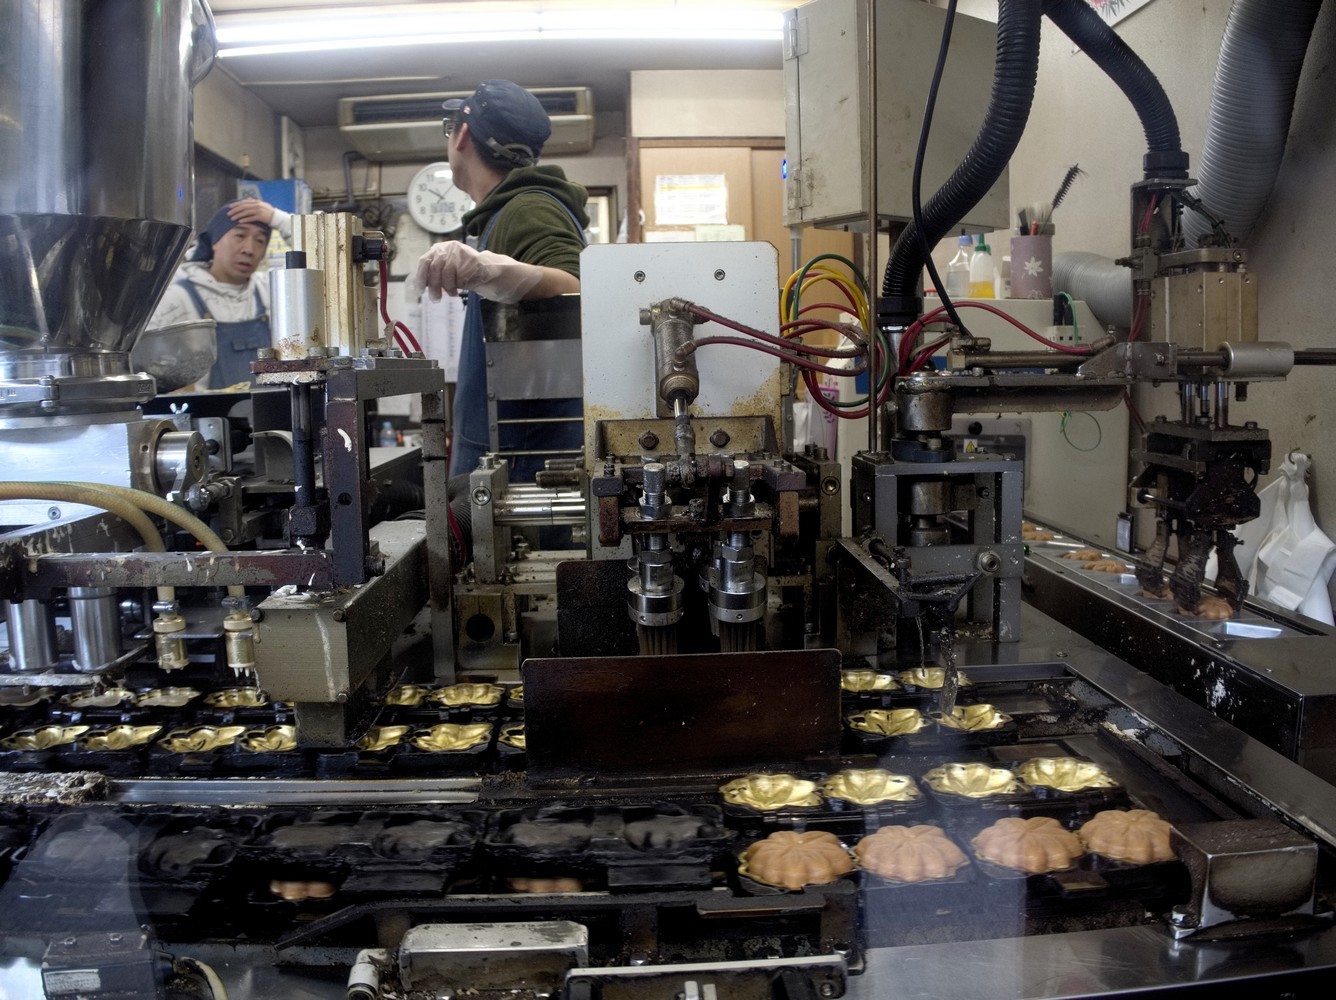
On your way back down, still on the way back to the harbour, take your time strolling through the Omotesando shopping street. Over there you can buy souvenirs or even taste local specialties such as grilled oysters or even eel buns. There are also bakeries that bake cakes in the shape of maple leaves. It’s pretty good and can make a nice souvenir to offer.
Stop # 2: Peace Memorial
To go back to downtown Hiroshima, just take the same itinerary as before. That is to say, taking the ferry and then the JR Sanyo Line train, but instead of returning to Hiroshima Station, get off at Yokogawa Station. From there, you can either walk to the Peace Memorial Park, it takes about 25 minutes and it’s a nice walk along the river, or you can take the tram line 7 and get off at Genbaku Dome-Mae Station.
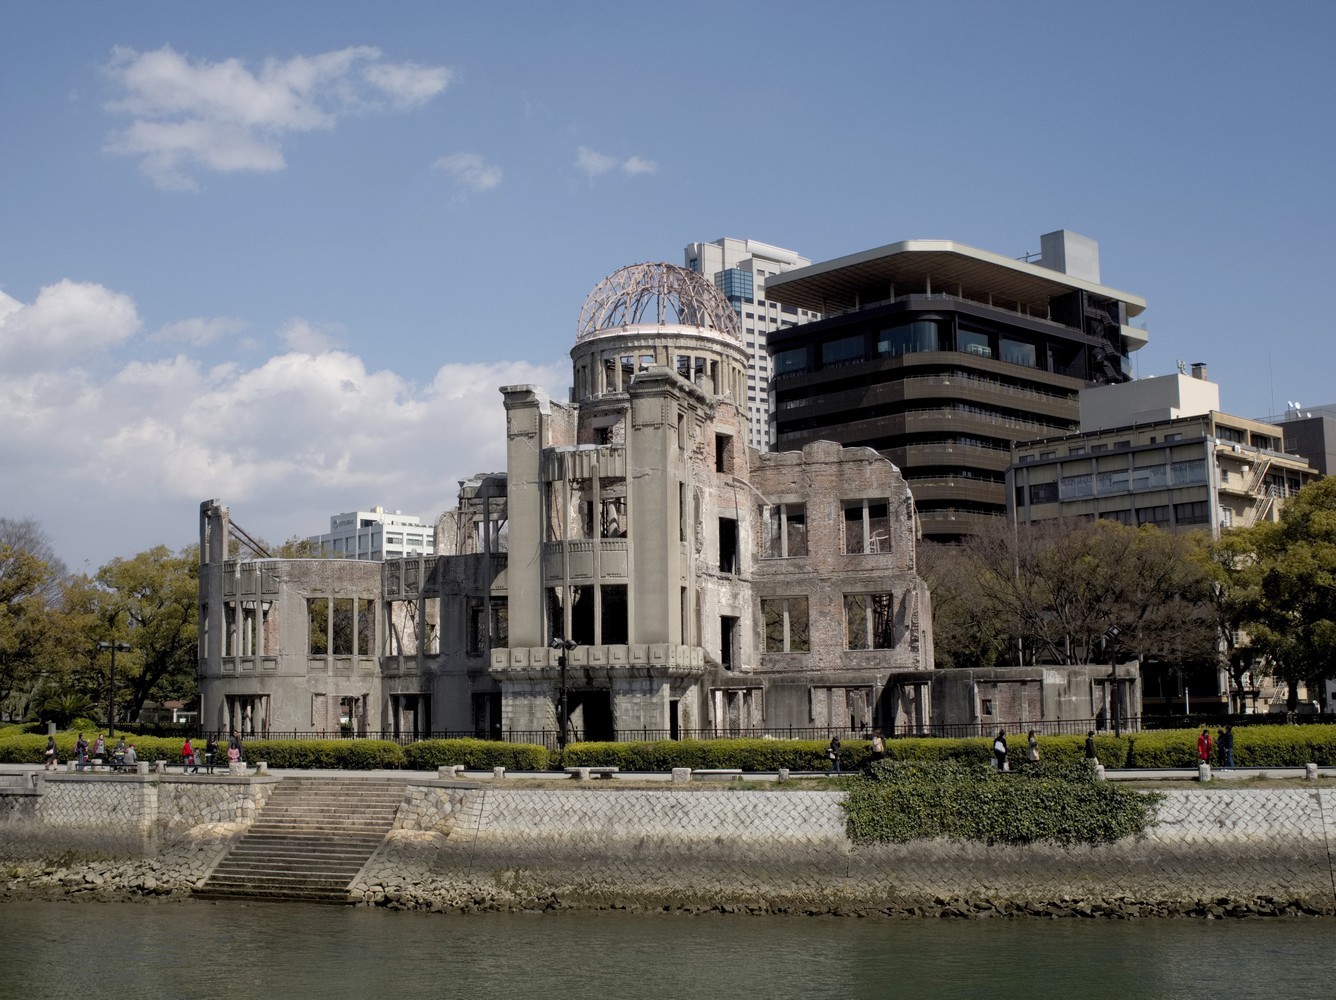
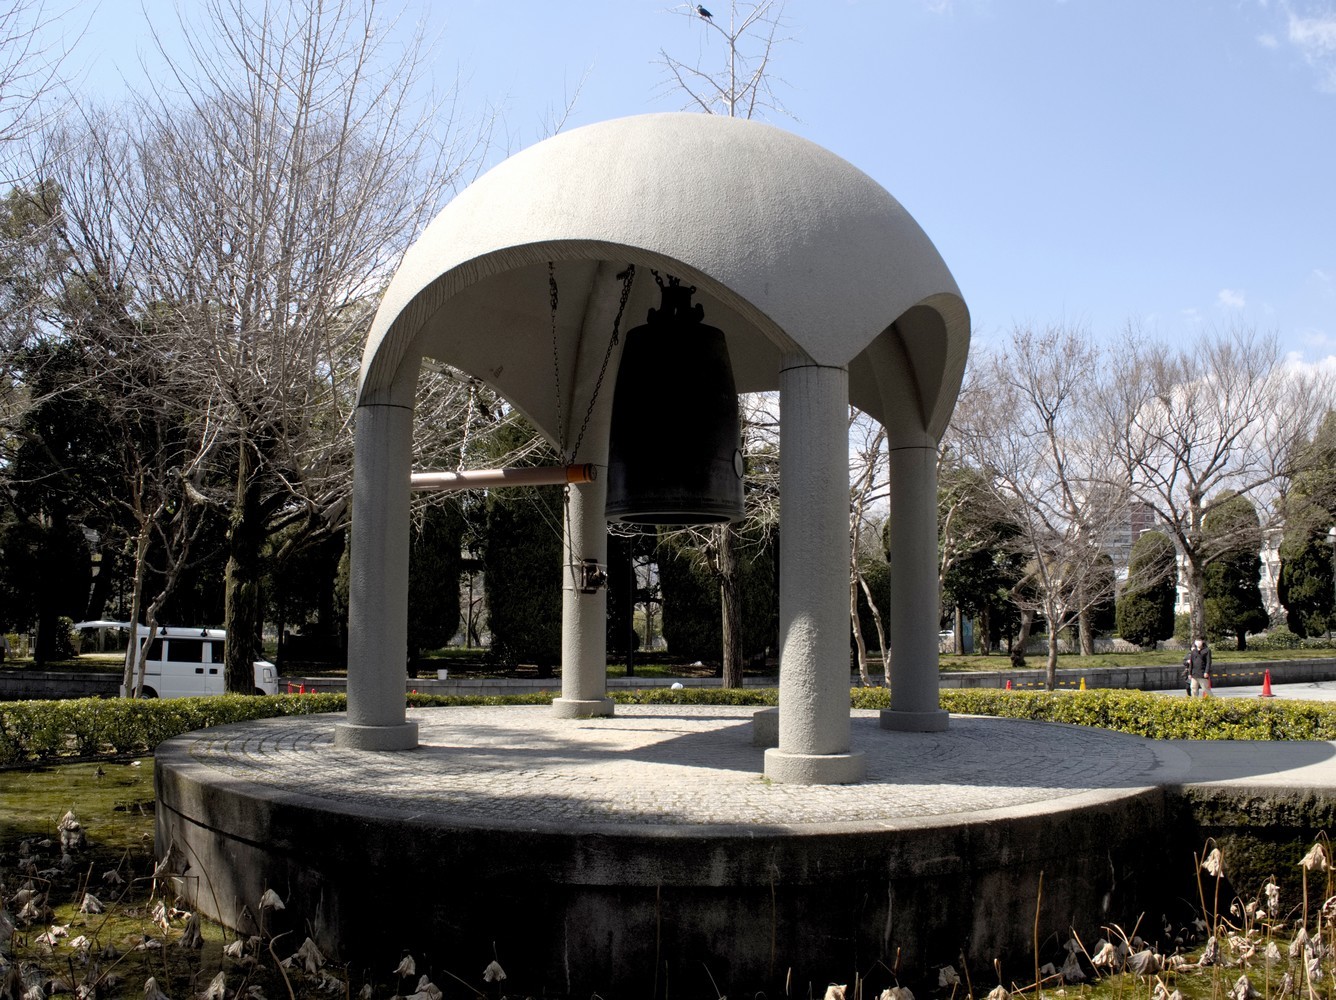
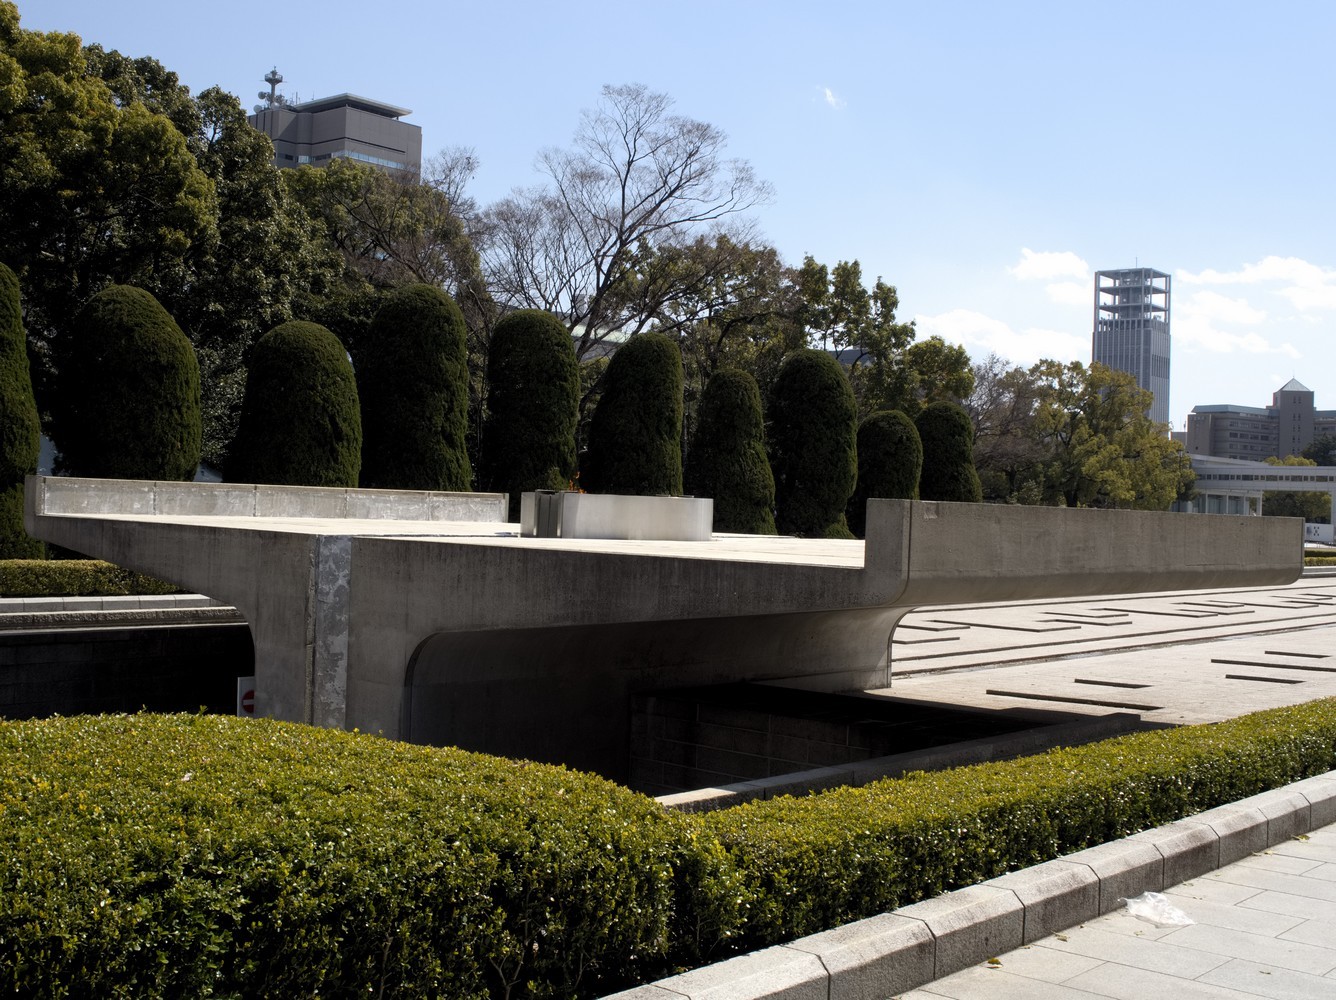
When entering the park, you’ll be able to see the Peace Bell located in front of the A-Bomb Dome. You can even leave the park in order to get closer to the dome. To continue visiting the park, located in the middle of it, you’ll find the Cenotaph and the Peace Flame. While there, you’ll notice that these two monuments are aligned with the A-Bomb Dome.

If you continue walking through the park, you’ll come across the Peace Memorial Museum which is a must-see when visiting Hiroshima. It’s very interesting and the entrance fee is ¥200 per person.
When you’re done visiting, to go back to Hiroshima Station from Genbaku Dome-Mae Tram Station, you can take the trams of the lines # 2 or # 6 . Then, you’ll have to go back to your hotel in order to pick up the suitcases you’ve left at the left-luggage office, before returning to the station to take a Shinkansen to go to Tokyo. Back then, I took the 5:22 p.m. Shinkansen and the journey lasted four and a half hours. But of course, there are other trains available, so make sure to check that out on hyperdia.com.
Tip: because it’ll be quite late when you arrive in Tokyo, and that the trip lasts for about 5 hours, I recommend buying some take out from the station before leaving, in order to be able to eat on the train.
Tips
Money
Japanese yen
When going to Japan, the best thing to do is to get yen in cash, as credit cards are not accepted everywhere. To do so, you’ll have to go to the money exchange office, you can either bring cash to change it over there, or either change it before leaving. And if you need money at the airport, just change what you need there, you’ll change the rest in town.
Transportation
Tram
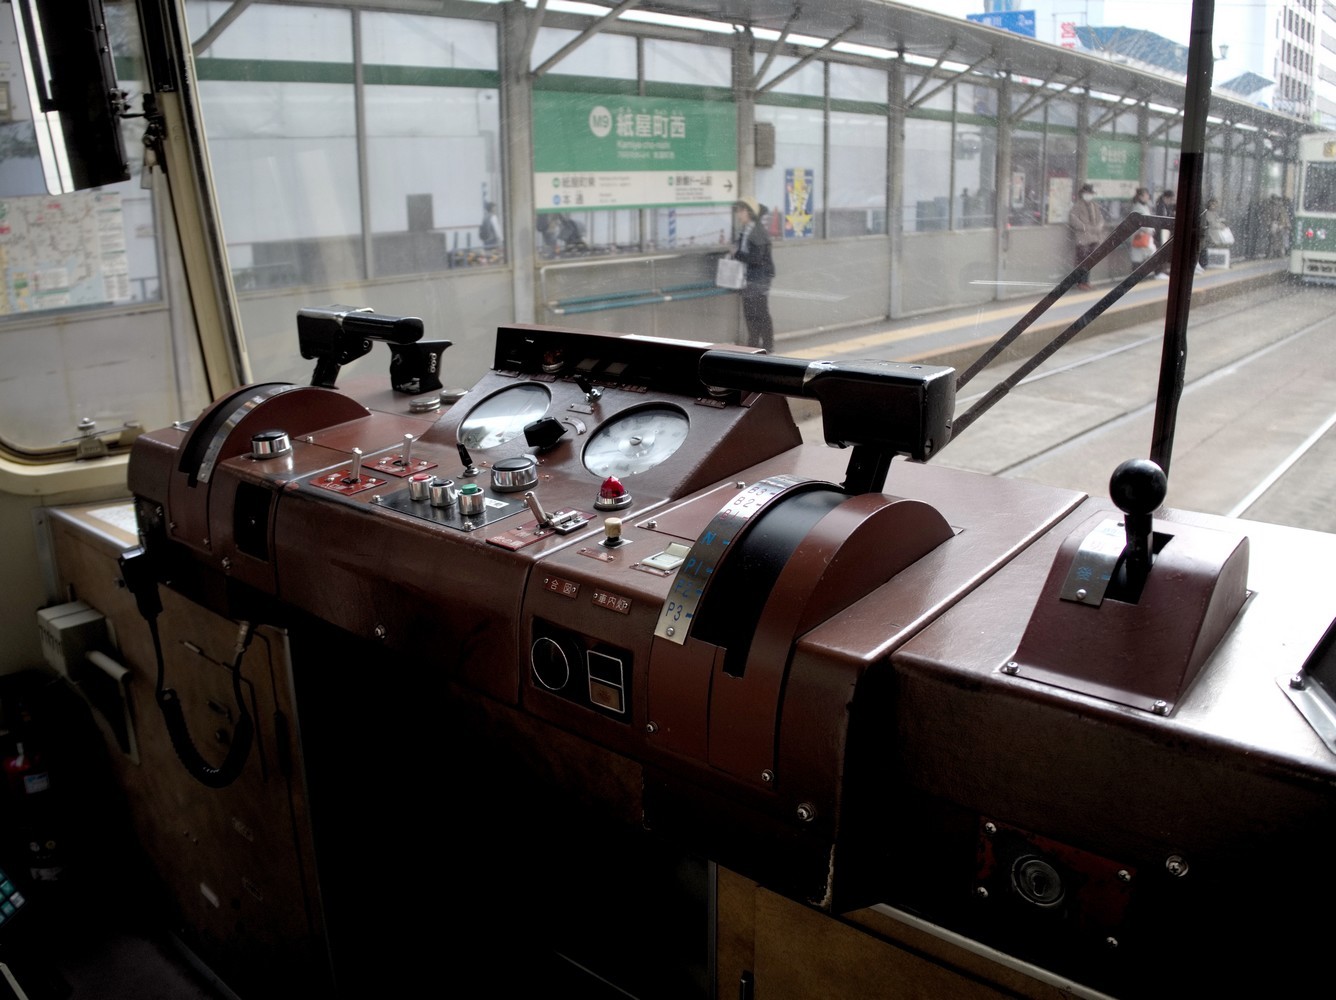
The tram is the most convenient way to get around downtown Hiroshima. Moreover, they’re quite frequent and pretty cheap, ¥180 for a one way ticket. You have to board from the rear and exit from the front, as payment has to be made before getting off, in the machine located next to the driver. And you need to have the exact change! If you don’t have enough coins, there is a machine that gives change on the ¥1,000 bills. There is also a day pass that costs ¥600.
Hyperdia
It’s a website that gives train timetables and that allows you to plan all your trips. The information provided is very accurate and the website gives not only the timetables but also the type of train, the journey time, and also the most important information, the platform number. You’ll see that in the train stations in Japan, there are a lot of trains and therefore just as many platforms. So for sure you could look for your train and its platform number on the TVs, but with the website, you’ll have these information right away and even before arriving at the station. This will save you a lot of time. And the best thing to do is to search the itinerary on your phone, on the way to the station, that way you’ll find out the platform number as soon as you arrive and could directly go to wait for the train. There is also a mobile app, but the mobile website was more than enough for me on my trip.
Tip: I had also used it a lot while planning my trip. Since you’ll be traveling by train from city to city, it’s quite important to have a rough idea of the train times available for each route. Especially since sometimes, for half an hour sooner or later, the length of the journey can go from simple to double. If you follow the route I took, I would give you the schedules of the trains I took, in each post about the different cities.
About the search, it’s quite simple, after going to the website hyperdia.com, all you have to do is to enter the departure and the arrival stations, as well as the desired date and time of departure. Just before clicking on « Search », click on « More options » to uncheck « Airplane », « Airport Shuttle Bus » et « NOZOMI / MIZUHO / HAYABUSA (SHINKANSEN) ». In the search results, the website will suggest several routes, it is up to you to select the one that suits you best. But the first one is usually the best.
Direction
To find your way in Japan, to get to all the sightseeing places, I highly recommend using Google Maps, especially if you take the data SIM card. But if you don’t, don’t worry because it works even without having an internet connection, it’s just that the « walking » routes won’t be available, you’ll only have the « driving » routes. But it’s still quite OK because it gives you a rough idea of the location, depending on your position. To do so, you have to save the map before going, or even while there, as long as you have an internet connection. On your smartphone, in the application, click on your profile picture at the top right of the screen, and then click on « offline maps ». Then click on « select your own map » and zoom out the map until you see the area you want to save. If the area to be saved is too large, then you’ll have to repeat the operation several times.
Tip: for your trip, I highly recommend getting a prepaid data SIM card which allows unlimited access to high-speed internet through your phone in Japan. And don’t worry, it comes pre-cut with all available formats (standard, micro, and nano SIM). And of course tethering is allowed. It’s not that expensive and it’s really convenient, it costs $23 for 8 days (there are different rental periods available with decreasing prices). This not only allows you to use Google Maps to find your way, but also to use the Hyperdia website, that gives real time train timetables (more details just down below). And I didn’t have any connection troubles during my trip.
In my opinion, Pocket Wifi is not an option to consider, because in addition to being much more expensive than the data SIM card, while providing exactly the same service, it makes an additional box to charge and carry around everywhere.
Remember to download the activation guide in order to set-up the SIM card.
Restaurants
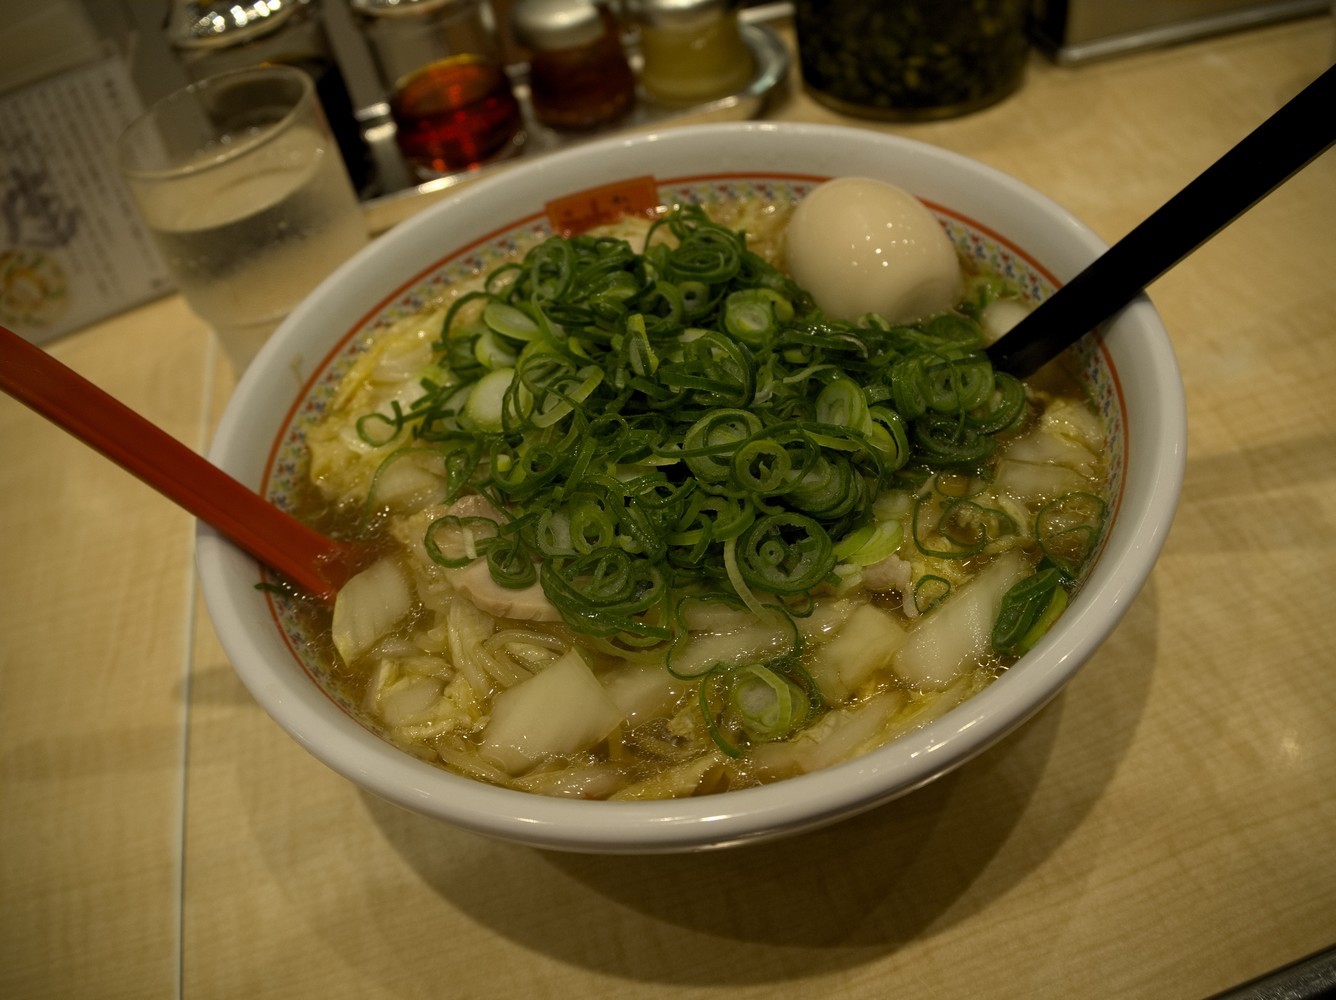
In Japan, in restaurants, food is not much more expensive than in France. The special thing is just that you’ll always find the miniatures of the dishes on display in front of each restaurant, which is very convenient for choosing where you want to eat. You’ll also see that there are some kinds of noodle fast food restaurants, where you can find all kinds of noodle bowls at rock bottom prices. And this is the perfect place if you are in a hurry, because in front of the restaurant there is an order kiosk, you make your choice, you pay, and when you enter the restaurant, your order is usually already available! You’ll also notice that the Japanese gulp down their bowls of noodles at breakneck speed.

Tip: NEVER leave tips in Japan, the Japanese would consider it rude and insulting!
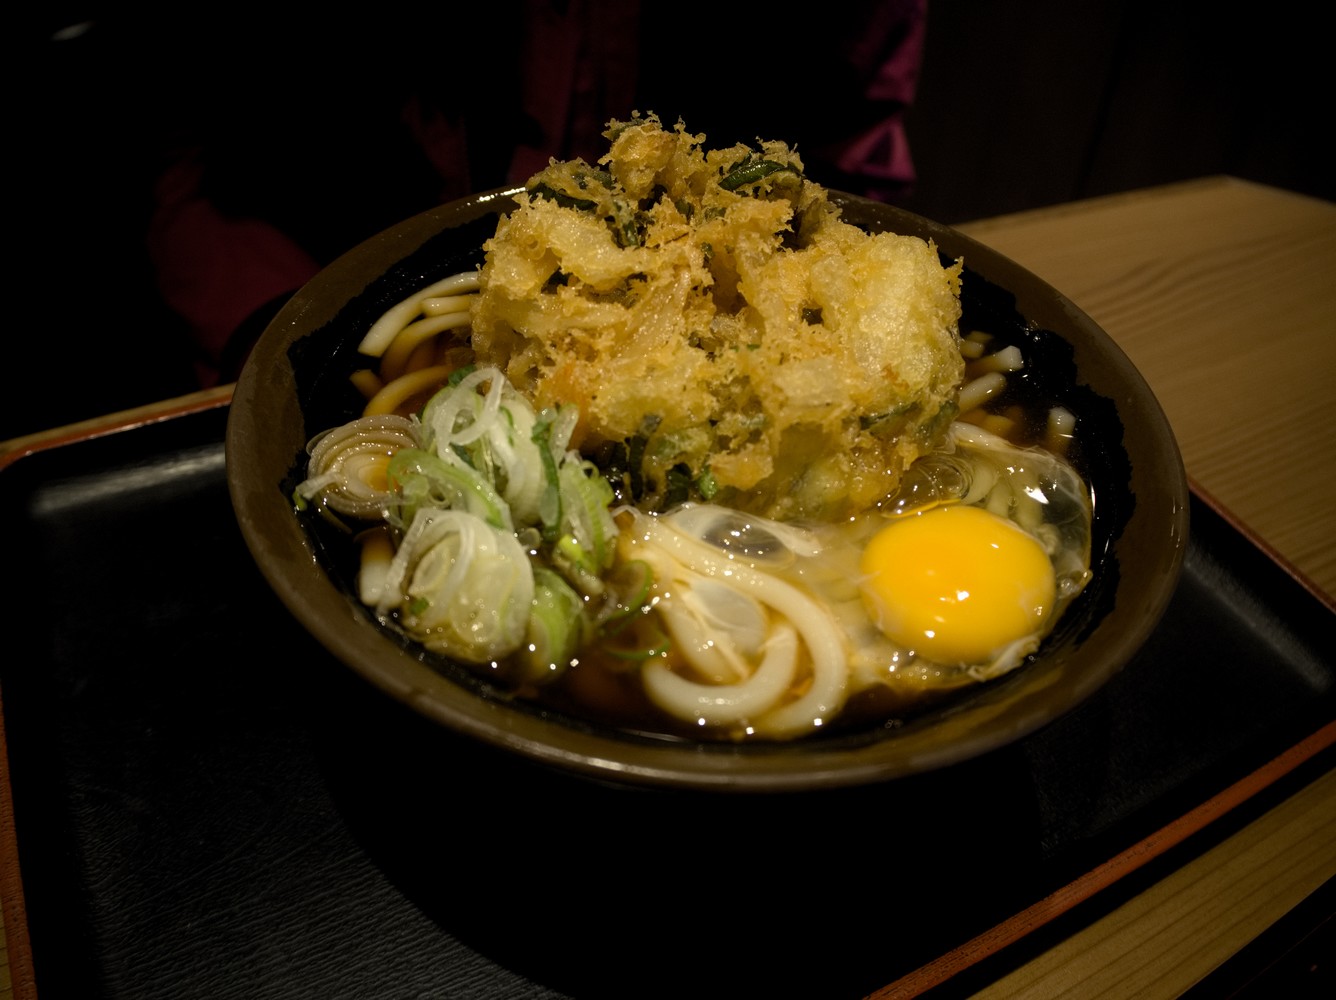
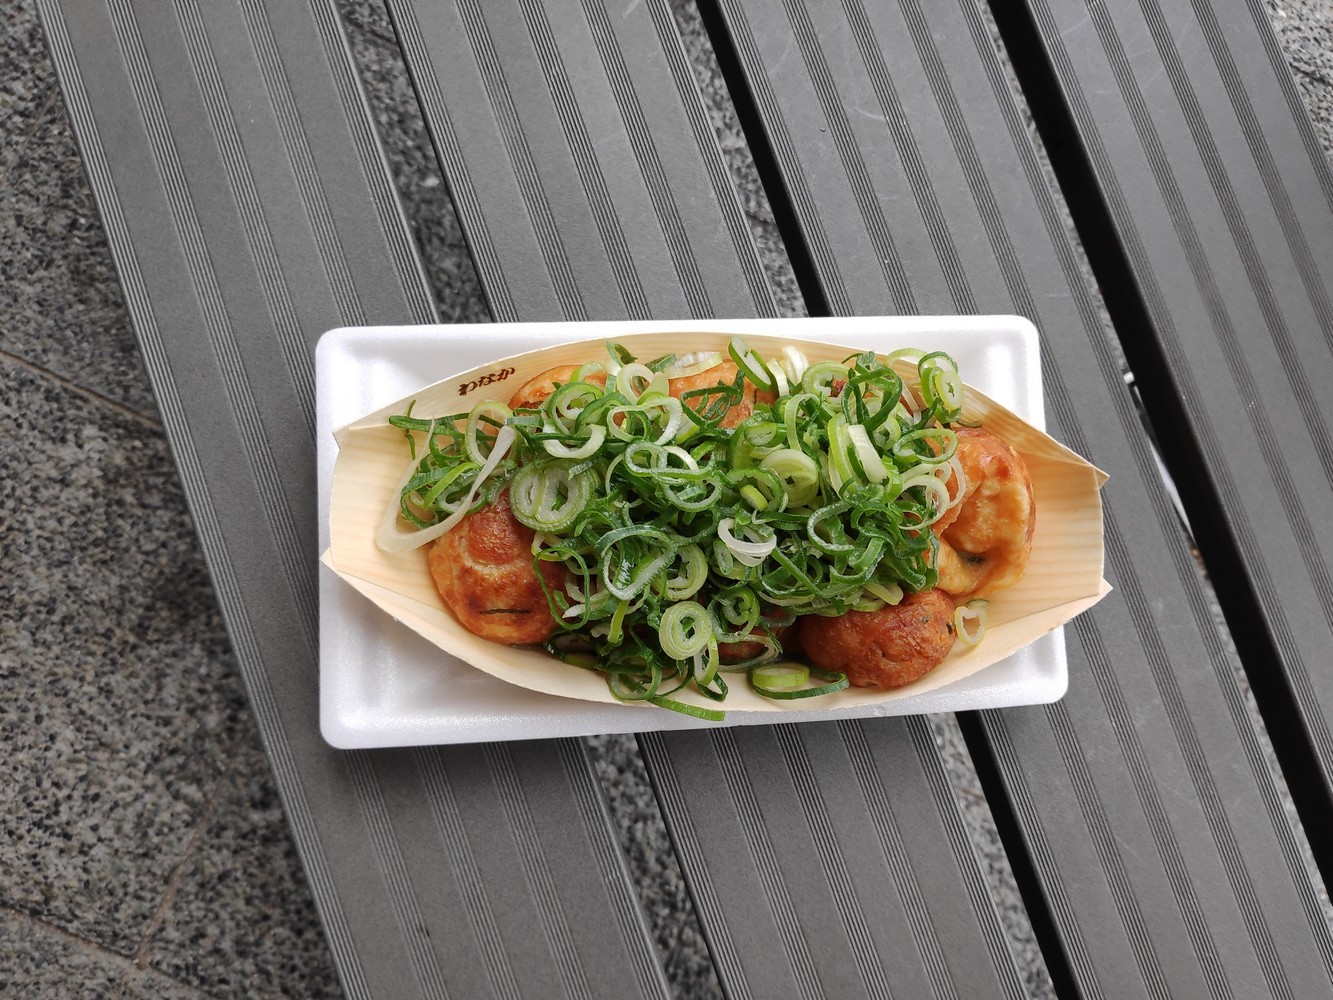
You could also try small nibbles you can find in some small stalls located on the edge of streets.

Hotels
I recommend booking a hotel located close to Hiroshima Station, because it’s very convenient. Not only for your arrival and departure, because you can reach your hotel or the station on foot, but also to take the JR train in order to go to take the ferry that leads to Miyajima Island, or even the tram to go downtown.
During my stay in Hiroshima, I stayed at the APA Hotel Hiroshima Ekimae.
Description: rooms are not that big, like everywhere in Japan, but the inside is clean. Moreover, there’s a desk and a small fridge into the room. In the bathroom, you’ll find a bathtub and high-tech toilet. It’s okay for a one-night stay.
Price: about €80 per night for 2 people, in March.
Location: the hotel is located about a 3-minute walk from Hiroshima station.
How to get there: when leaving the station, turn right and walk along the car park. When reaching the post office, turn right again. Then go straight ahead, and just before reaching the bridge, turn left in order to take a little street. At the end of the street, you’ ll see the hotel on the left.
| Pros | Cons |
|---|---|
| price | - |
| very convenient location | - |
| free Wi-Fi in the rooms | - |
| free left-luggage service | - |
Thanks for reading :)


