
Want to go to have a look at the famous Mount Rushmore, a sculpture of Presidents’ heads carved into the granite? Come on to get some advice to explore the area in 2 days.
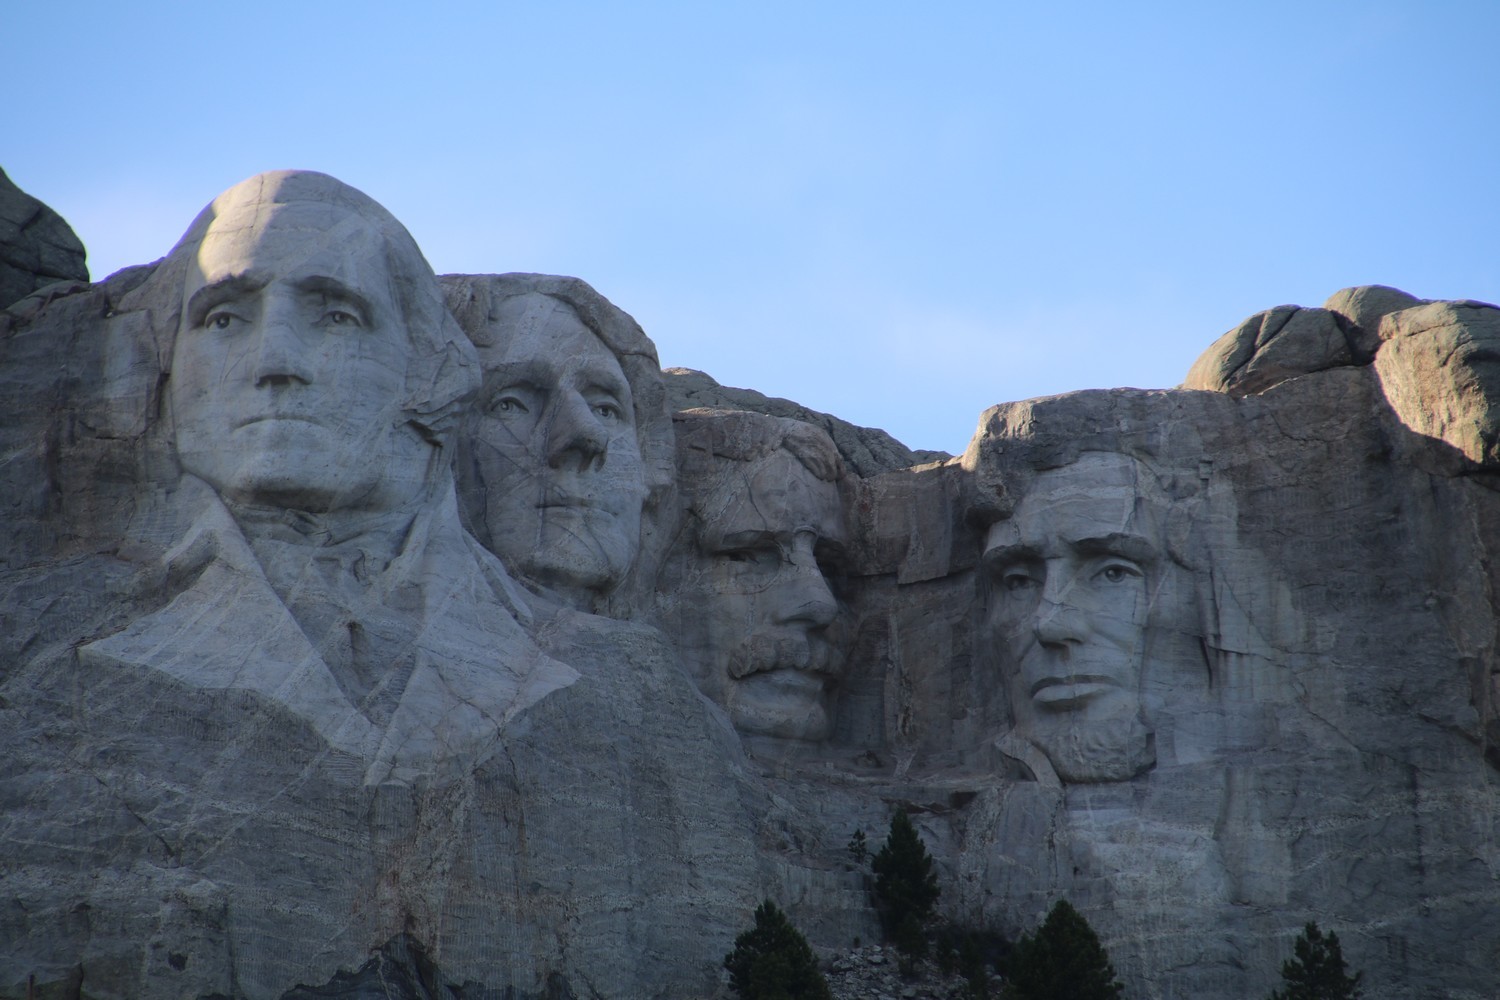
Mount Rushmore is kind of a symbol to Americans. This 60-foot colossal sculpture carved into the granite is visited by more than three million people each year. However, the Black Hills area isn’t just about Mount Rushmore, and you should definitely go to explore the surroundings.
Back then, I reached South Dakota by car, coming from Yellowstone National Park. However if you don’t intend to visit Yellowstone during the same trip, I recommend landing at Rapid City Regional Airport, which is located at about a 30-minute drive from Mount Rushmore. But the airport being regional, you must necessarily make a stopover in a city located in the U.S. in order to be able to reach it. So you won’t find direct flights from your country. Moreover you can easily rent a car from Rapid City Airport in order to go to visit the area.
With that being said, let’s go to see the details of the schedule:

Day 1: Devils Tower and Mount Rushmore
Tip: you can also click on the link down below from your smartphone, to open the itinerary to follow on google maps: « Devils Tower and Mount Rushmore » tour
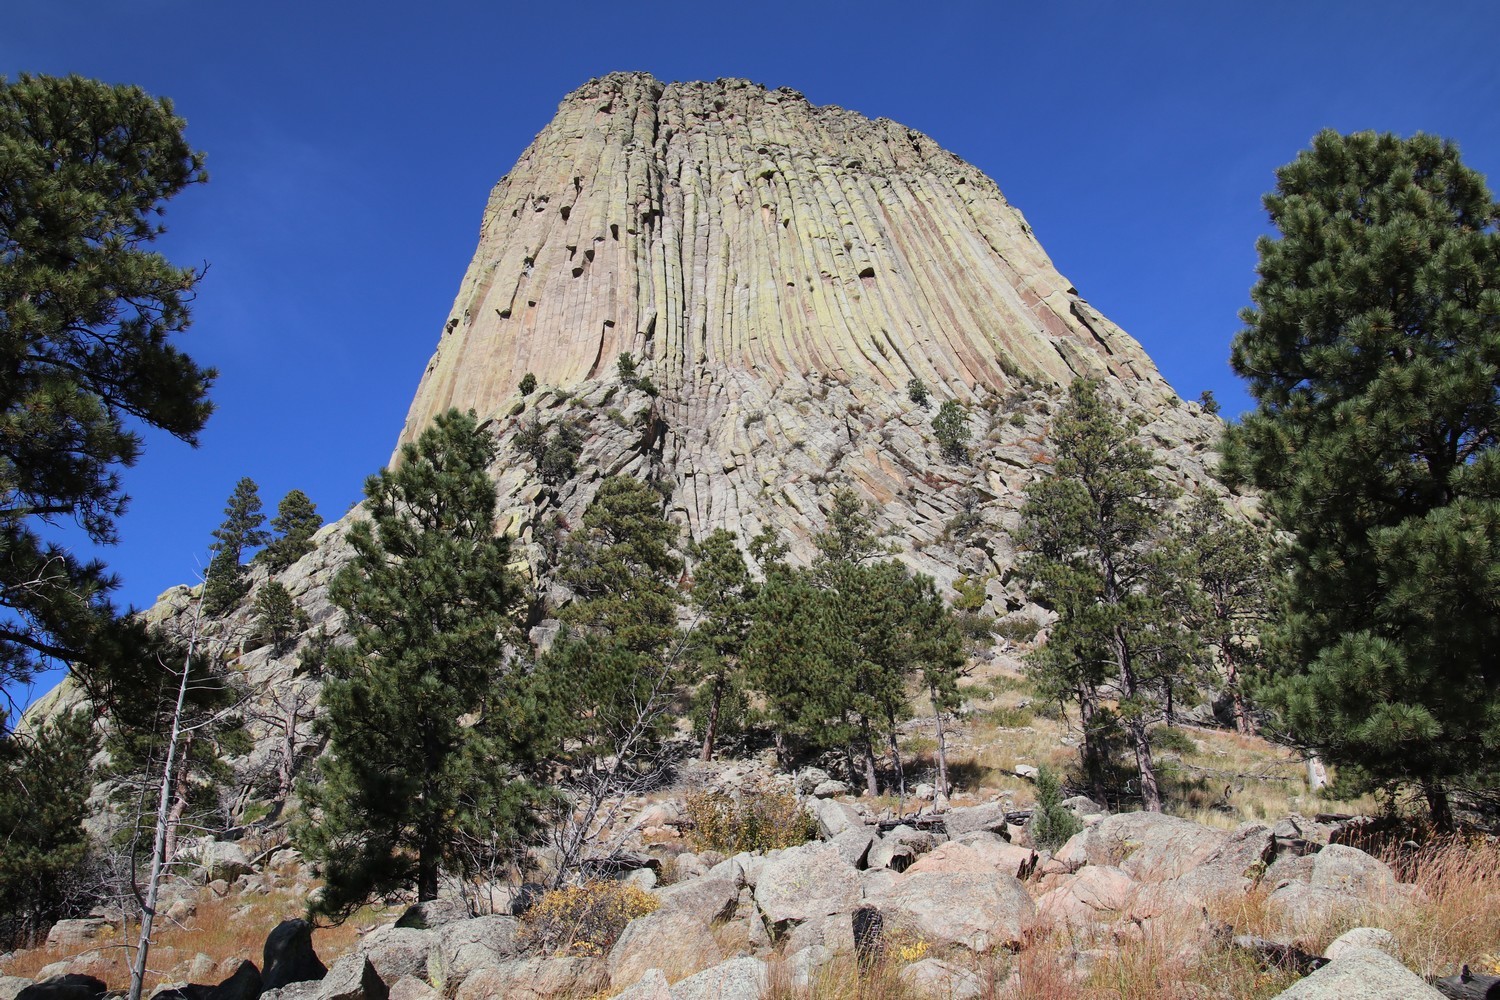
Devils Tower
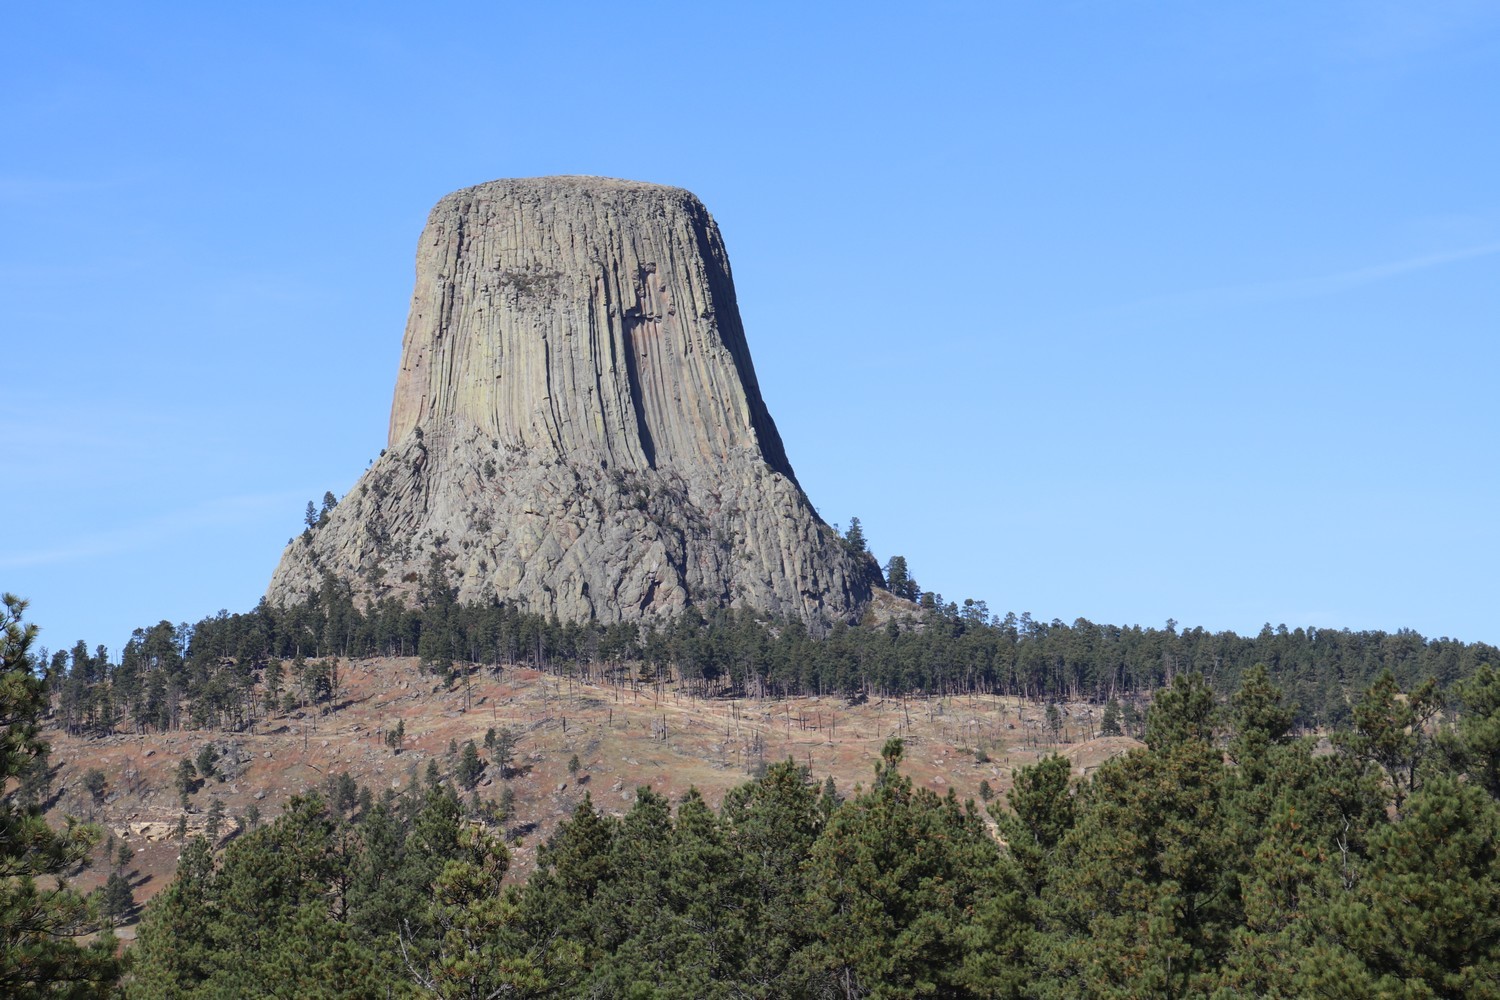
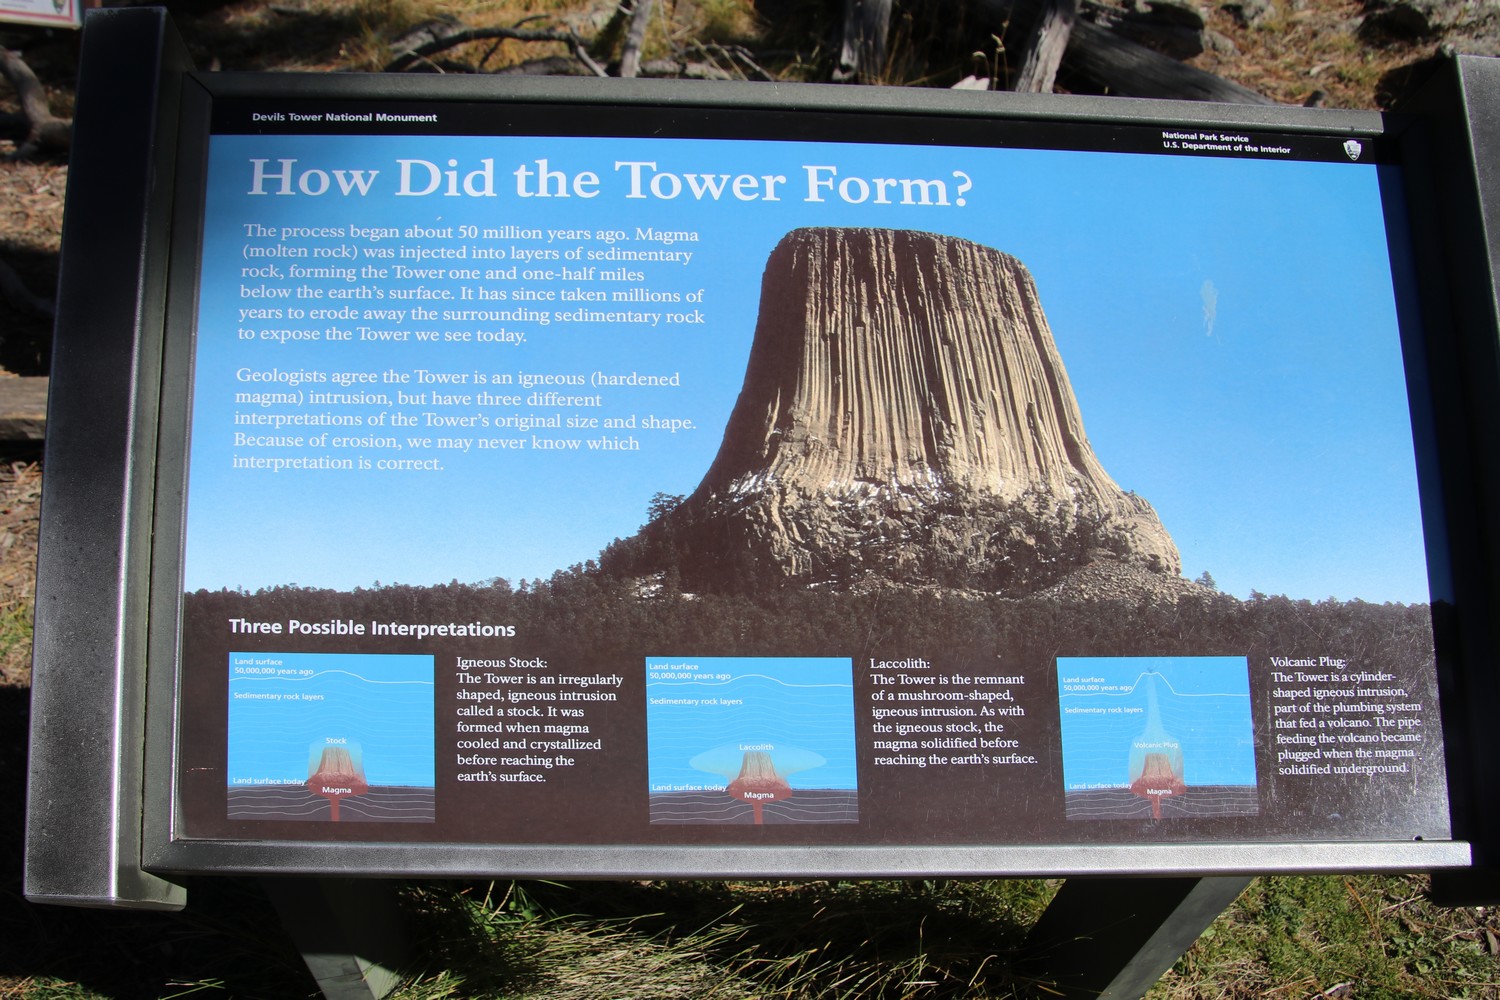
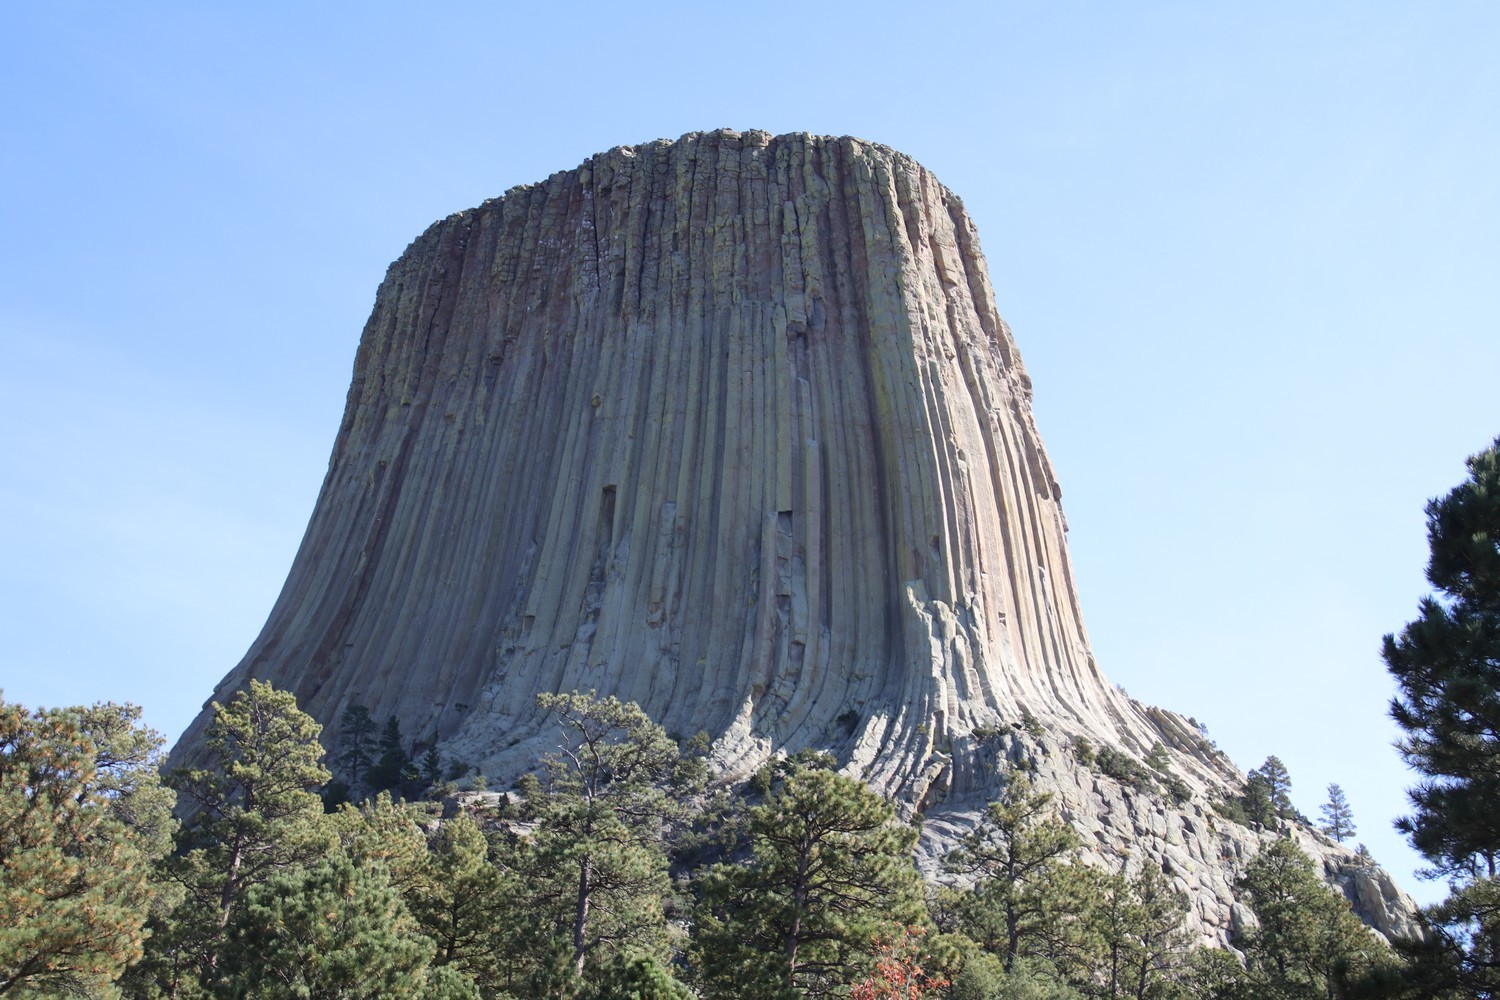
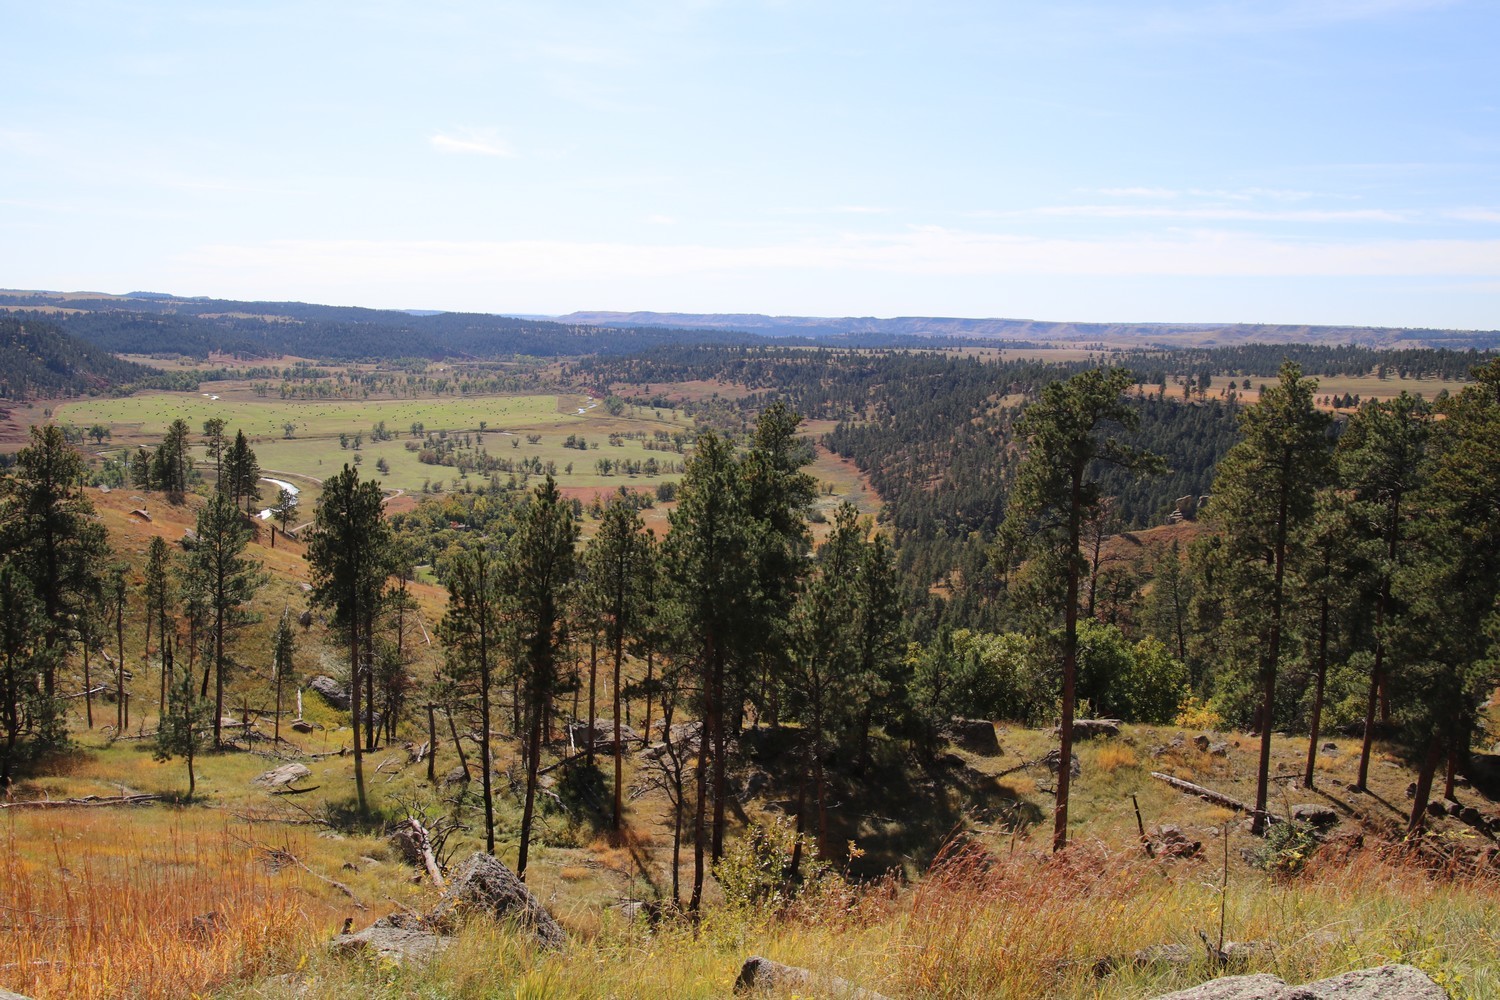
For this first day visiting the Black Hills area, let’s start with Devils Tower. It’s a kind of big rock tower which apparently was formed by an igneous intrusion.
Entrance fee is $25 per vehicle (valid for 7 days) but it’s free with the « America the Beautiful » pass.
Tip: the « America the Beautiful » pass gives access to all national parks in the United States for 1 year (for 1 car or 4 people where per-person fees are charged). It costs $80 but you can put 2 names on it, so if you know someone who is also planning a trip among America’s national parks, you can share the fee.
The pass can be issued at the entrance to almost any national park in the U.S.
To know: the pass is a good option only if you’re visiting at least three national parks in the same year.
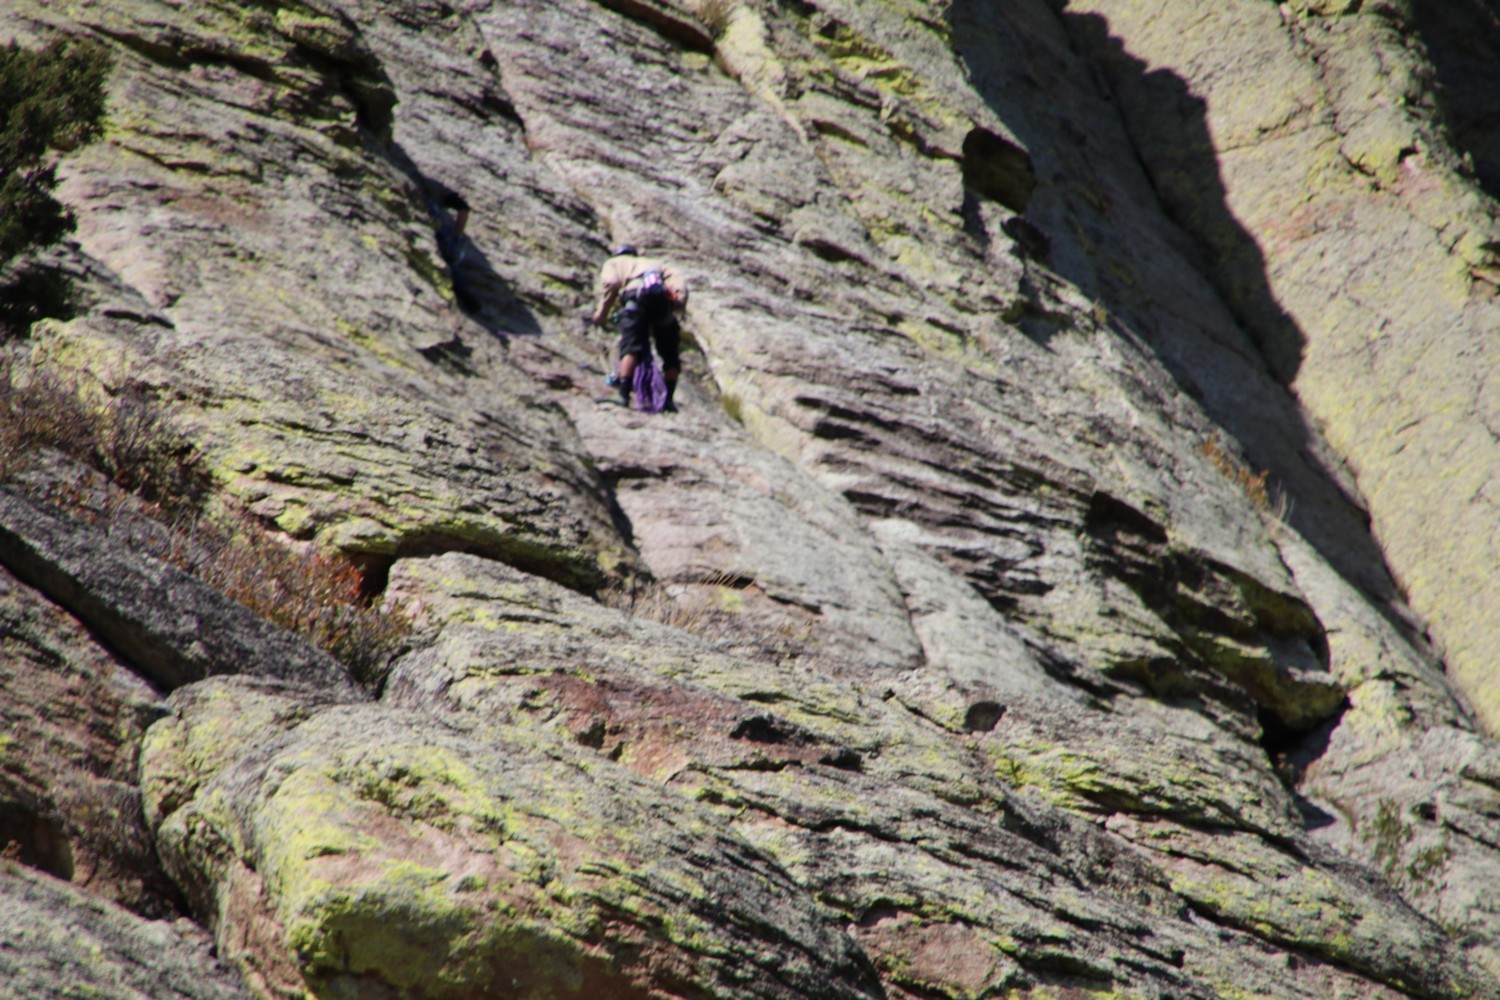
The visit is basically a 30-minute walk that goes around the monument. Moreover, all along the way, there are a few signs that give geological information. And you may even spot some people climbing the Devils Tower.
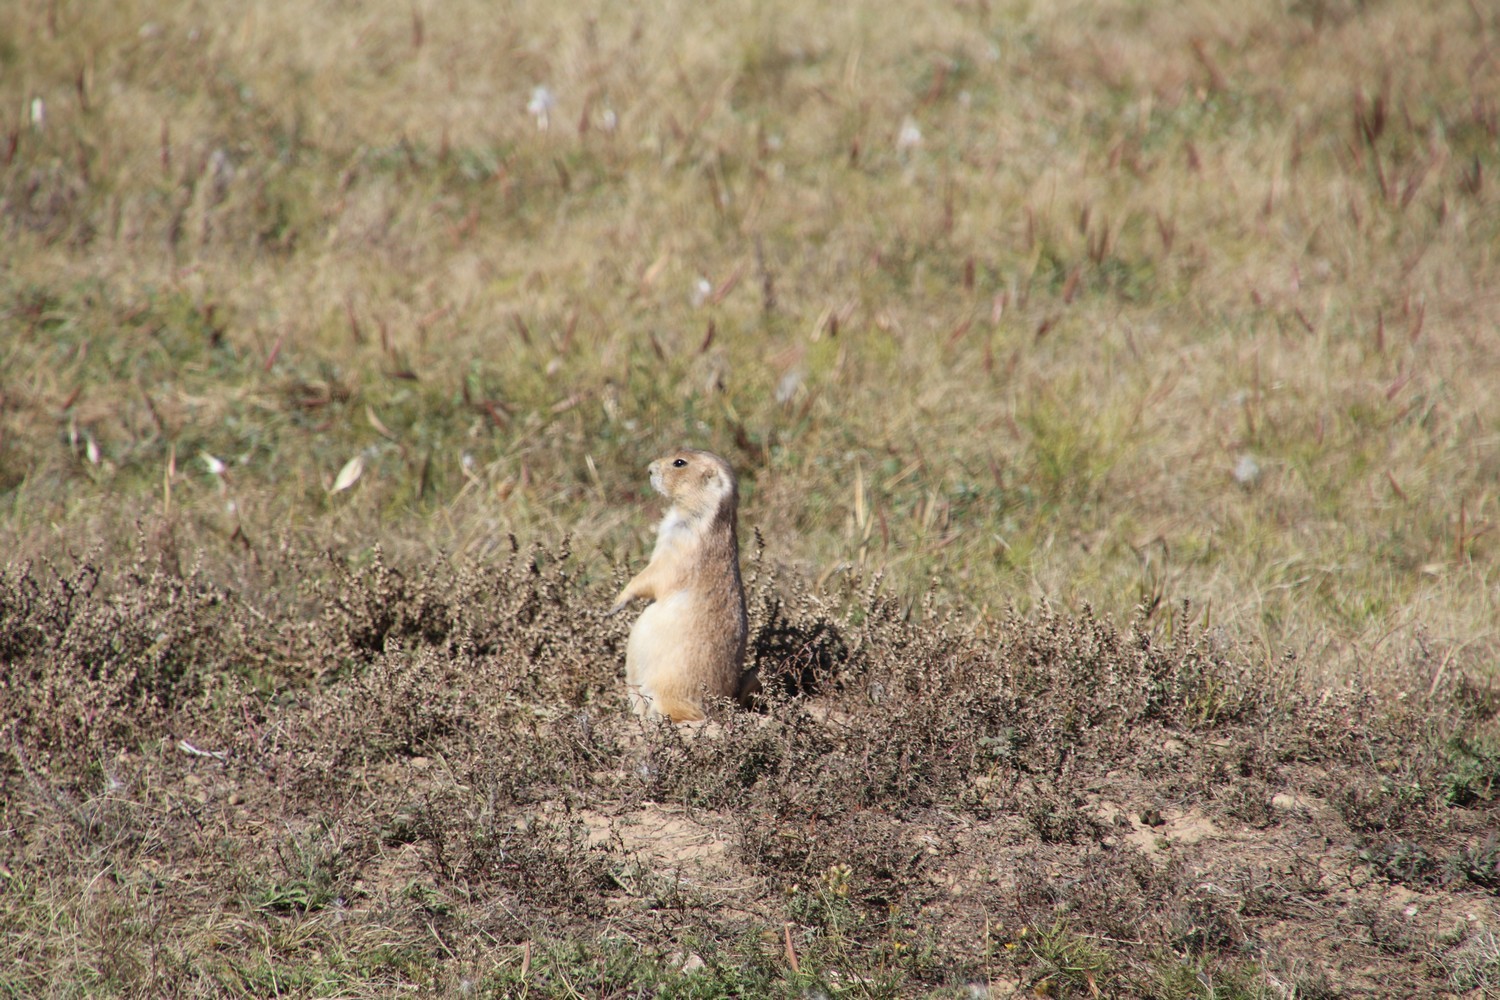
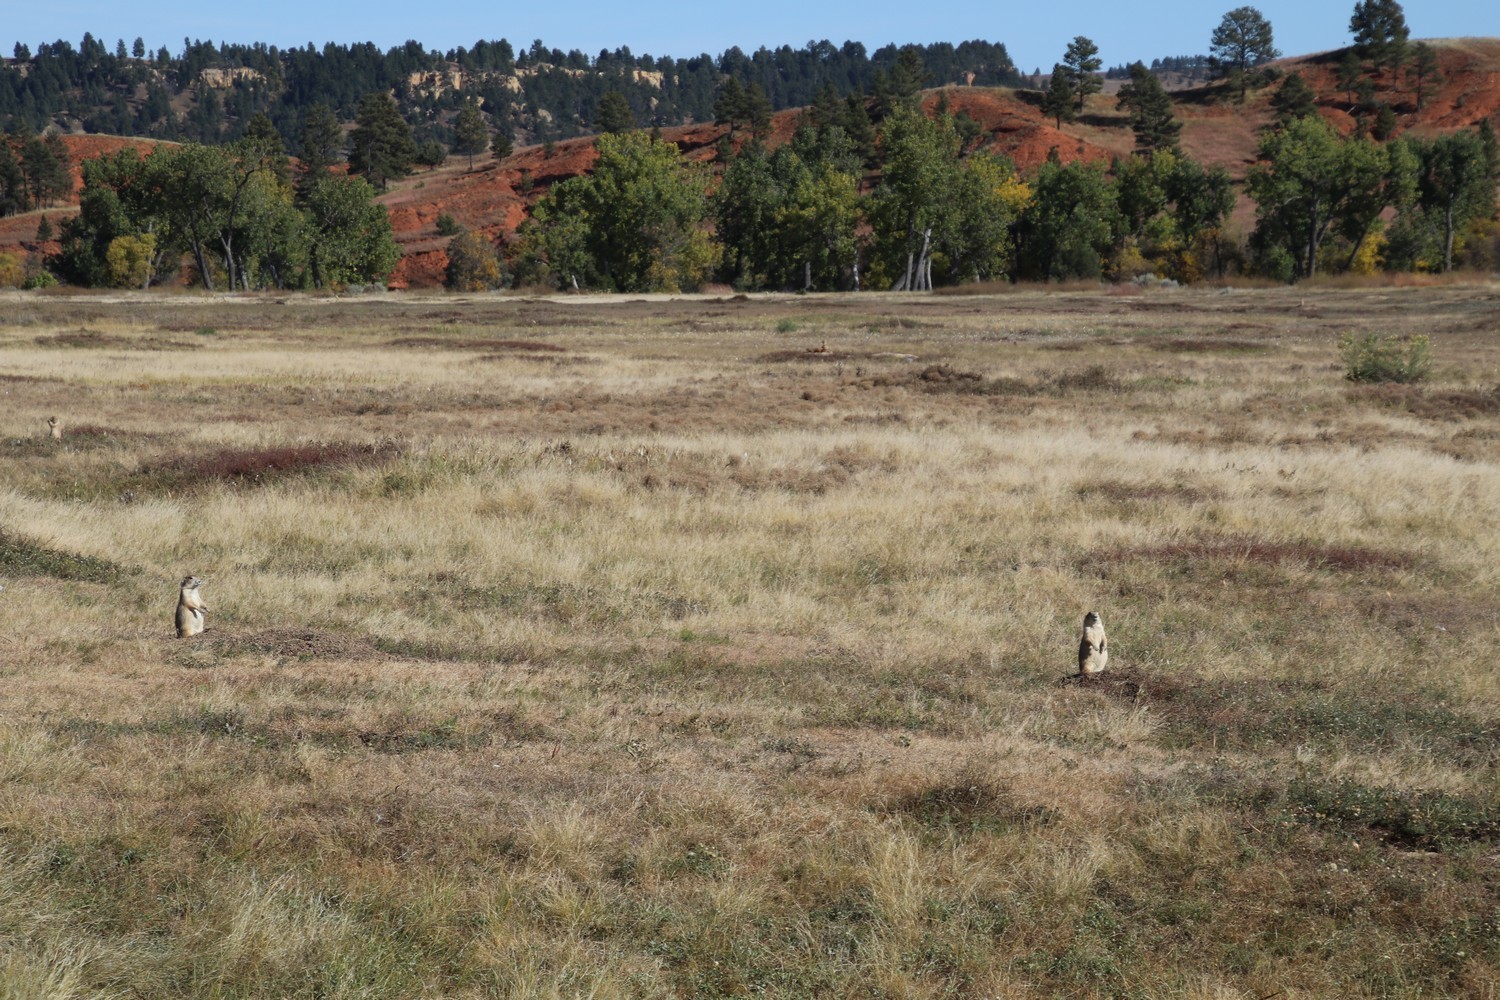
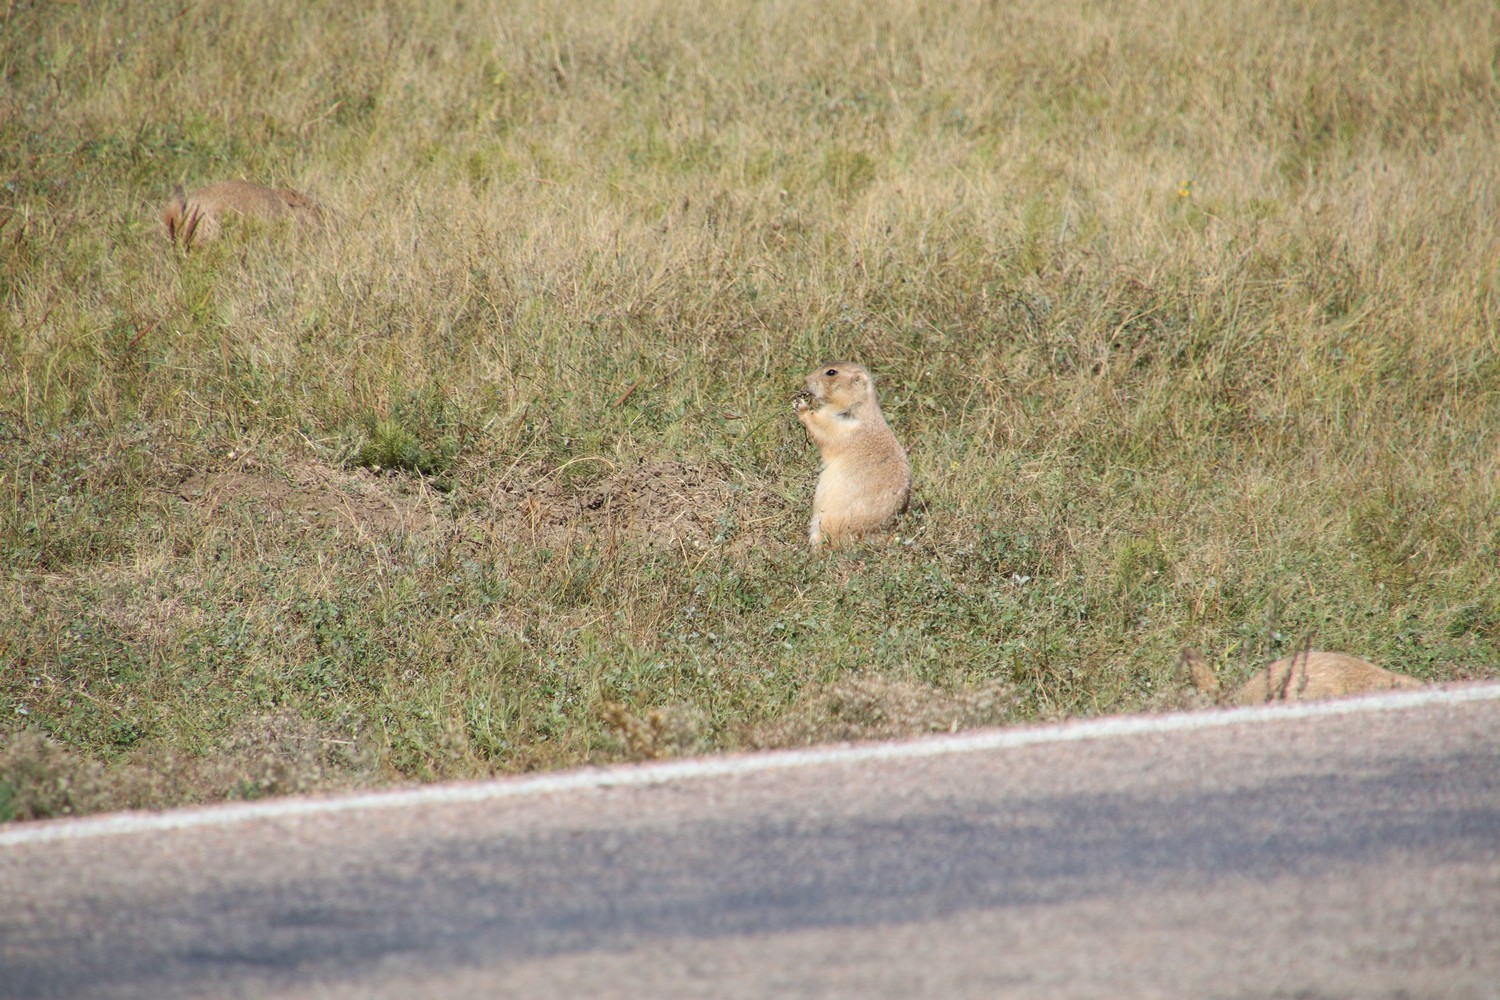
Don’t Miss: you should also definitely stop at Prairie Dog Town, which is located halfway between the entrance to the park and Devils Tower. Over there, you’ll spot very cute little animals!
For lunch, you can either have a picnic at Devils Tower or look for a restaurant in a nearby town. Afterwards, it’ll be time to head to Mount Rushmore, which is located at about a two-hour drive.
Mount Rushmore
When arriving at Mount Rushmore, the first thing to do will be to park your car at the parking lot. Parking fee is $10, but the parking pass is valid for one year.
Then head to the Avenue of Flags which is an alley lined with flags. This alley leads to the Grand View Terrace which is located just at the bottom of Mount Rushmore. But unfortunately, when I was there, everything was under construction, so I could only look at the mountain from afar.
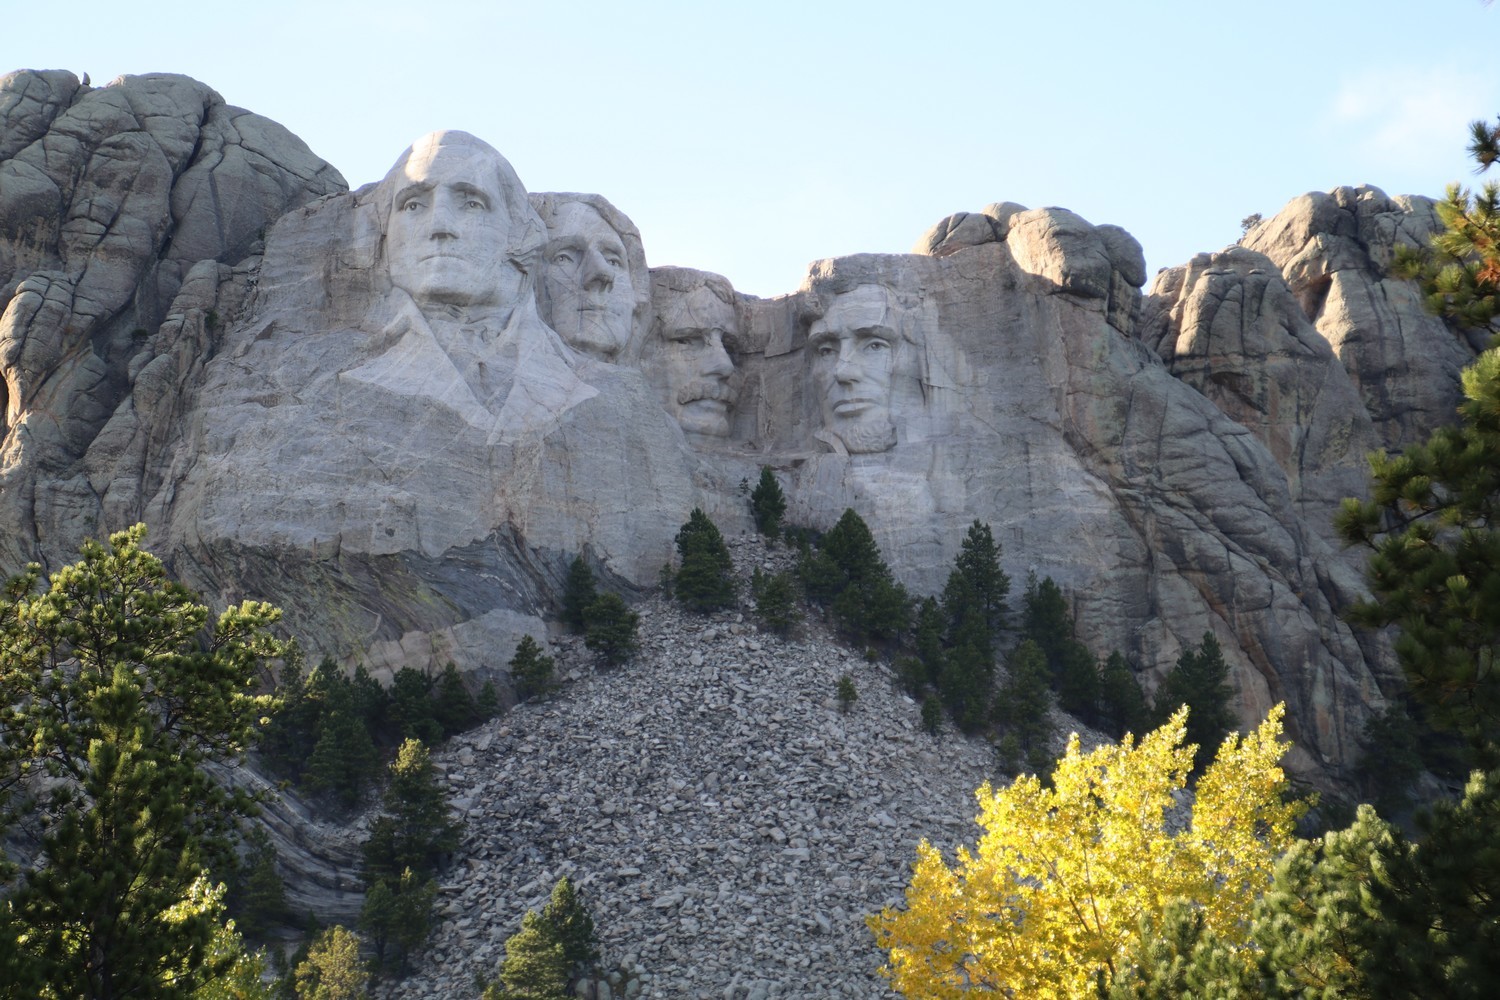
When the site is not under construction, after having a look at the heads of presidents from the Grand View Terrace, and taking some pictures, you can go for a 30-minute walk at the Presidential Trail. It’ll not only allow you to get closer to Mount Rushmore, but also provides access to the Sculptor’s Studio which is a little museum that gives details about the building of the memorial.
After visiting Mount Rushmore, I recommend heading to Wall. You should definitely spend the night there, as it’s located quite close to the entrance to Badlands National Park. That way it’ll save you a lot of time for the next morning.
Day 2: Minuteman Missile and Badlands National Park
Tip: you can also click on the link down below from your smartphone, to open the itinerary to follow on google maps: « Minuteman Missile and Badlands National Park » tour
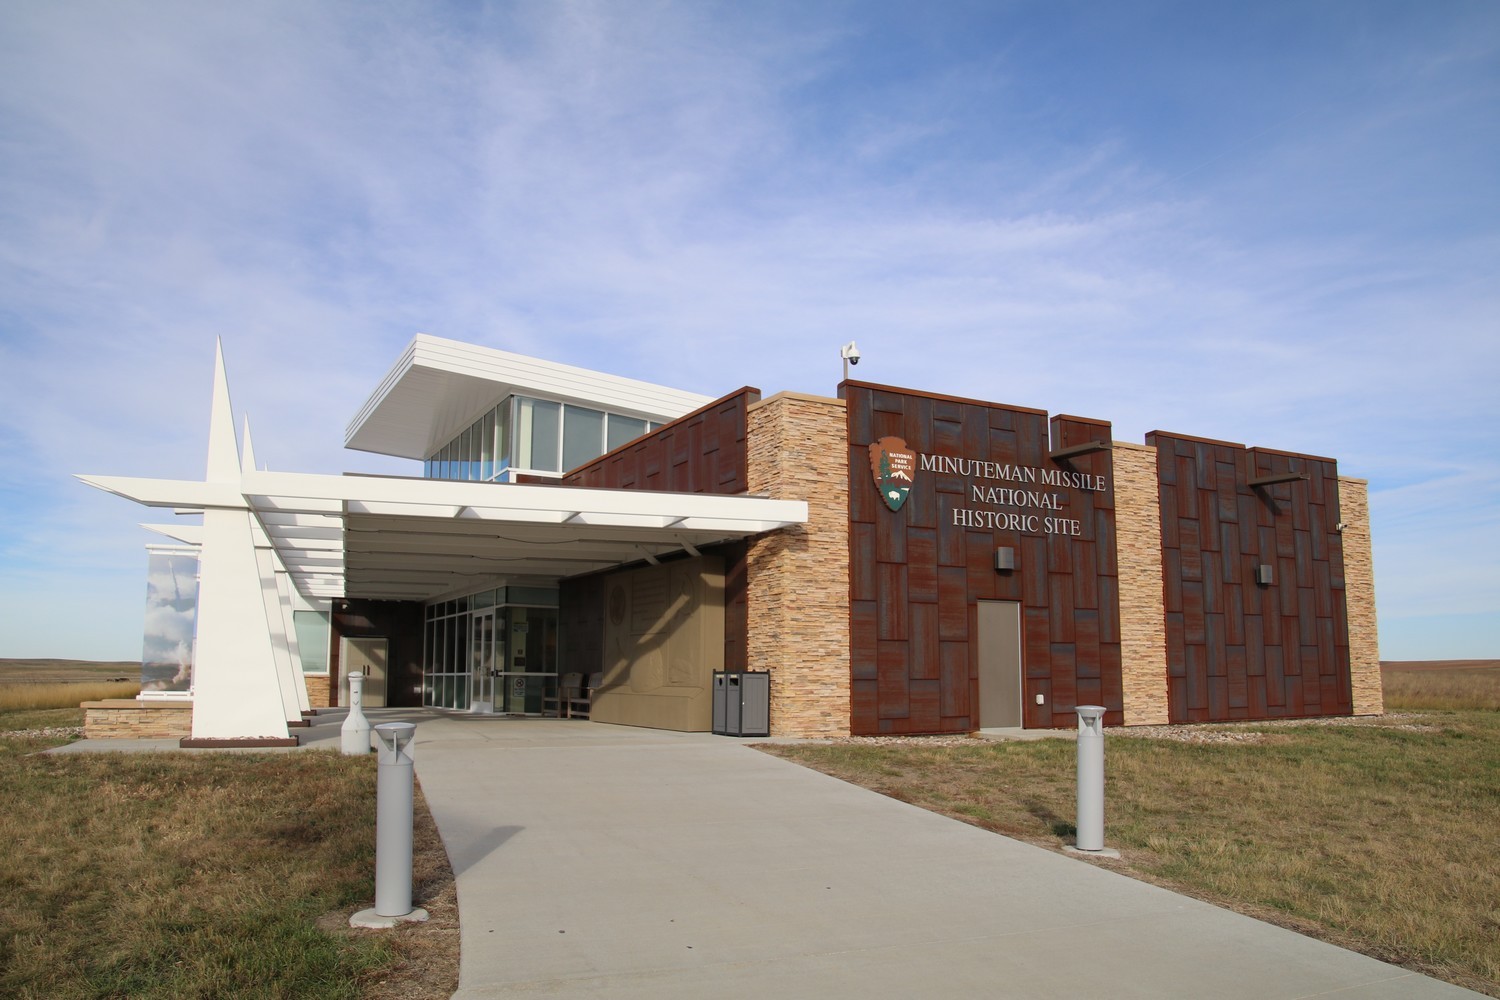
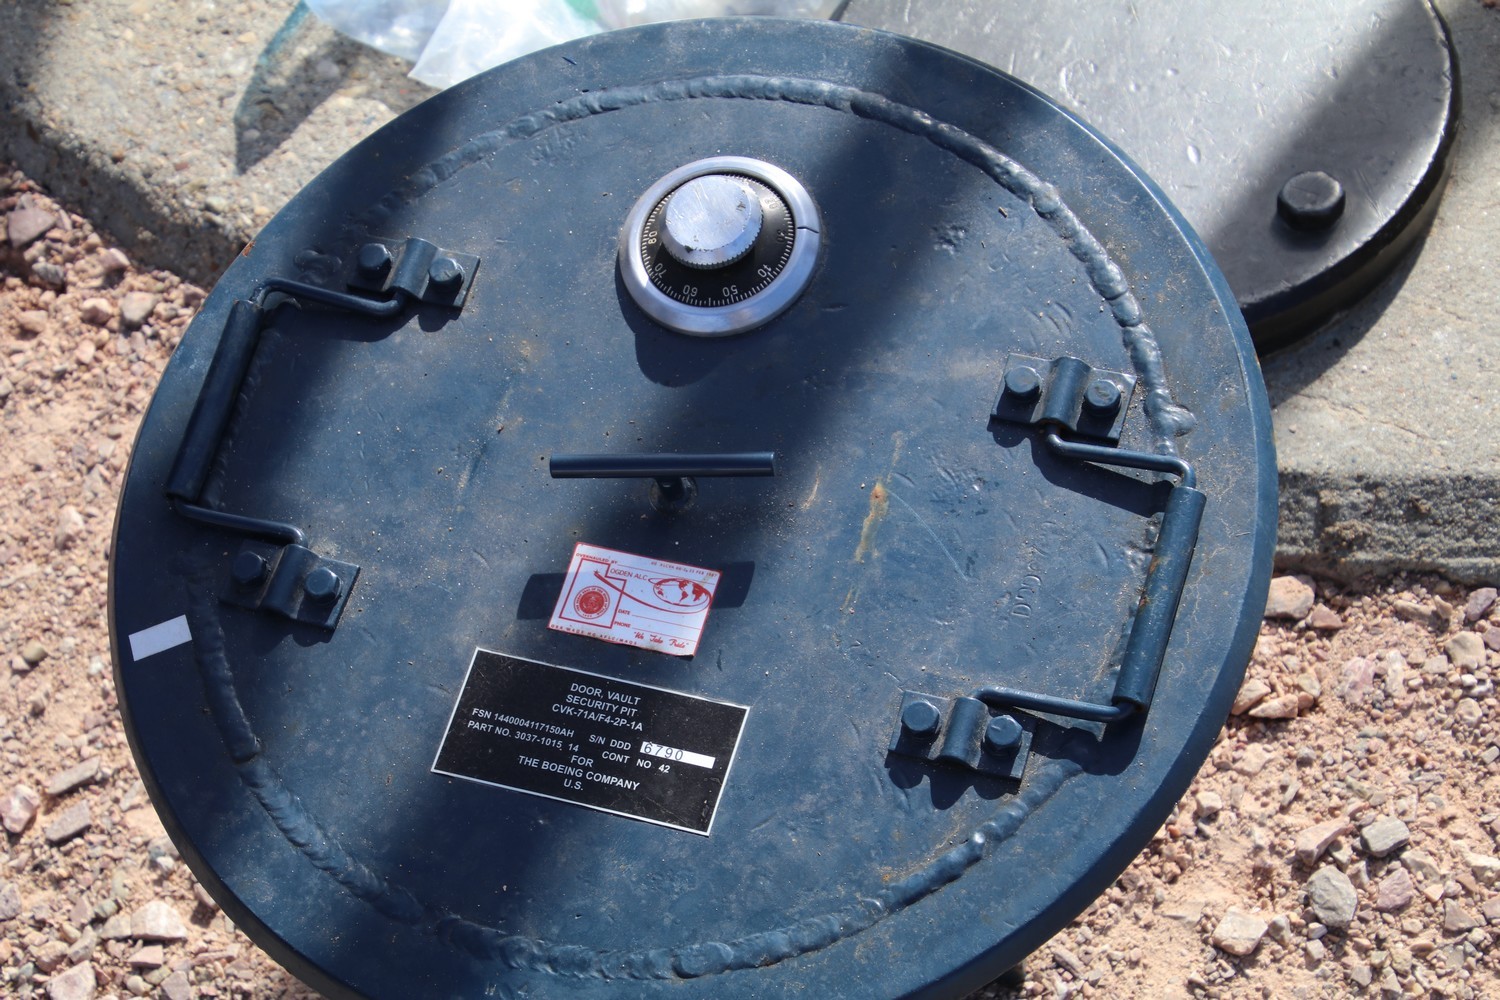
Minuteman Missile: National Historic Site - Delta-01 - Delta-09
For this second day in South Dakota, just before reaching the northeast entrance to Badlands National Park, on Interstate 90 (I-90) exit 131, you can go to visit Minuteman Missile National Historic Site, which is a kind of little museum that talk about the Cold War and intercontinental ballistic missile (nuclear weapon) developed by the United States. During the Cold War, the area was used as a nuclear warhead fire center.
No admission fee charged at Minuteman Missile National Historic Site.

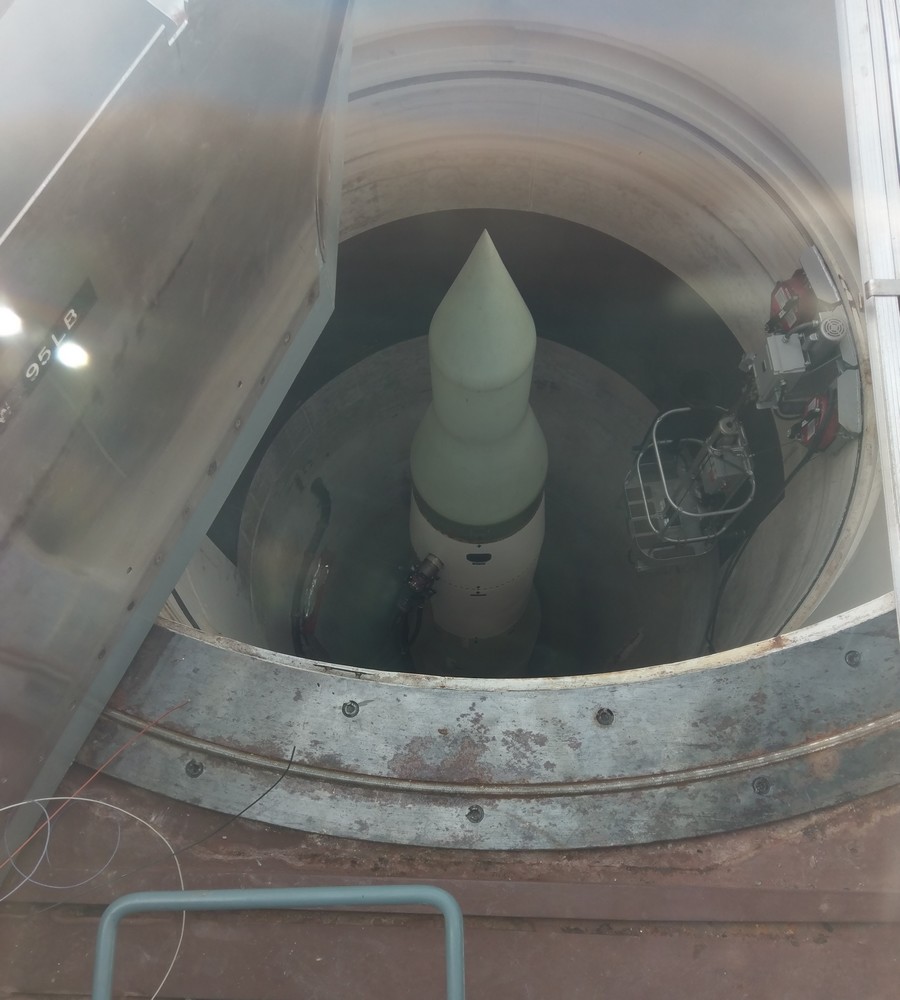
If you’re really interested in nuclear weapons, you can book a tour of the Delta-01 Launch Control Facility but it requires advanced reservation and an amenity fee. The forty-five-minute ranger-guided tour let you enter the inside of the control center. Tour amenity fee is $12 per adult and $8 per child. Delta-01 is also located on Interstate 90, but a bit west of the National Historic Site.
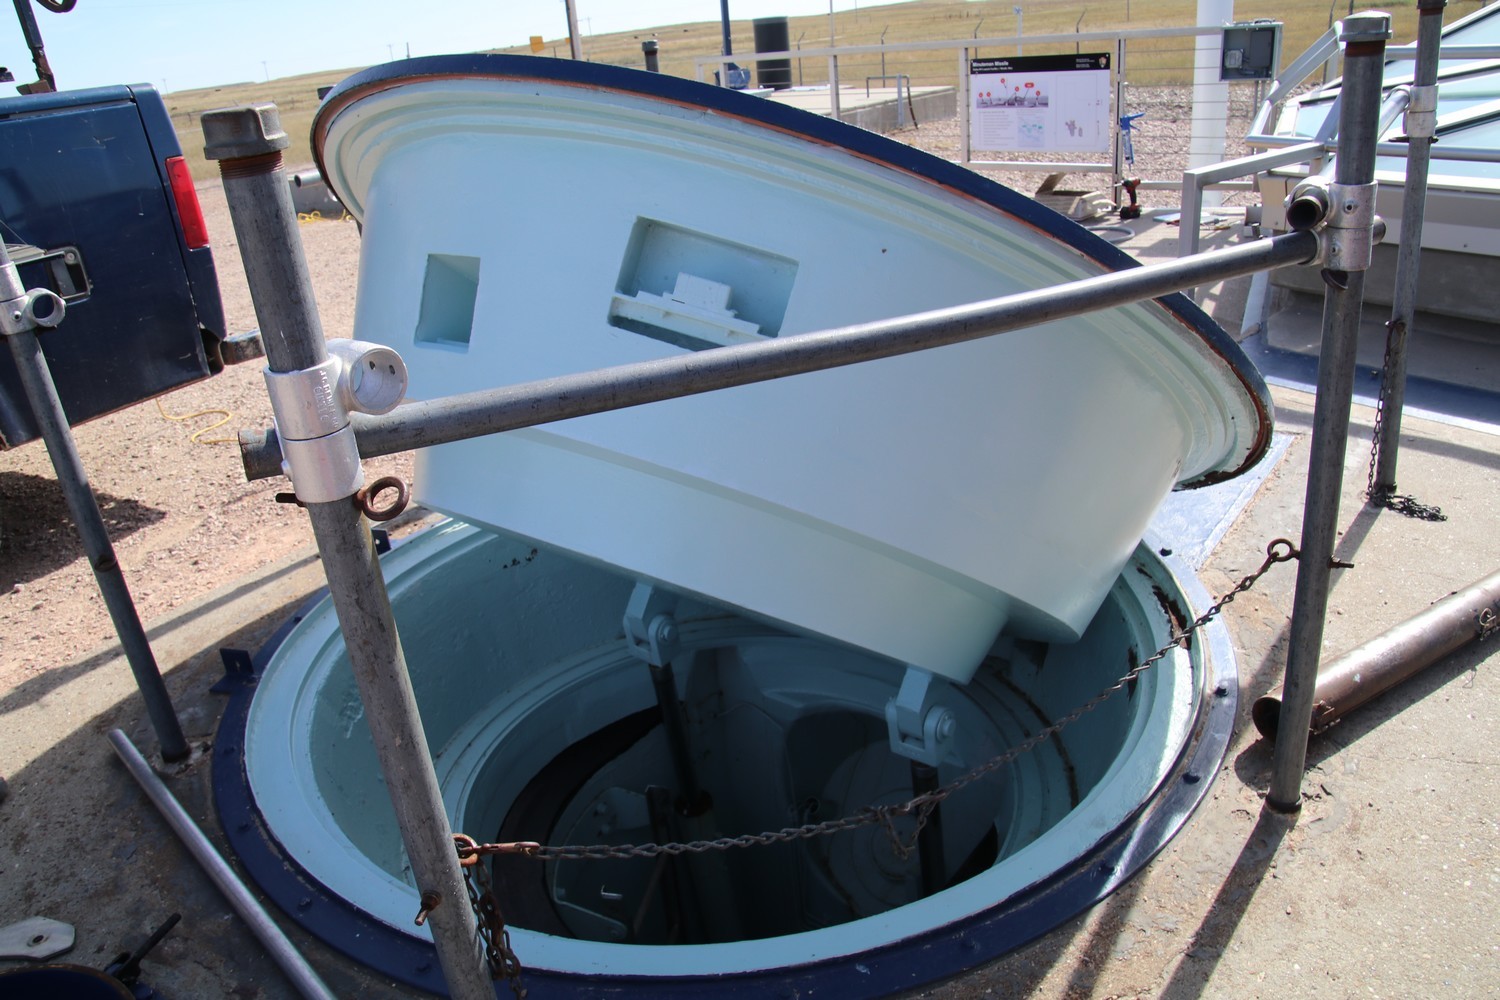
Otherwise, still on Interstate 90 but a bit closer to Wall (exit 116), a free self-guided tour is available at Delta-09 Missile Silo (no entrance fee charged). It features an unarmed missile that was placed inside the silo. For the self-guided tour, you can either use the Mobile Web App, or dial the phone number: 605-301-3006.
During my visit, there was an on site intervention, so I was able to see the opening of the vault.
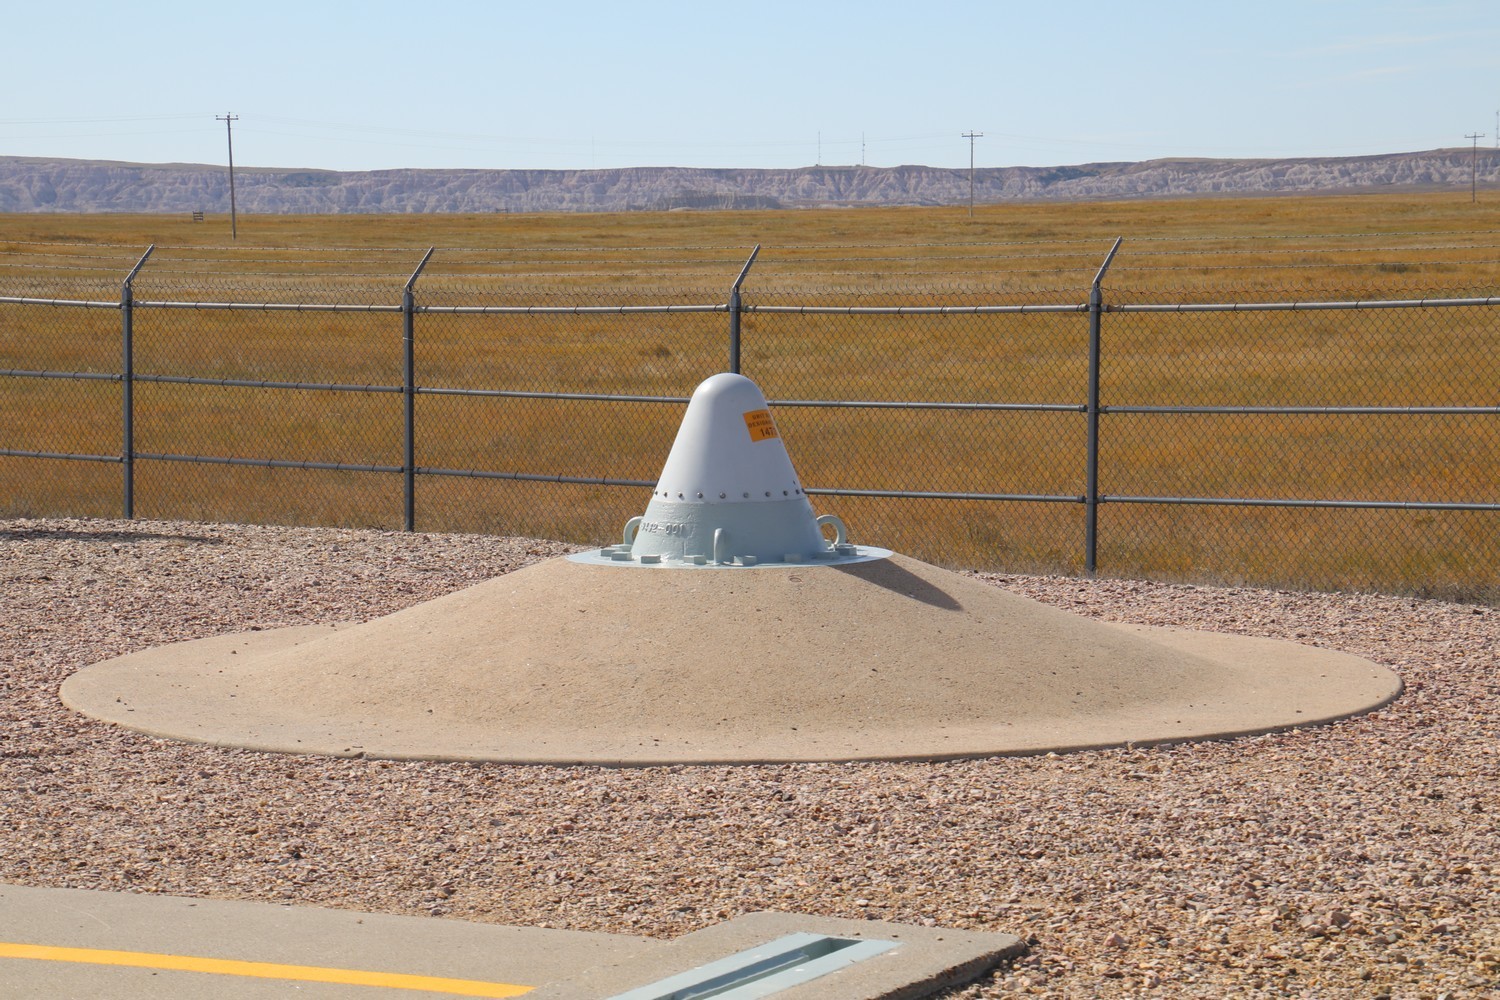
Tip: if you’re coming from the small town of Wall, and want to go to visit Delta-09 in addition to Minuteman Missile National Historic Site and Badlands National Park, I recommend starting or finishing with Delta-09 because it’s the furthest one. Also, when arriving at Delta-09 missile silo, it looks like you are entering a farm but don’t worry, continue driving and you’ll reach the site.
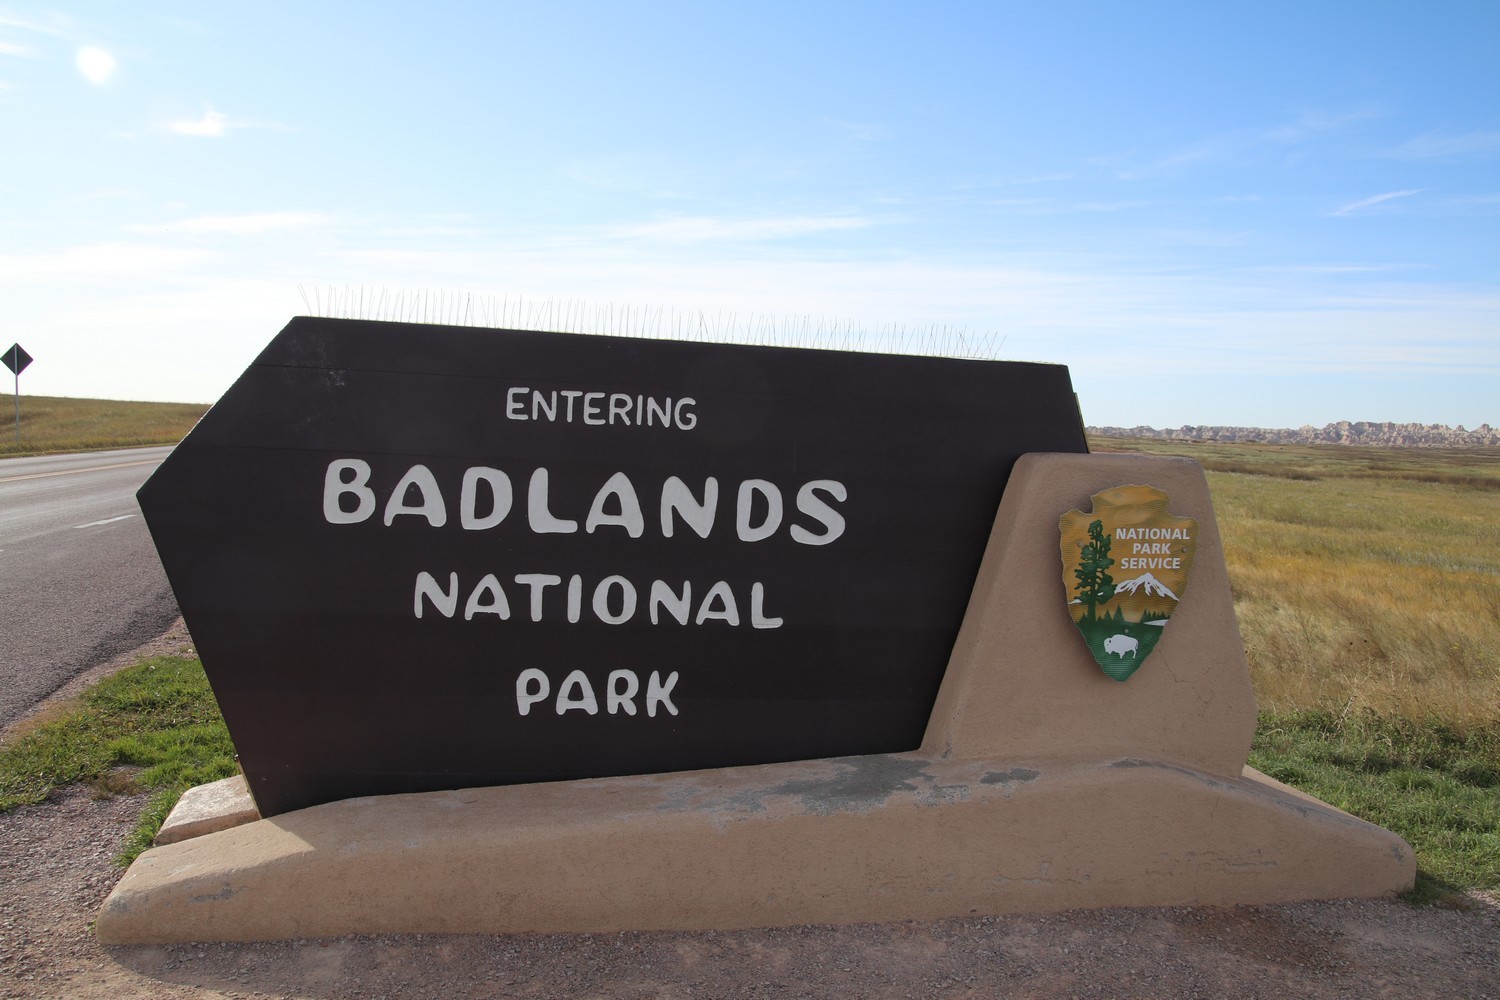
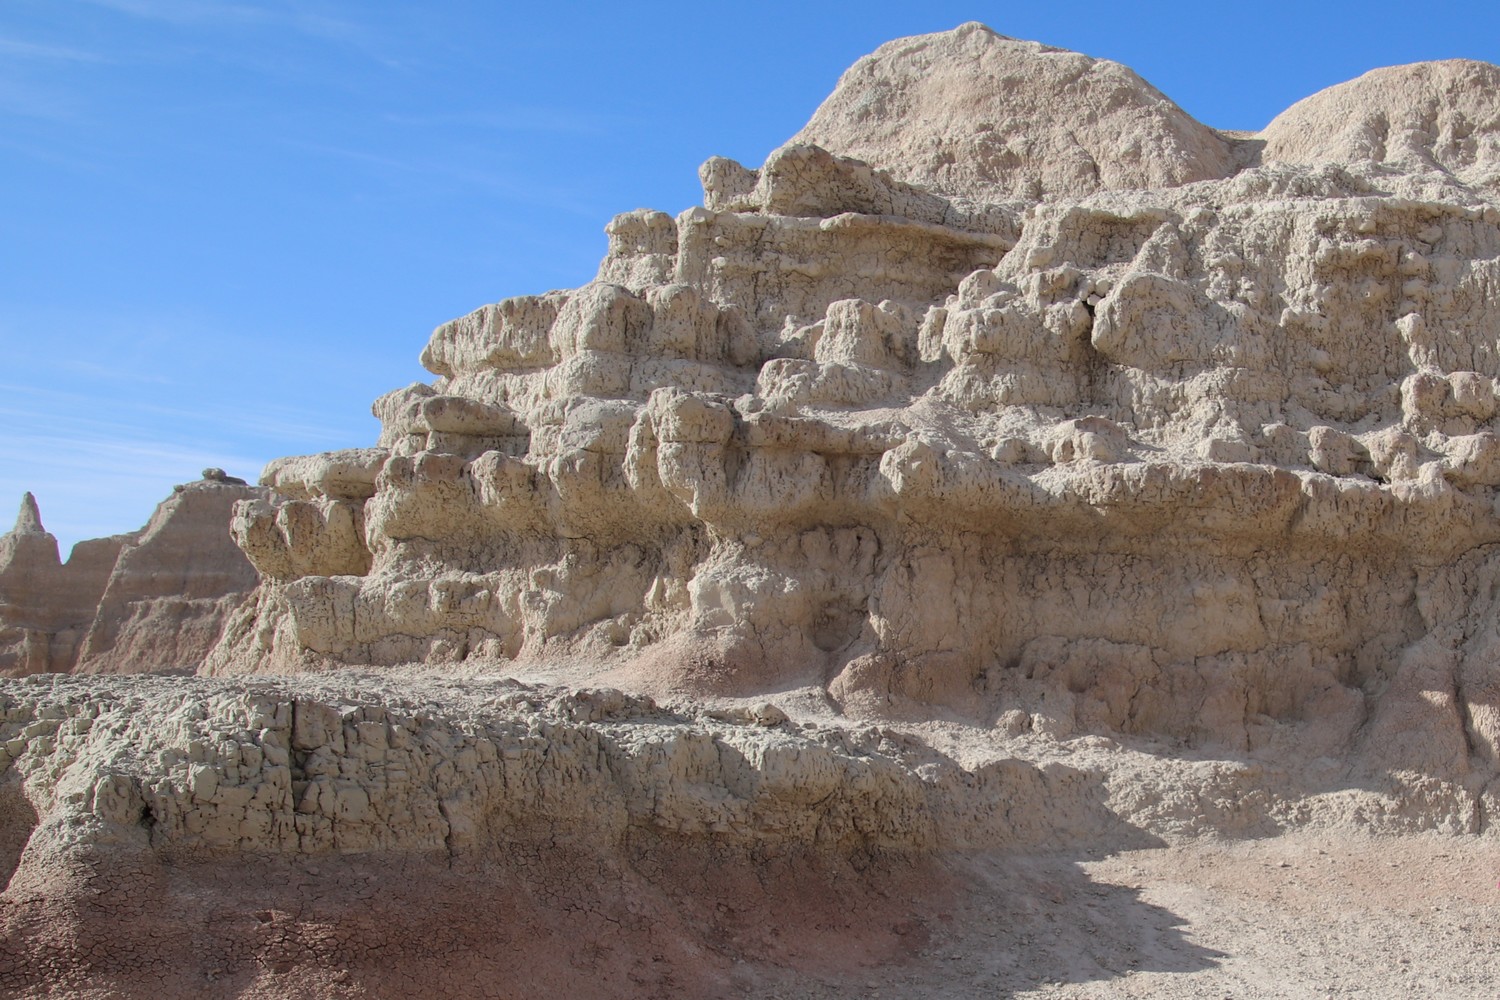
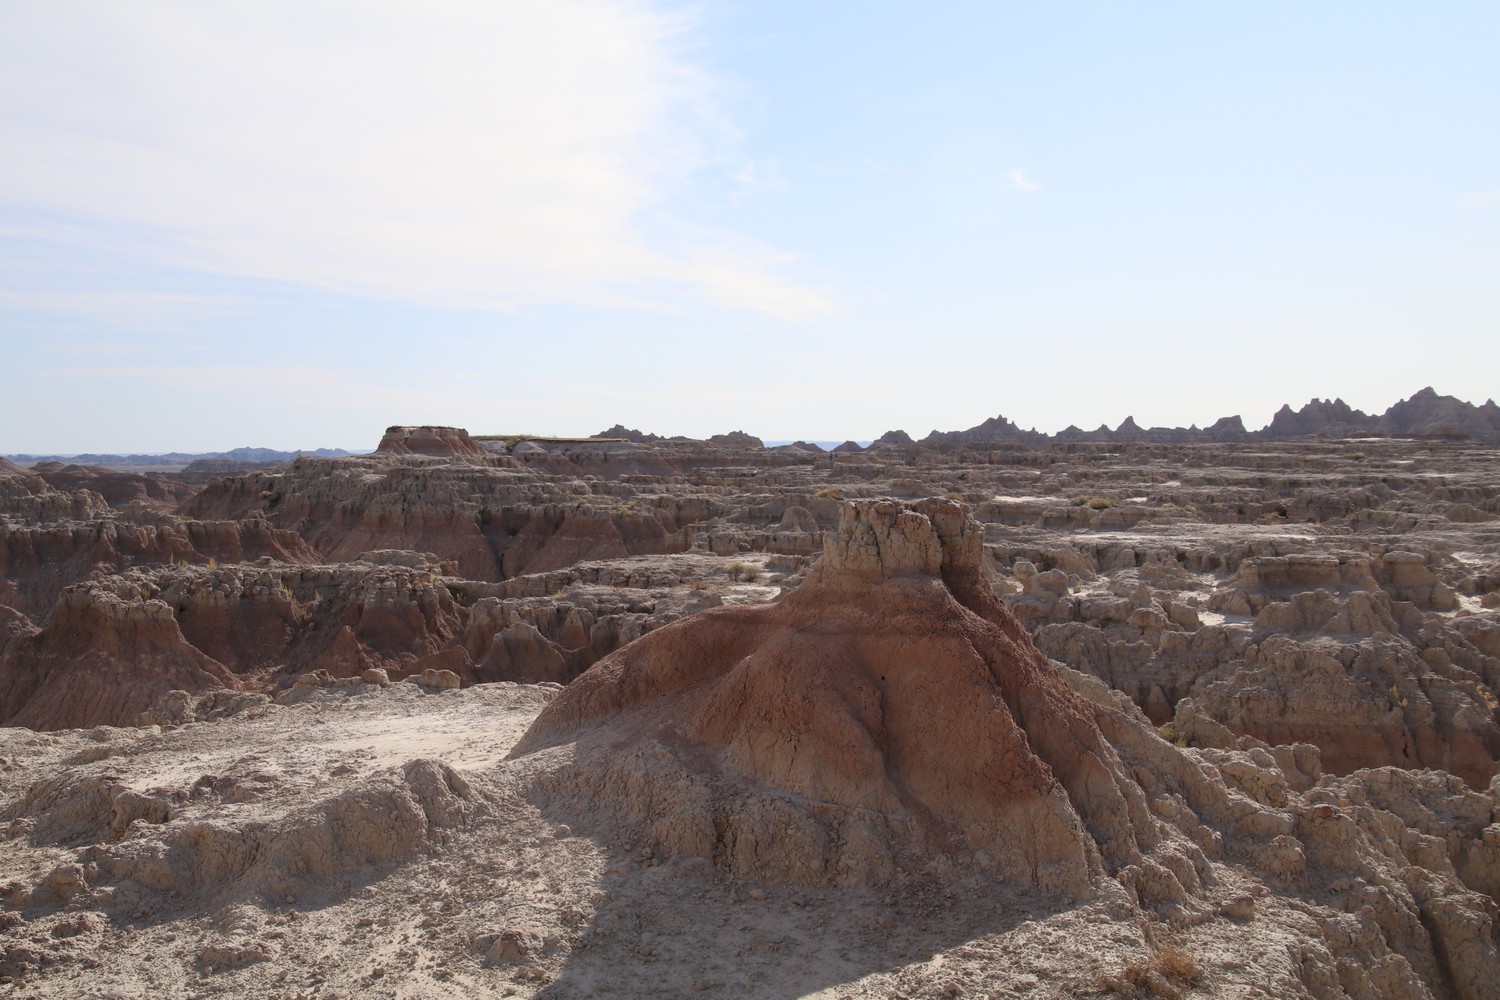
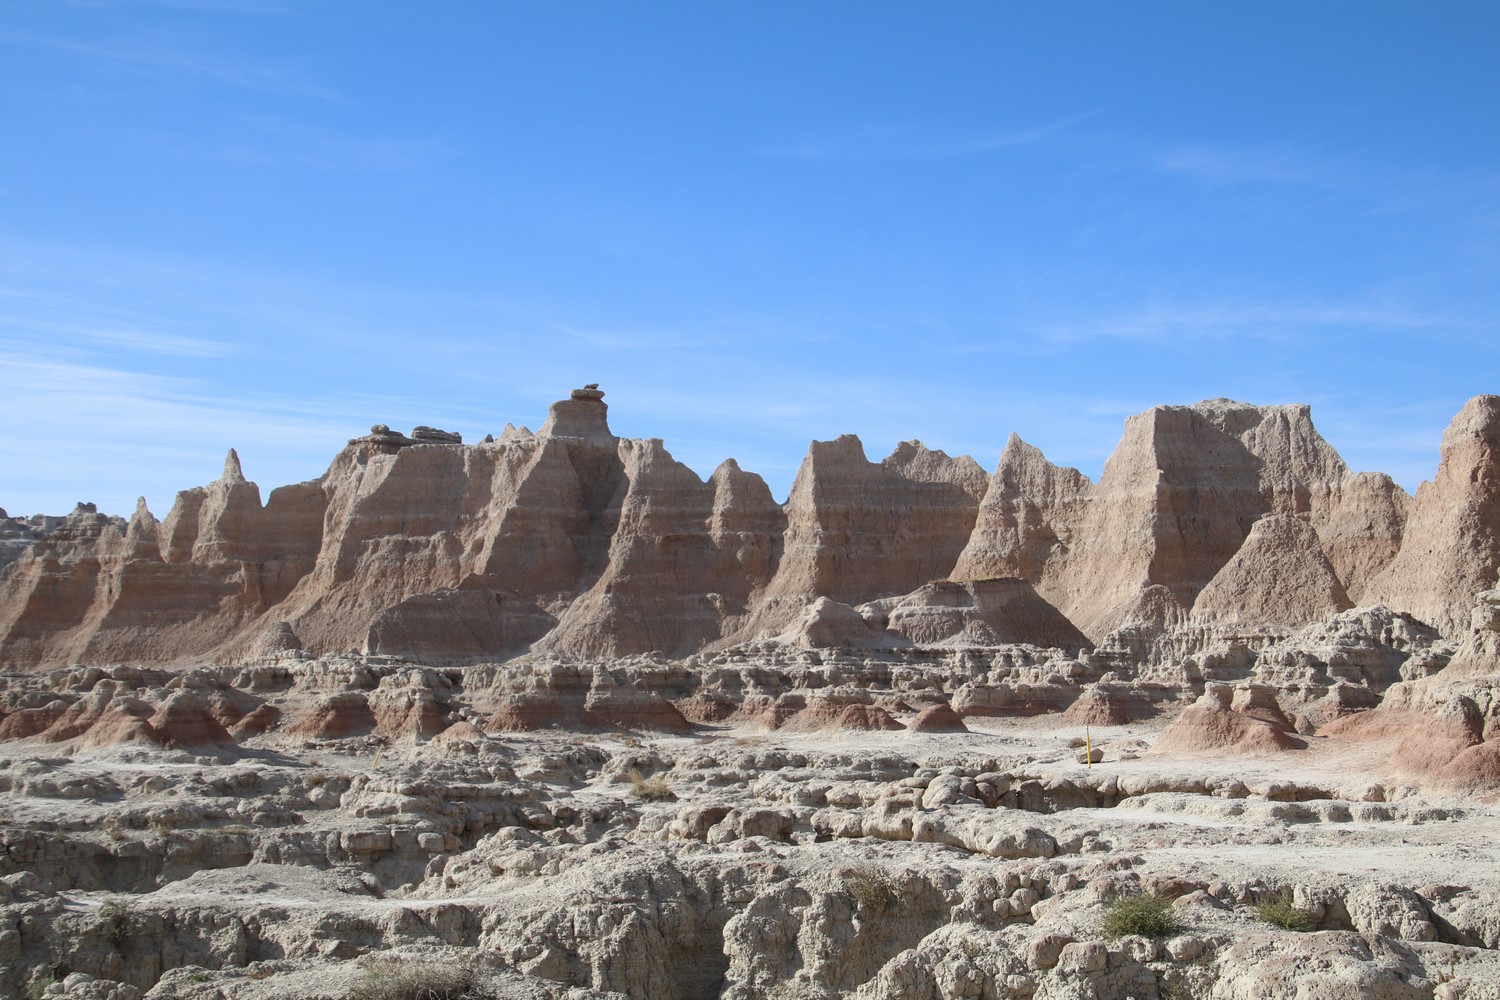
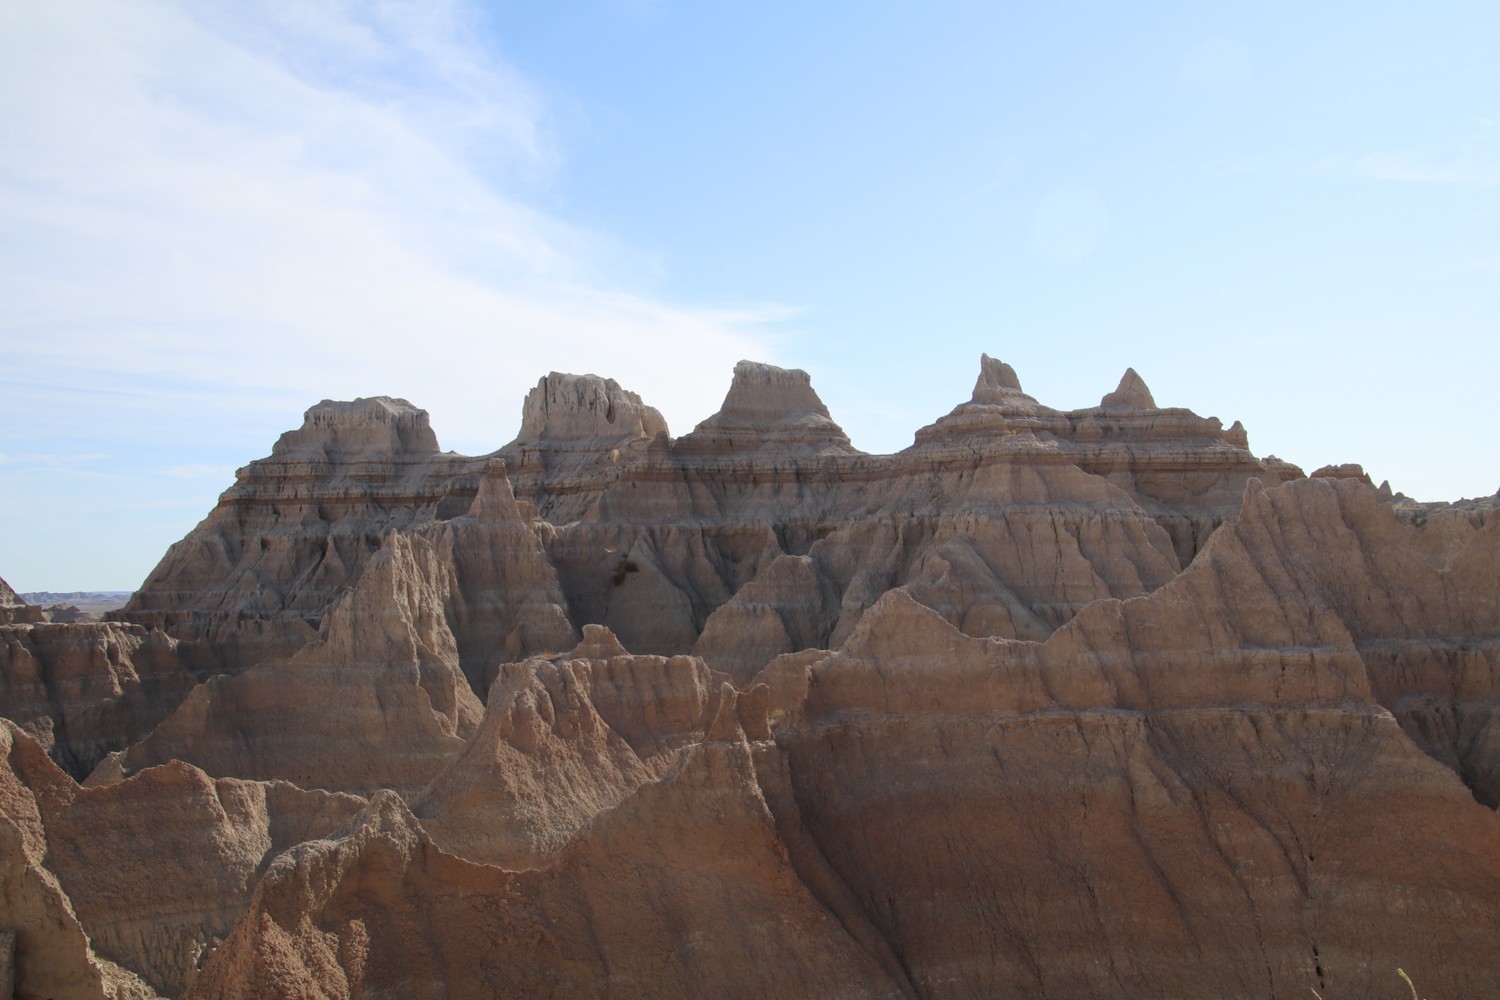
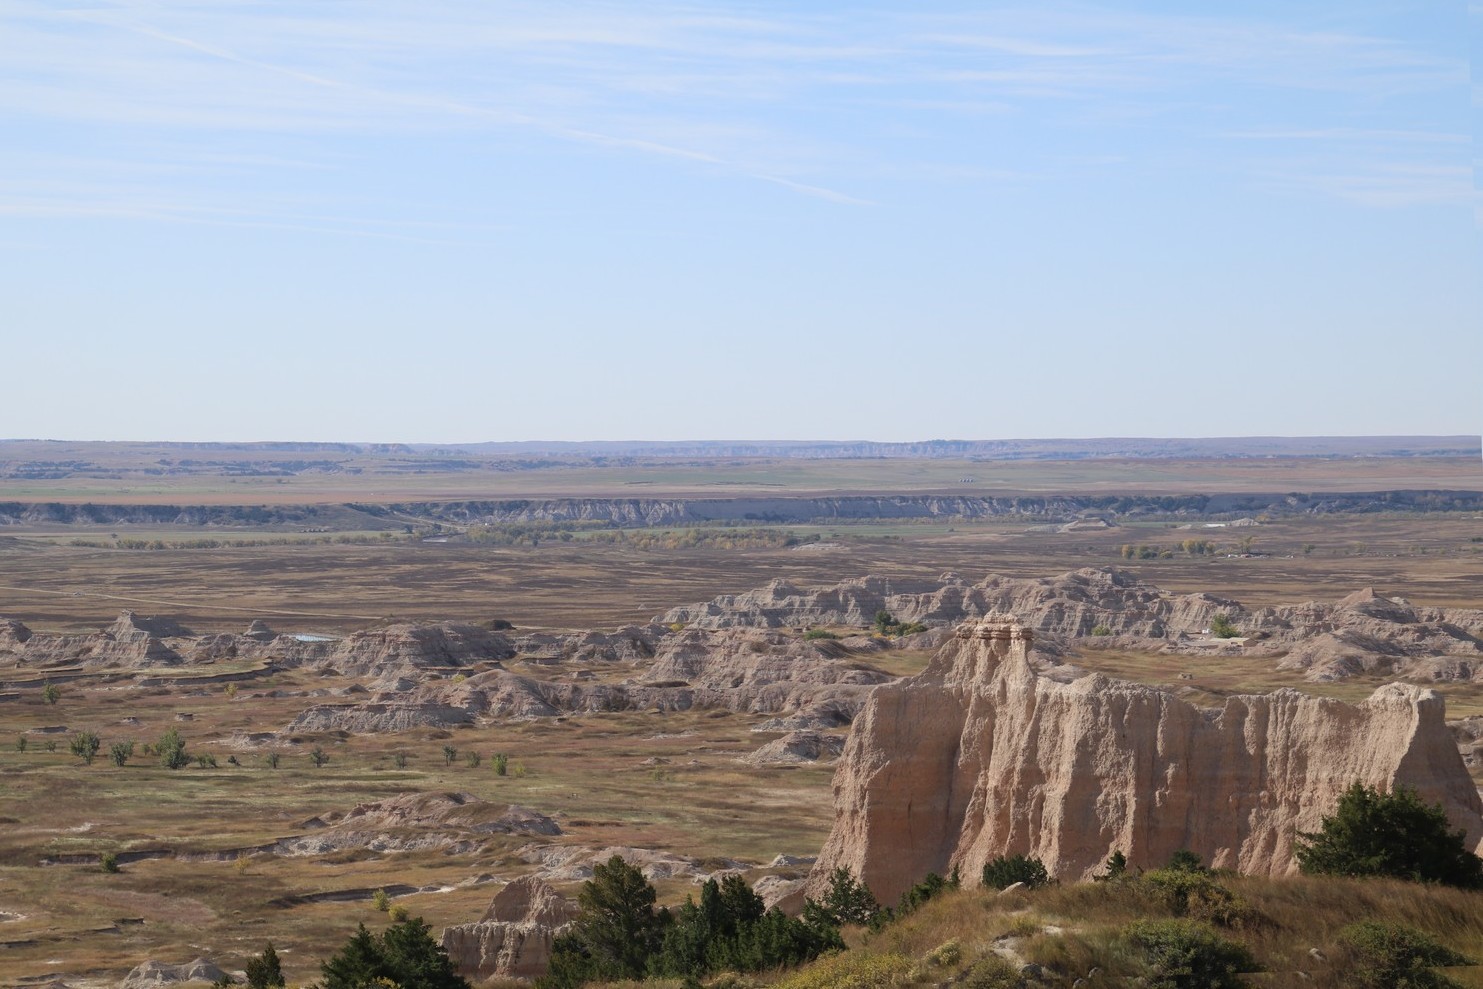
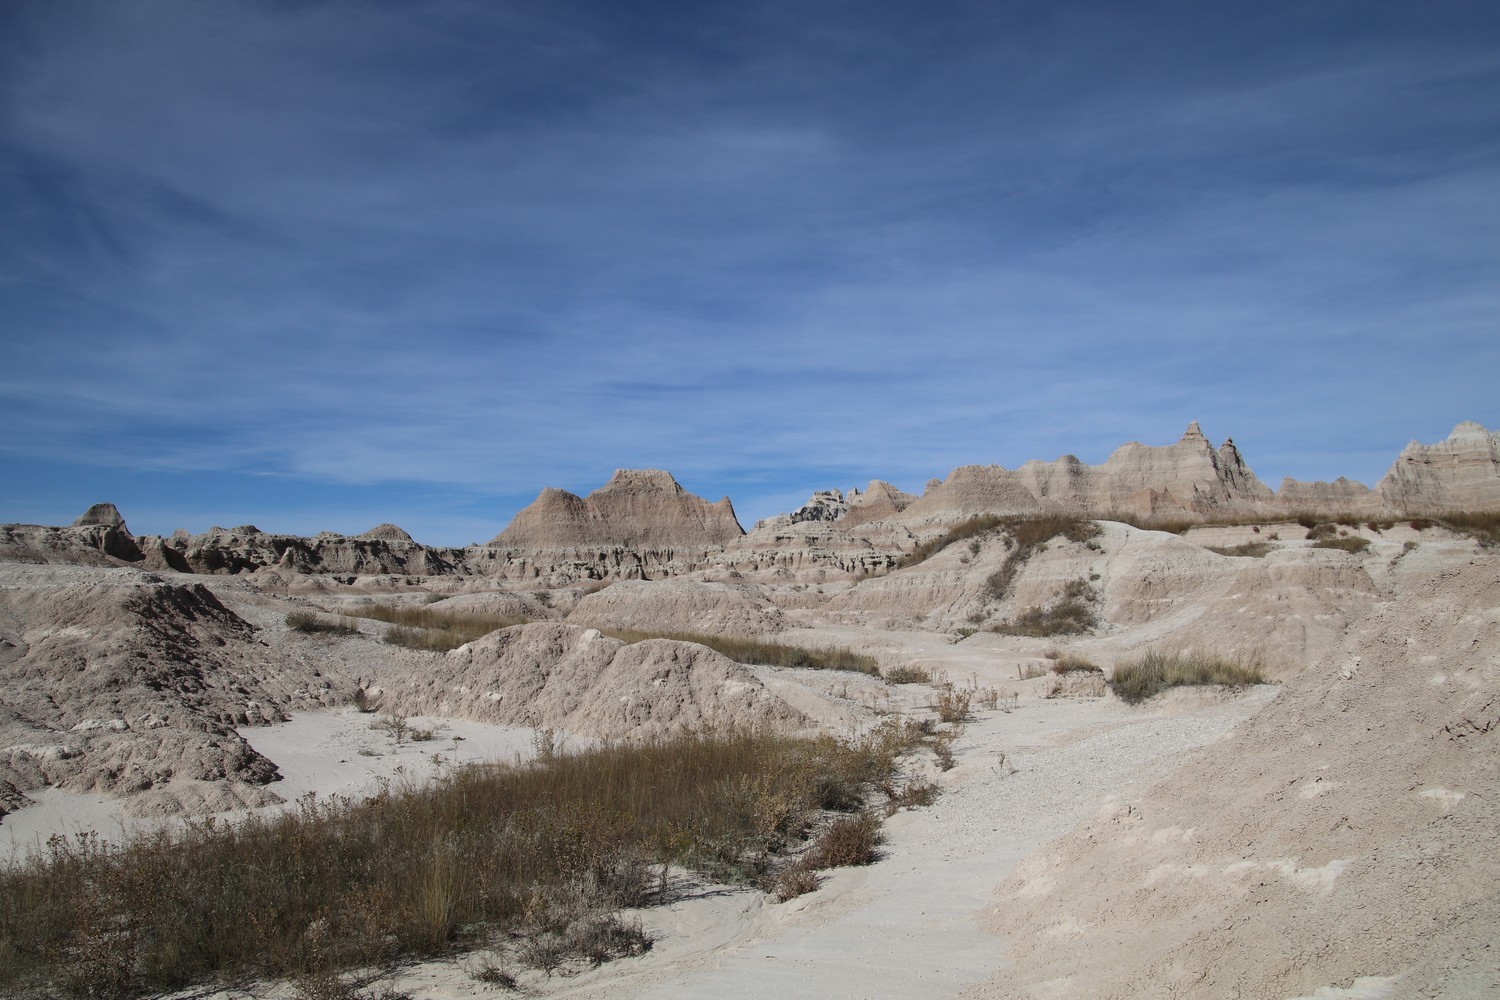
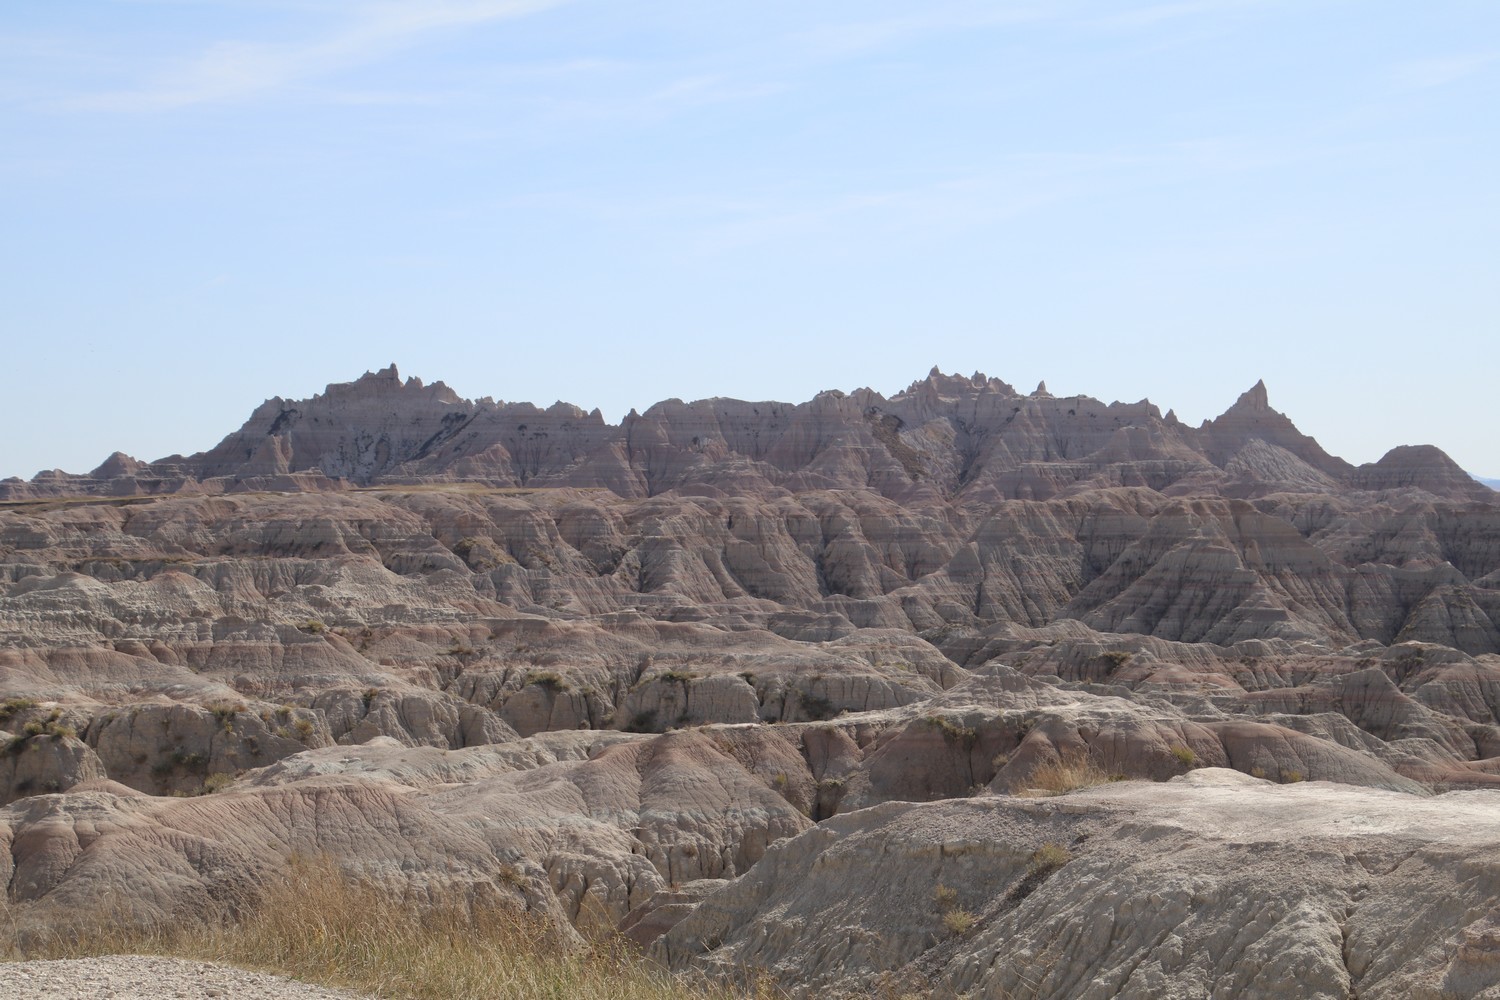
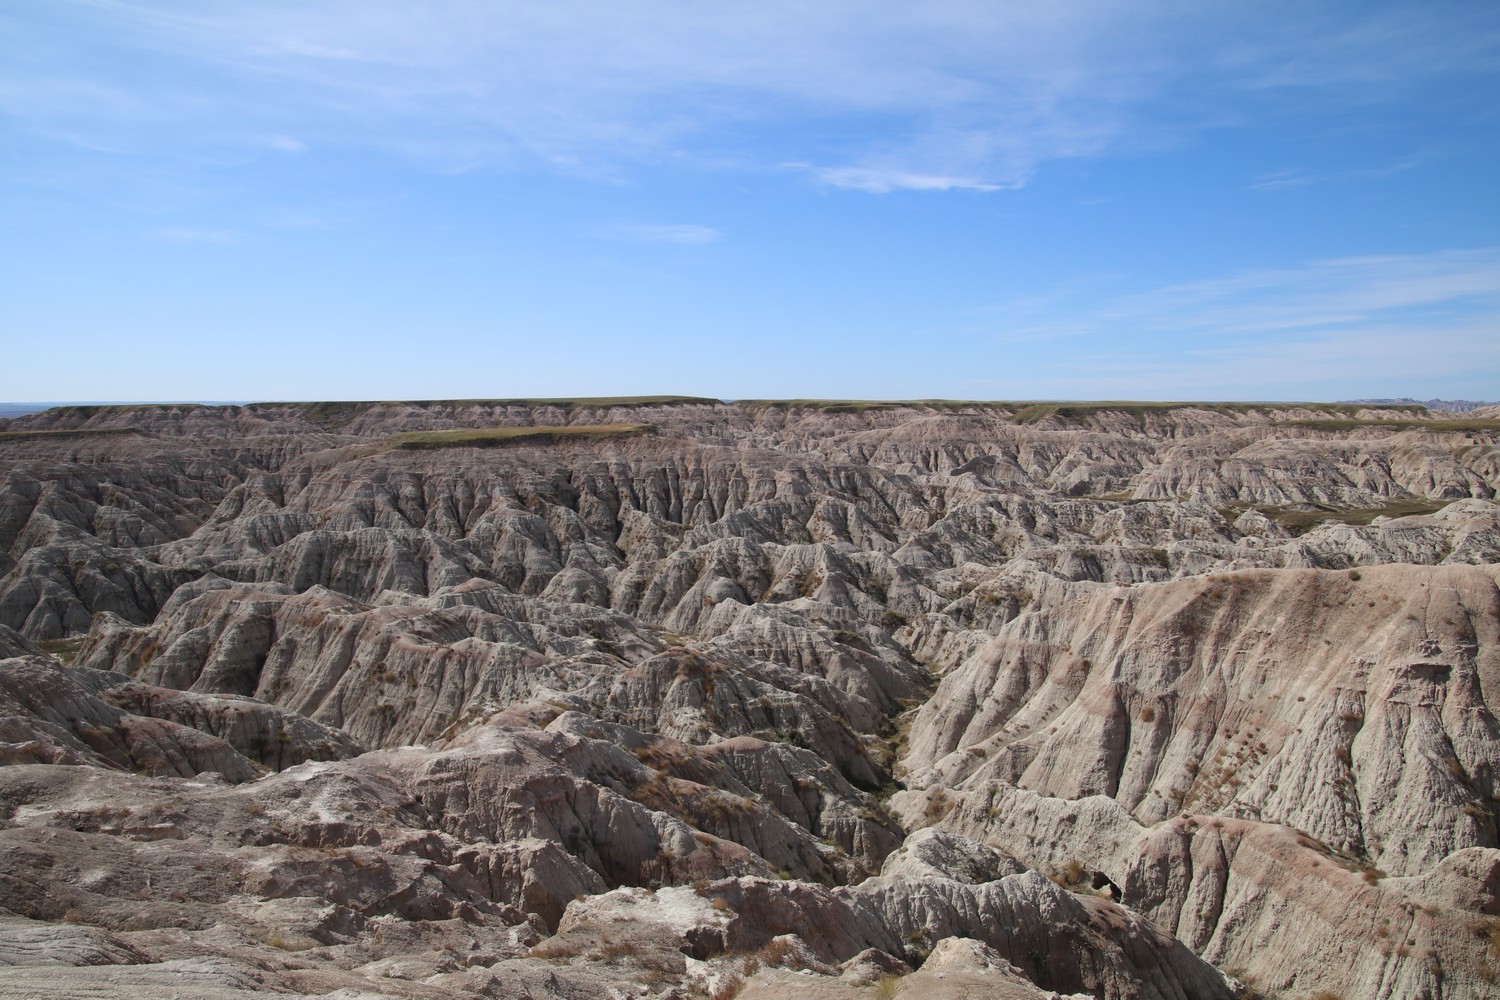
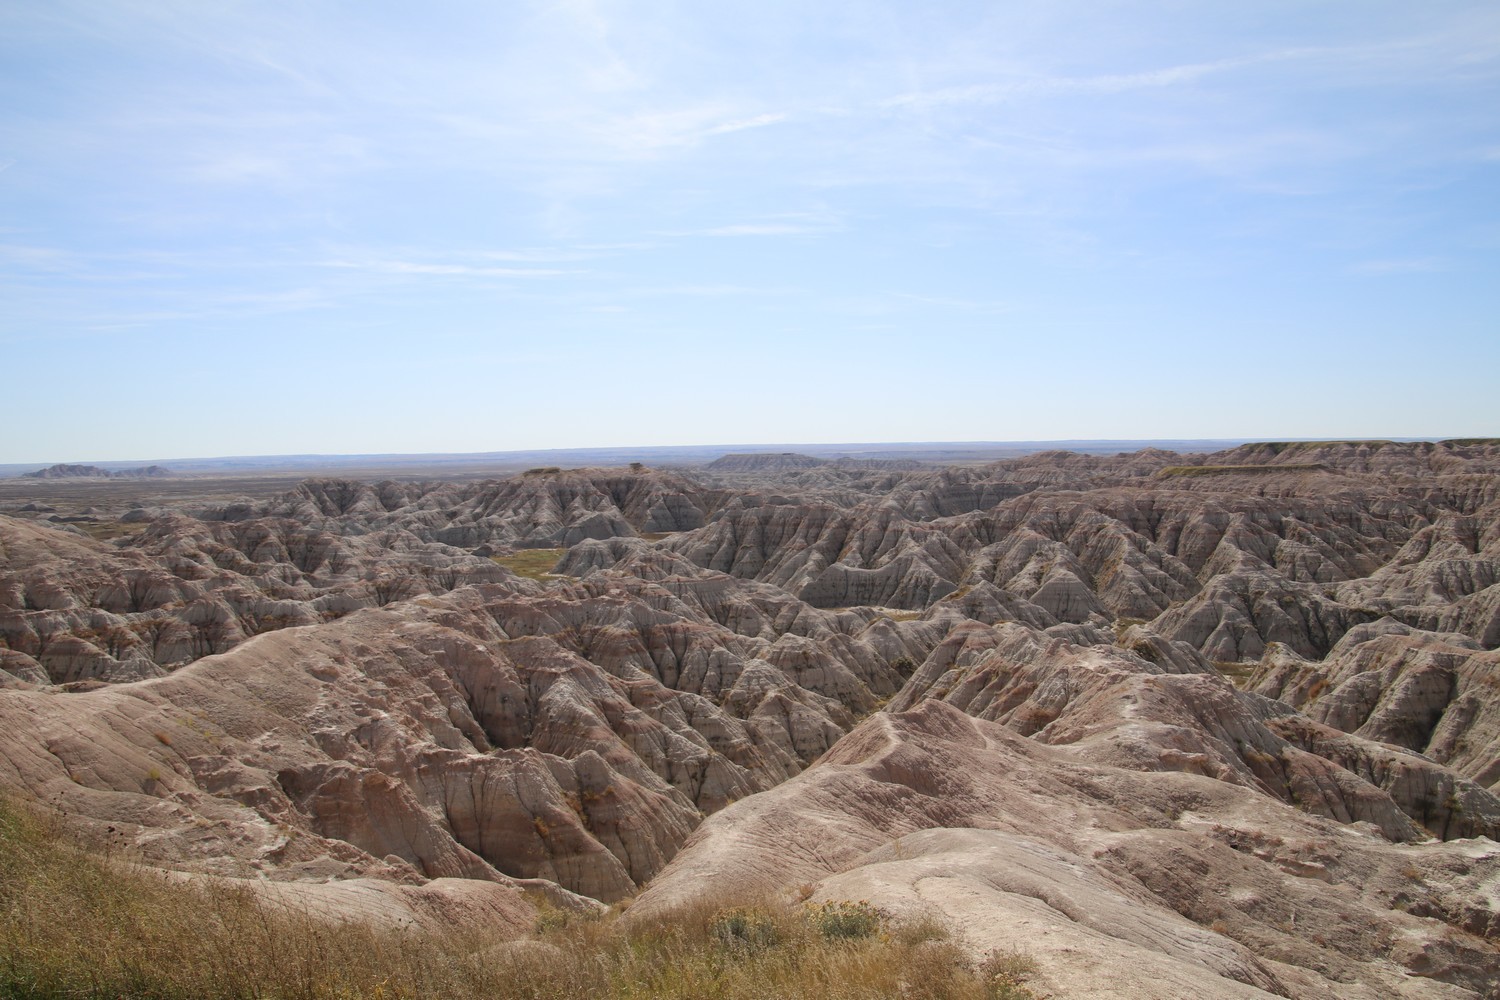
Badlands National Park
Once you’re done exploring the Minuteman Missile area, it’ll be time to head to Badlands National Park. I recommend entering the park through the northeast entrance, that way you can make a stop at the visitor center and even reach some short hikes, before driving the Badlands Loop Road.
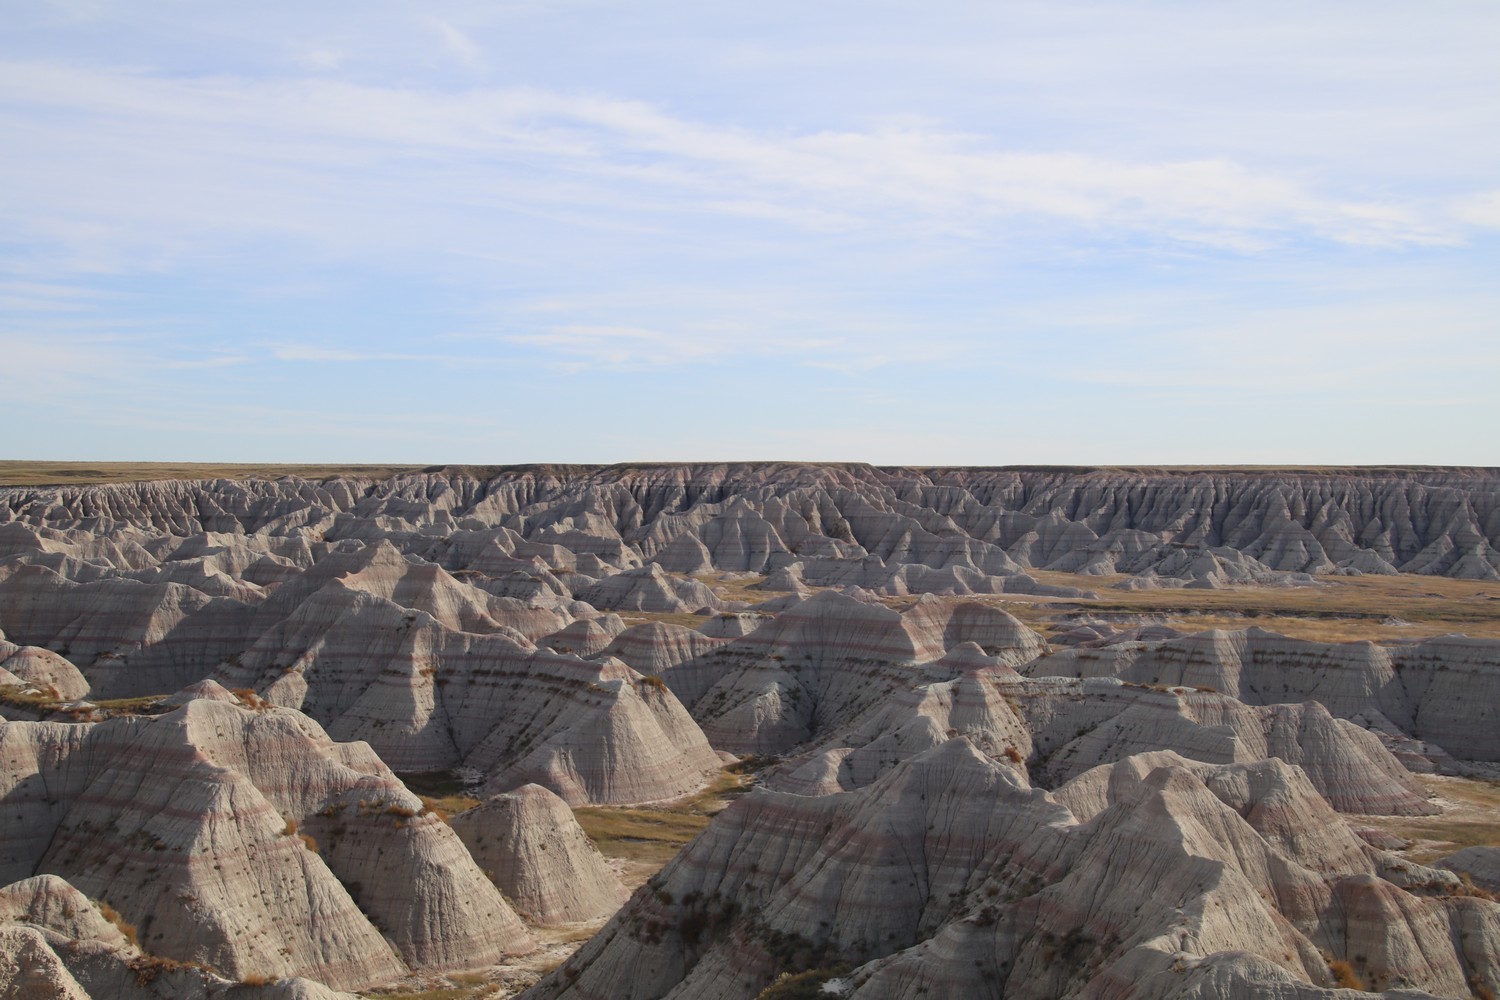
Right after the north-east entrance, on the side, you can stop at the Big Badlands Overlook. You’ll notice that the landscape is pretty special over there!
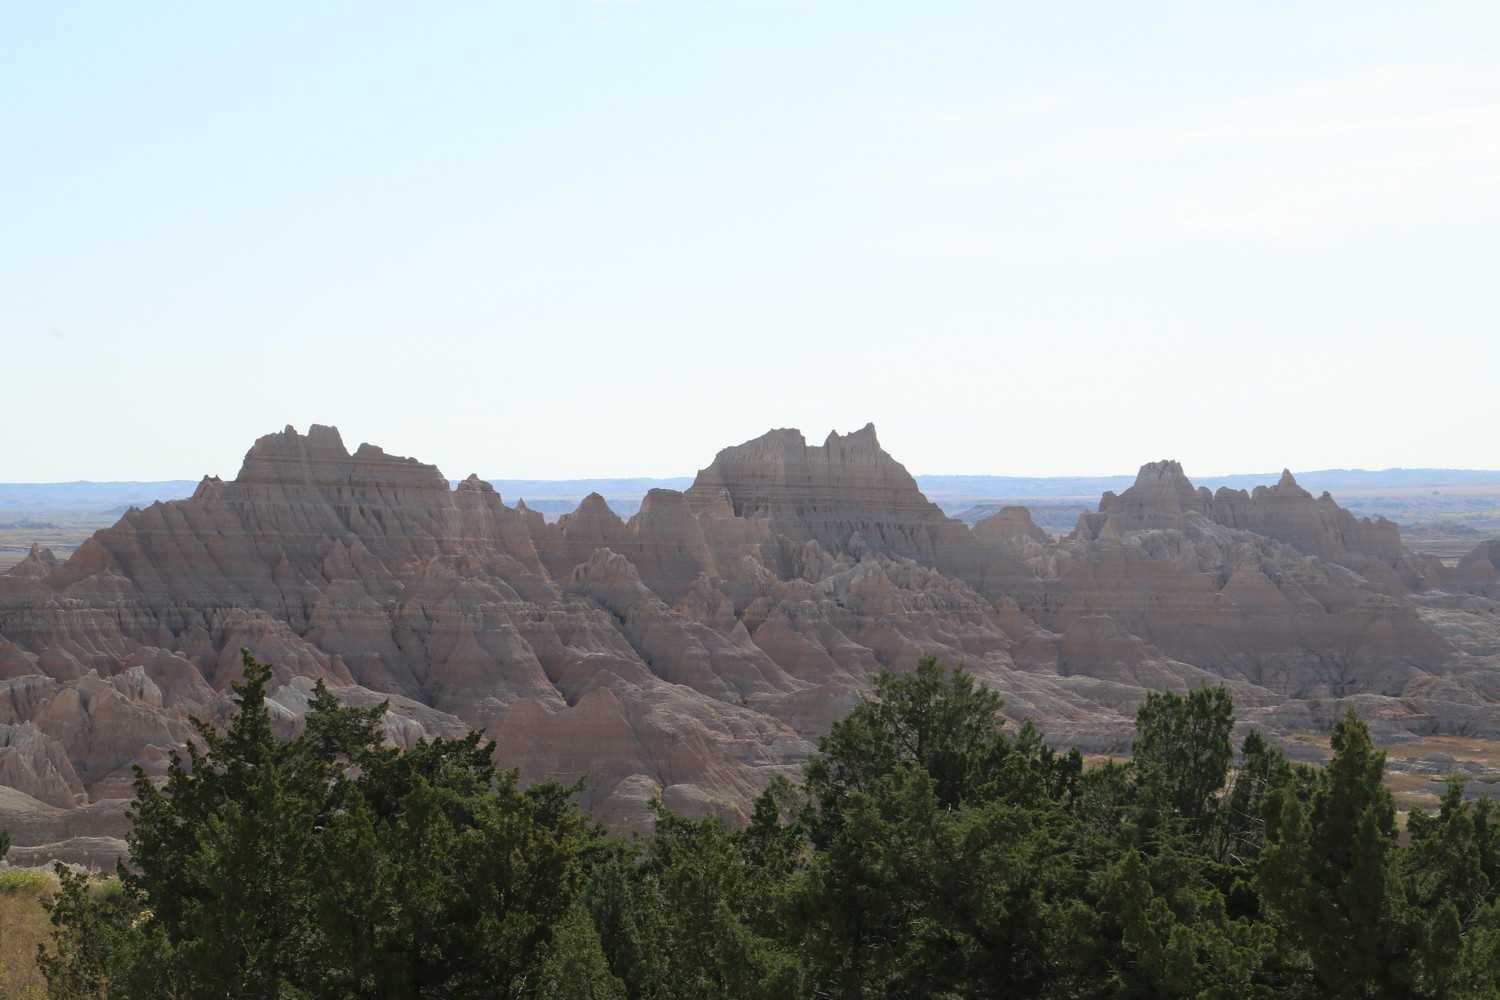
Then, continue driving a little bit and you’ll be able to reach some short hiking trails: the Door Trail, the Window Trail and for the more adventurous there is the Notch Trail (it features a very large wooden ladder to climb).
Door Trail
This trail is pretty easy.

Window Trail
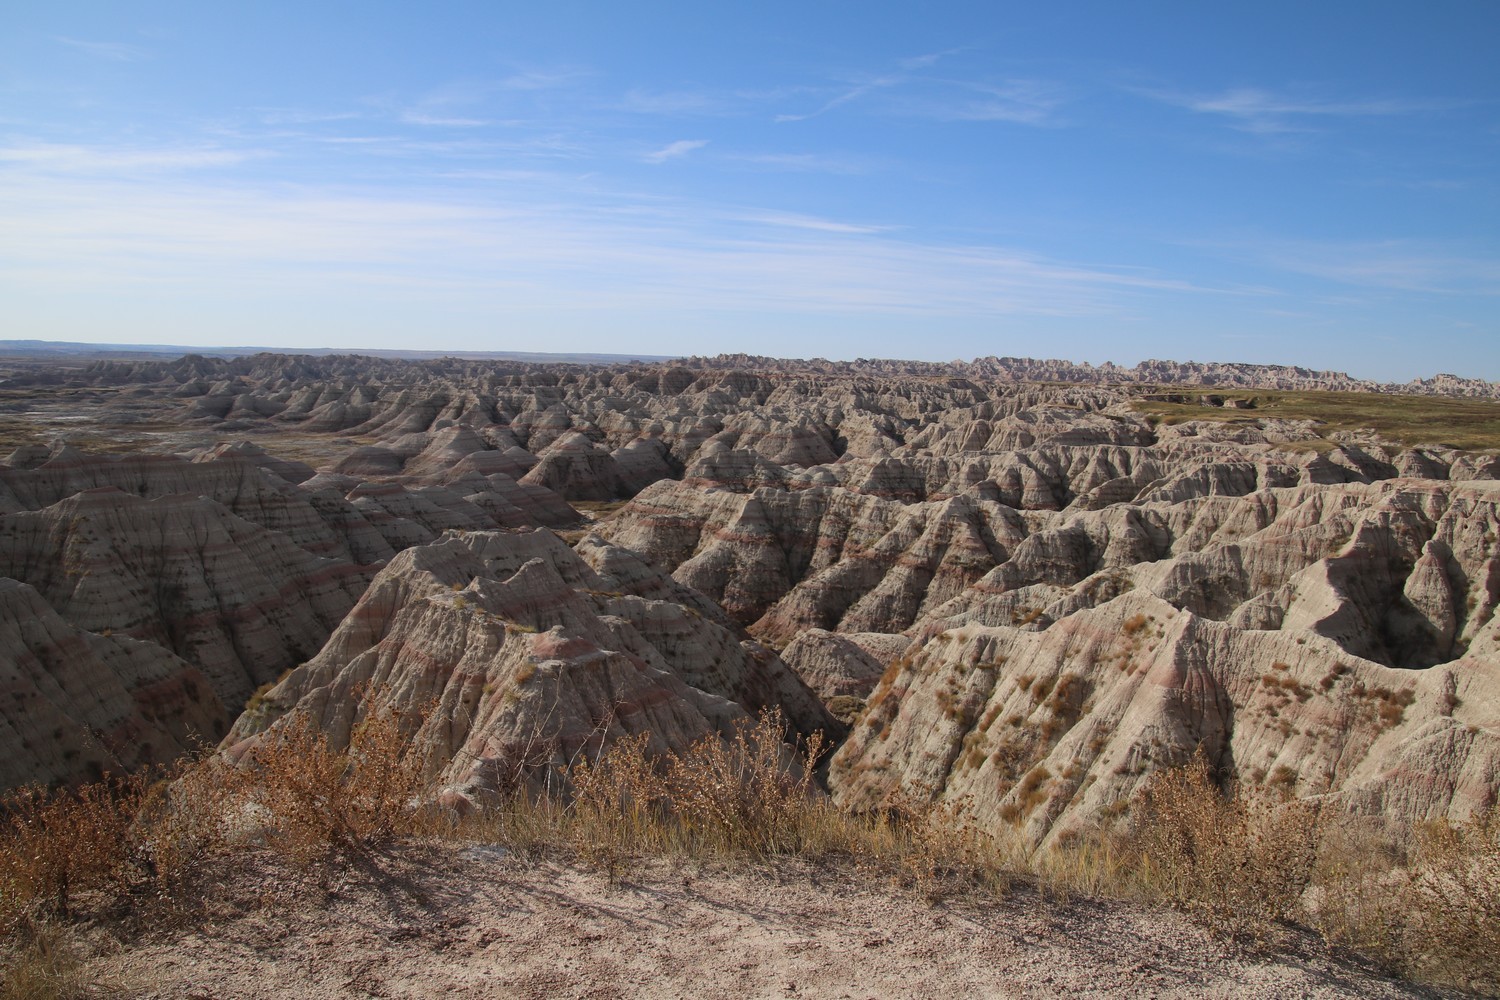
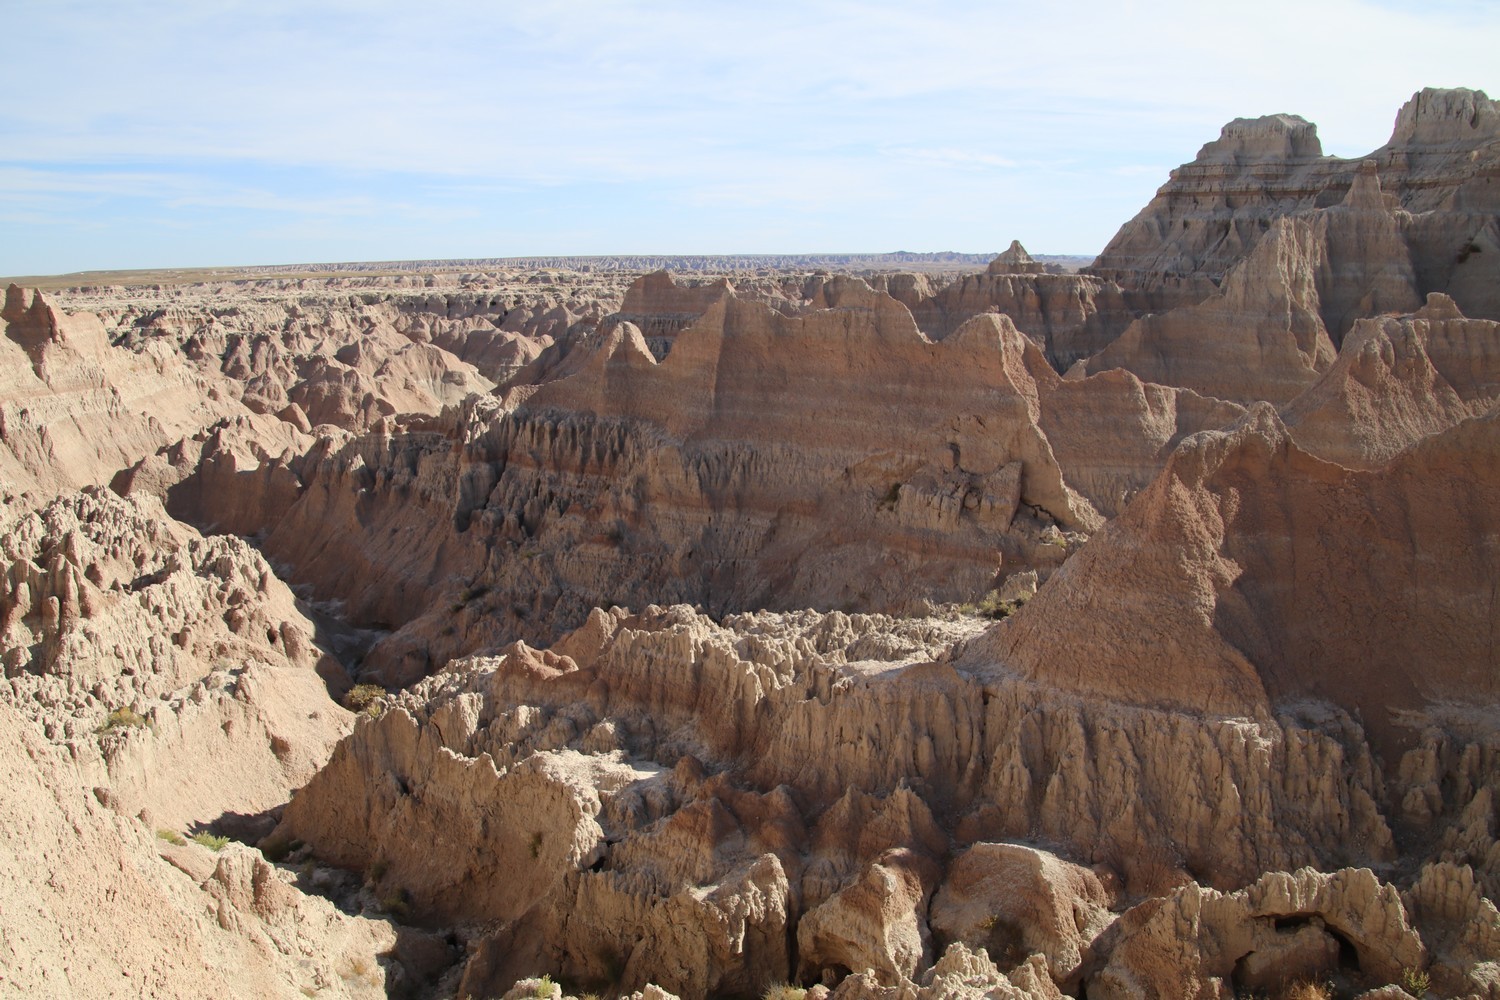
From this trail, you’ll be able to reach an overlook that provides a wonderful view of the eastern section of the Badlands.

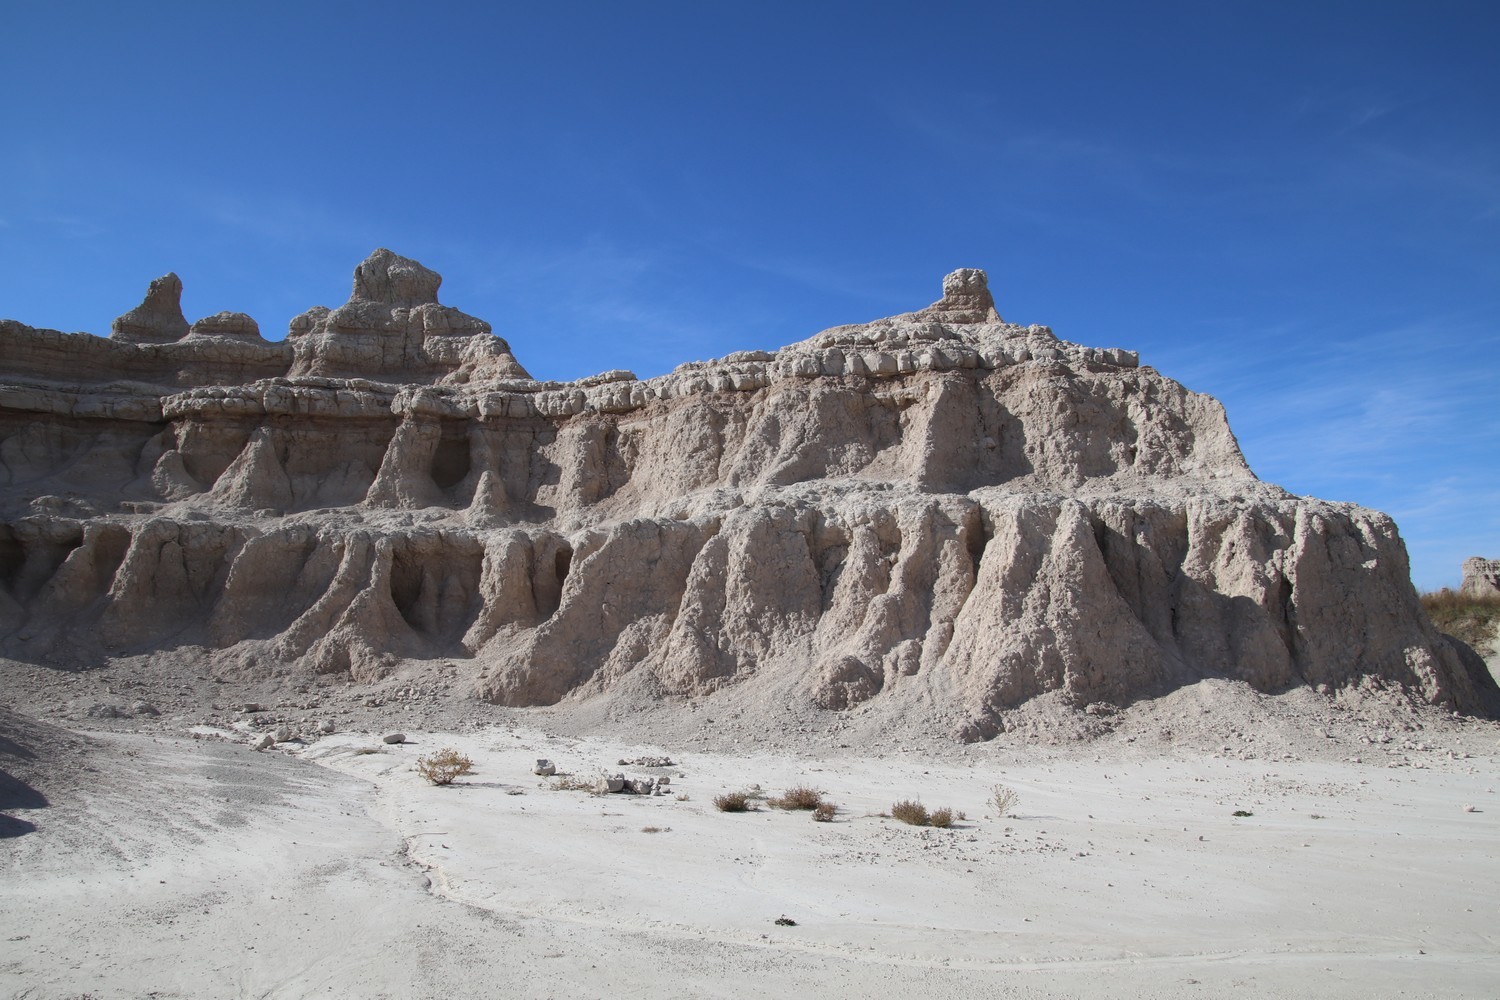
Once you’re done hiking Door and Window Trails, go back to your car and continue driving a little bit. Then, you’ll reach the Cliff Shelf Nature Trail which is a short trail that features a few stairs.
Once you’re done hiking all these trails, make a stop at the Visitor Center. It’s really worth it, especially for its little museum.
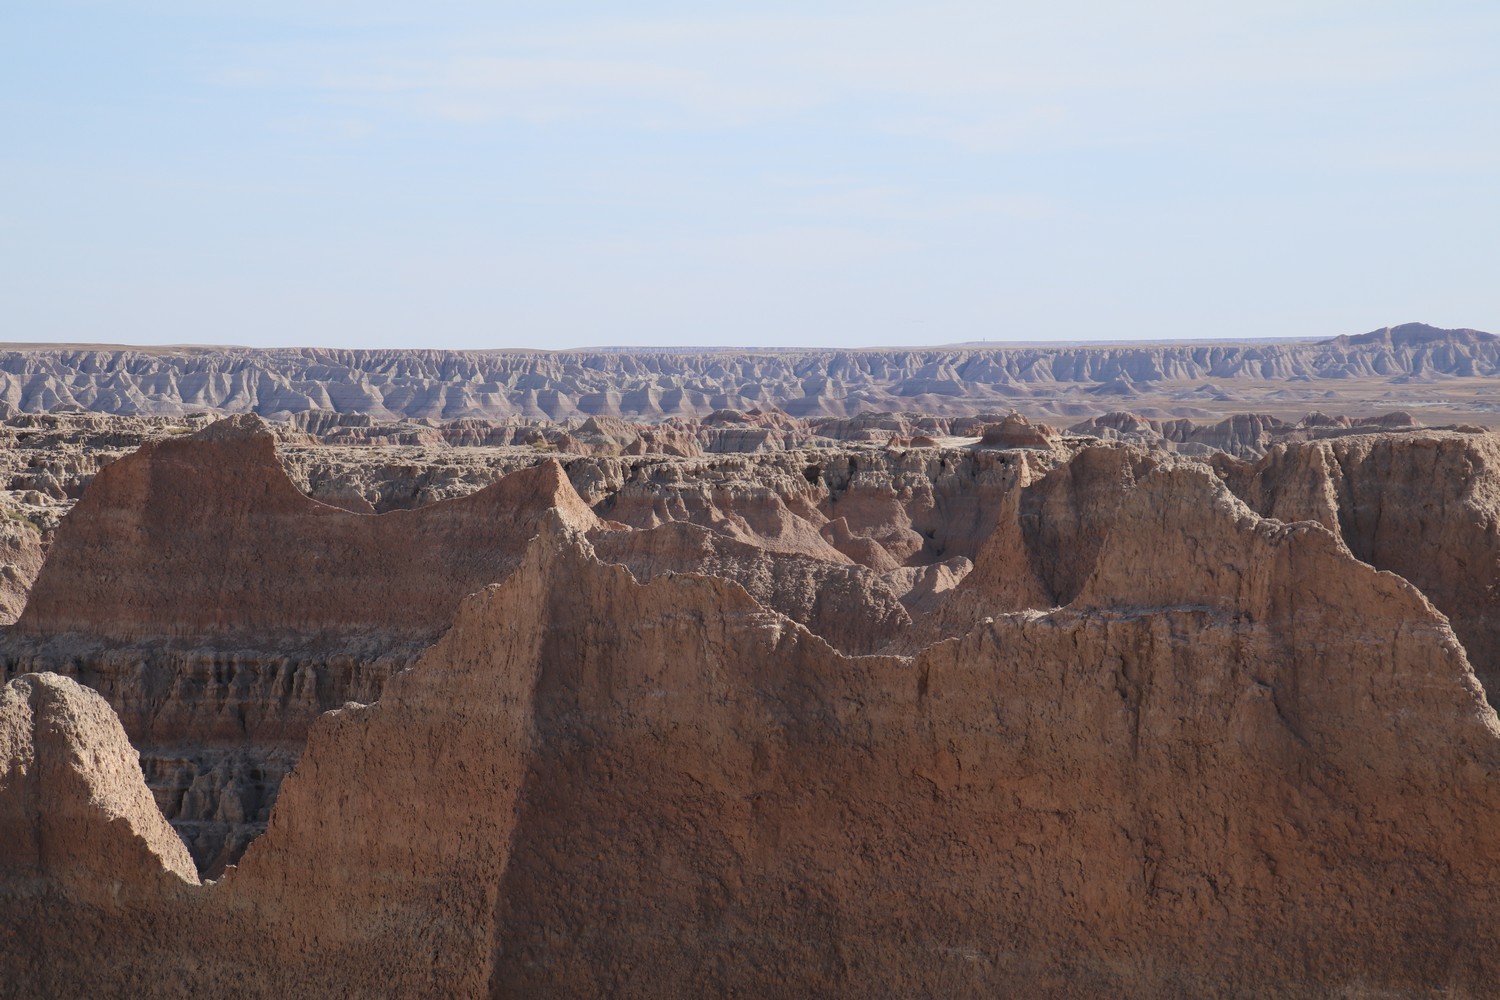
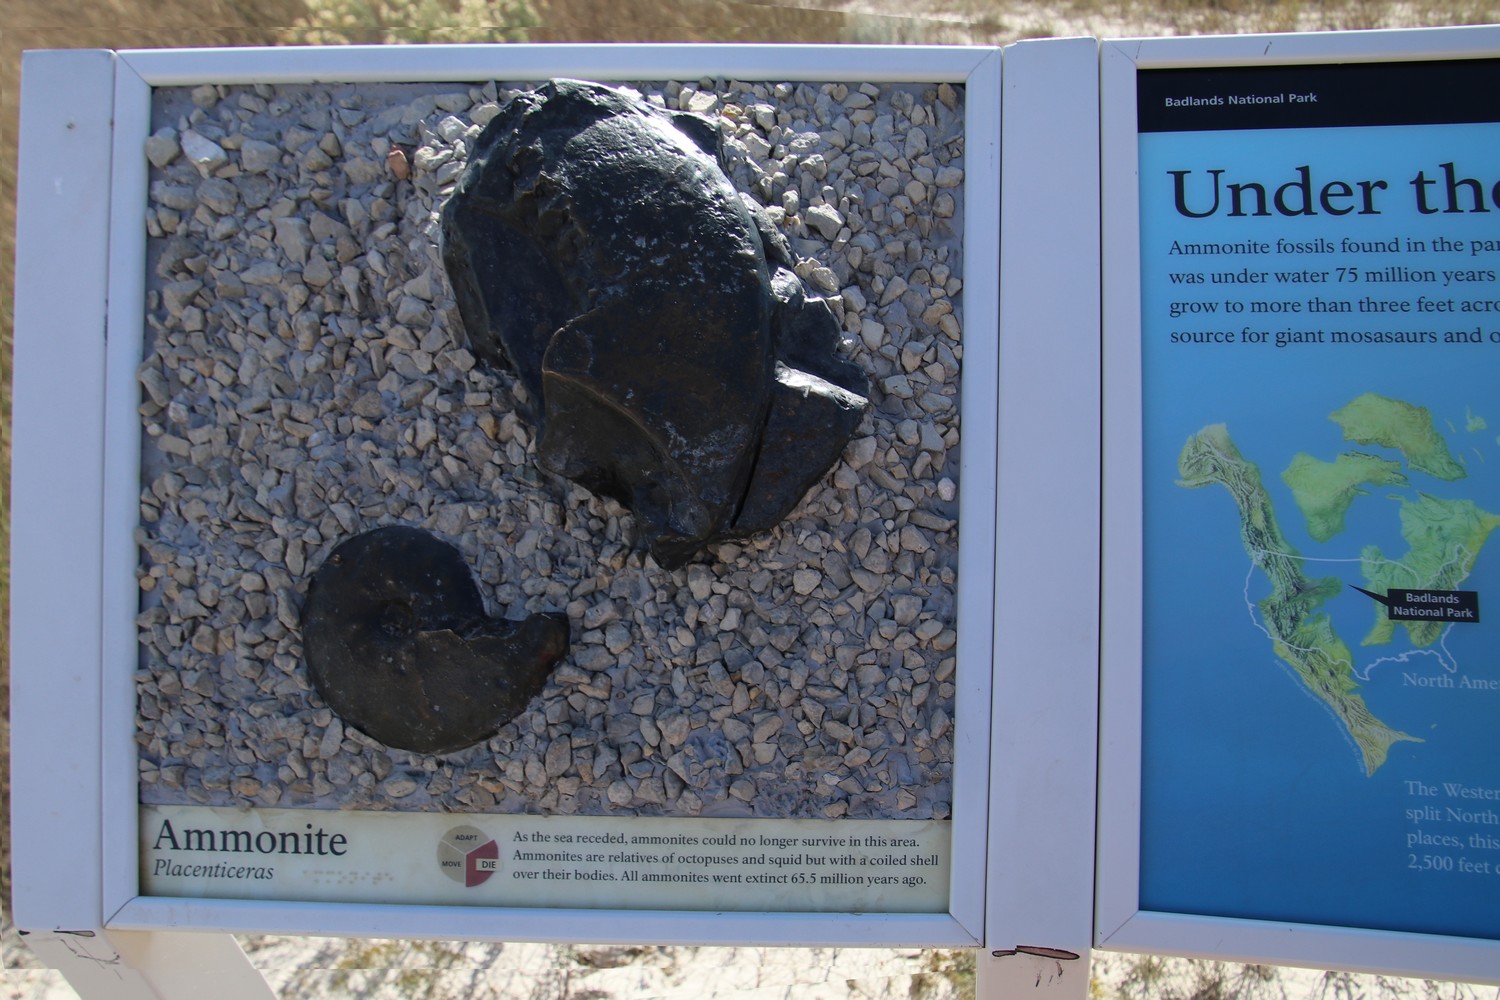
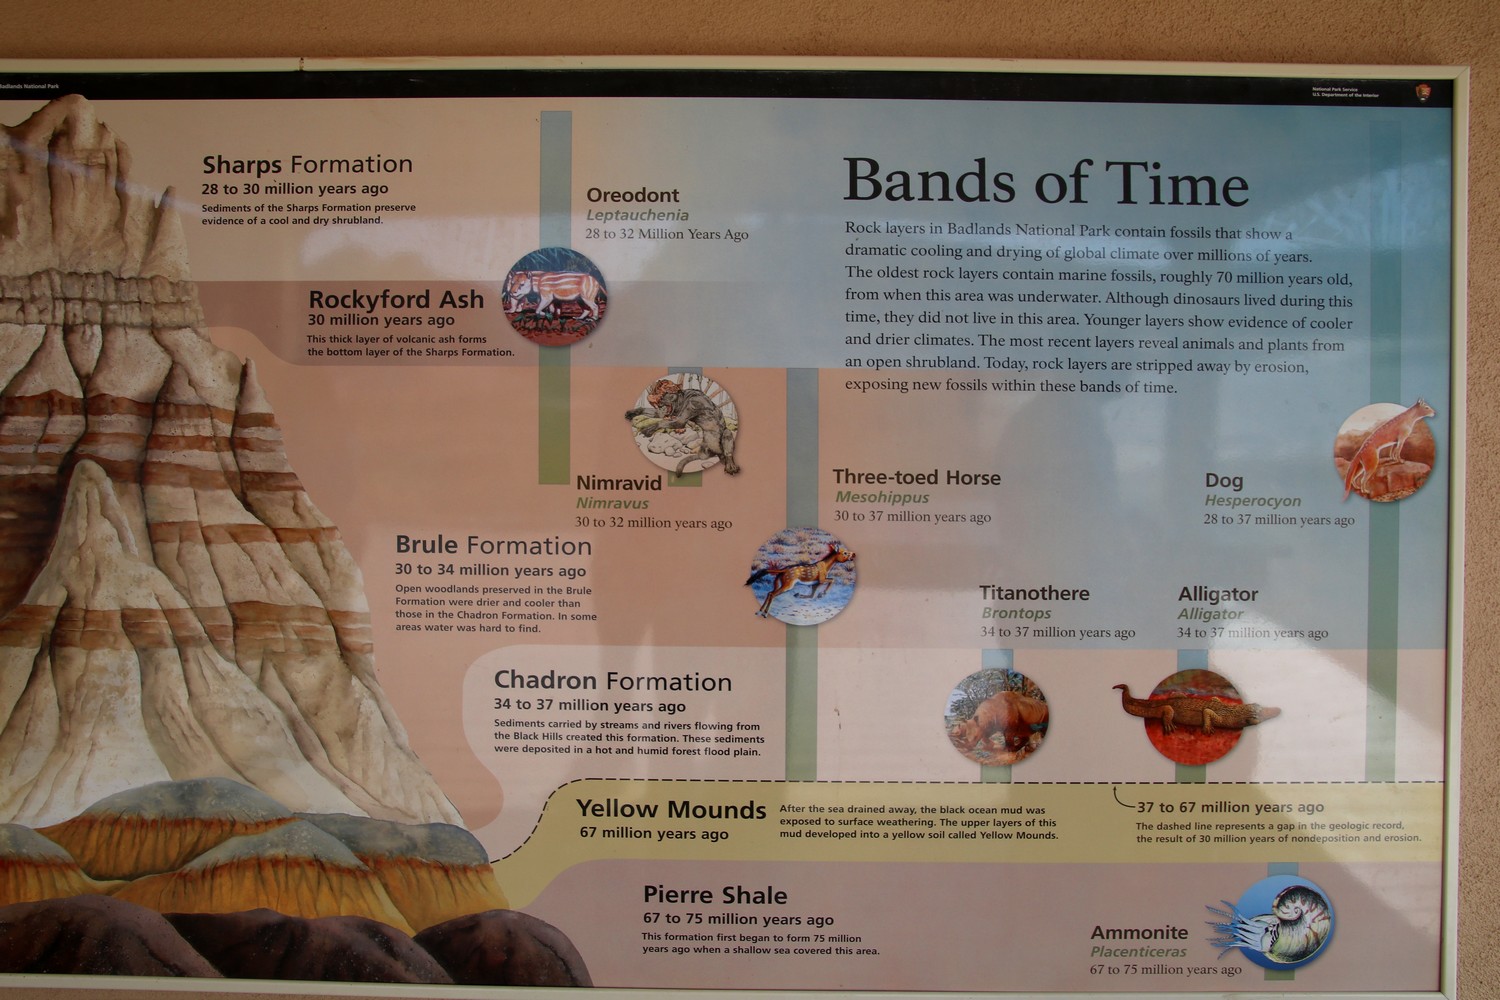
When leaving the Visitor Center, go driving the Badlands Loop Road. The first stop will be Fossil Exhibit Trail which is a short and easy trail. All along the way, you’ll find some fossil exhibit signs.
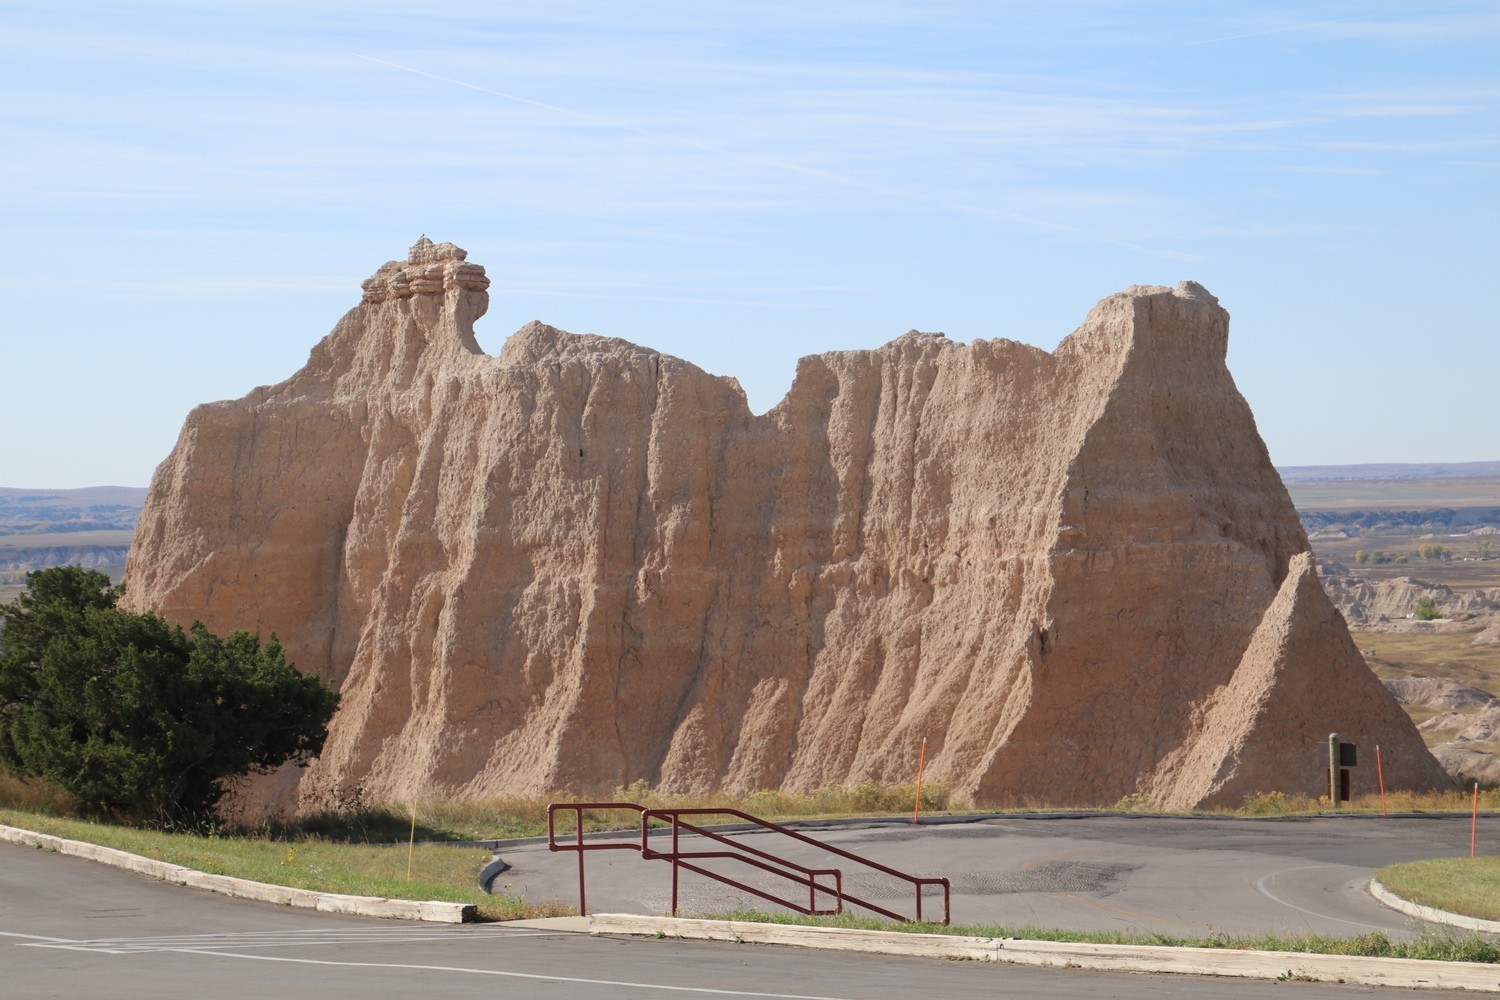
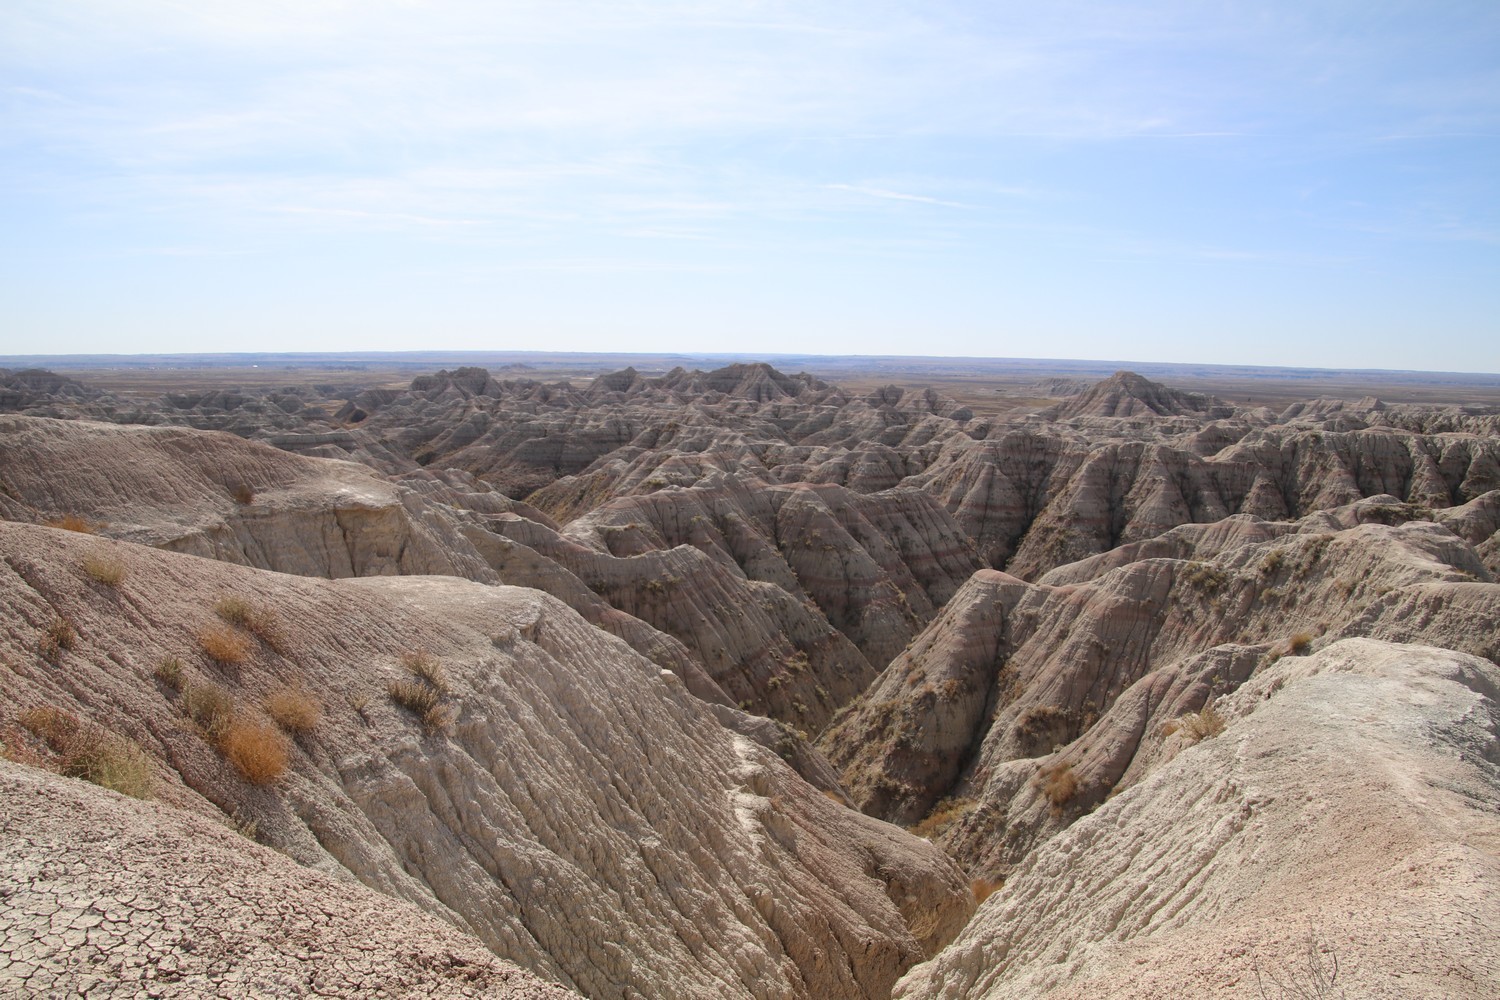
Then, continue driving the Badlands Loop Road which provides access to many viewpoints located on the sides of the road.
Once you’ve reached the Pinnacles Entrance, you can either go back to Wall, or you can travel a part of the Sage Creek Rim Road before heading to Wall. But be aware that Sage Creek Rim Road is a dirt road, so it can be rough during or after storms.
Badlands National Park is where my trip ended, and right after that I headed to Rapid City Regional Airport. But of course, if you feel like it, you can continue exploring the Black Hills area. For example, you can go to visit:
- Custer State Park: a wildlife reserve that is home to abundant wildlife, including bison
- Jewel Cave National Memorial: the third longest cave in the world
- Wind Cave National Park: known for its calcite formations
Tips
Money
American dollars
The best way to get American dollars in the Black Hills area in South Dakota is to change money before going.
However, if you book hotels before going, you won’t have to spend that much money while there, it’ll just be food, petrol and some admission fees. So in the end you won’t have to carry that much cash.
Taxes
Purchases
In the U.S., all stores display prices without tax. The tax is approximately 6% in South Dakota. So you just need to know that prices will be higher at checkout. However there is an exception on all unprocessed food because the tax doesn’t apply.
Restaurants
If you are planning on going to the restaurant, be aware that the bill can quickly become very expensive because on top of the price of the meal is added the 6% tax and you also have to add 15% tip.
Hotels
Because I visited the Black Hills area for 2 days, I only stayed there for one night. I spent that night in the small town of Wall for convenient reasons, and especially because it’s located right next to Badlands National Park.
During my trip, I stayed at Best Western Plains Motel. It’s pretty comfortable and considering the price and location, it’s good value for money.
Description: comfortable and decent sized rooms. The bathroom is provided with a bathtub. Breakfast is included into the price of the room. It’s a kind of buffet with corn flakes, oatmeal, toast, cakes, yogurt, milk, coffee, juices, a pancake maker, fruit …
Price: about €81 per night for 2 people, in October. But the price is the same whether you are 2 or 4 people.
Location: located at about a 10-minute drive from the Pinnacles Entrance to Badlands National Park, and also Delta-09, the nuclear missile silo.
| Pros | Cons |
|---|---|
| comfortable and decent sized rooms | - |
| good value for money | - |
| breakfast included | - |
| very convenient location | - |
Transportation
Car
Renting a car to visit the United States is kind of mandatory, and especially when it comes to visiting national parks! Moreover, you won’t need an international drivers licence for a trip up to 3 months. Just remember to take out CDW (included into Gold Mastercards and Visa Premier cards) and LIS insurance when renting a car.
GPS
To be able to find your way when driving the car, there are several options available:
- Google MAPS: it works even without any connection, it’s just that there won’t be traffic information. All you have to do is to save the maps before going or even once there, as long as you have an internet connection. To do so, on your smartphone, in the application, click on your profile picture at the top right of the screen, then click on « offline maps ». And then click on « select your own map » and zoom out the map until you see the area you want to save. You have to repeat the operation several times if the area to be saved is too large.
- GPS rental from the rental car company: you can rent an optional GPS from the rental car company, but it’s pretty expensive and you won’t have traffic information either. In my opinion, this is not an option to consider. However, if you are renting a high-end car, there is frequently a GPS already available in the car, so without extra charge. But you won’t know it until you get on board, because no one will tell you, either at booking or when getting the keys.
Thanks for reading :)


